Grow Light Team
Purple Haze: The Iconic Cannabis Strain with Legendary Origins
Introduction to Purple Haze: History and Background
Purple Haze is one of the most renowned cannabis strains, celebrated for its rich history and distinctive characteristics. This iconic strain, named after the famous Jimi Hendrix song, has captivated cannabis enthusiasts for decades. Known for its vibrant purple hues and potent effects, Purple Haze offers a unique experience that blends a rich cultural heritage with exceptional quality.
Originating in the 1960s and 70s, Purple Haze quickly became a symbol of the counterculture movement. Its name is synonymous with creativity and euphoria, making it a favorite among artists and musicians. The strain’s legendary status is not only tied to its historical significance but also to its unique genetic makeup and remarkable effects. In this article, we will delve into the origins of Purple Haze, explore its genetic profile, and uncover the reasons behind its enduring popularity.
Genetic Makeup and Unique Characteristics of Purple Haze
Purple Haze is a sativa-dominant hybrid, typically featuring a genetic blend of 85% sativa and 15% indica. This iconic strain is believed to be a cross between Haze and Purple Thai, combining the best attributes of both parent strains. The result is a cannabis variety that is not only visually stunning but also potent and flavorful.
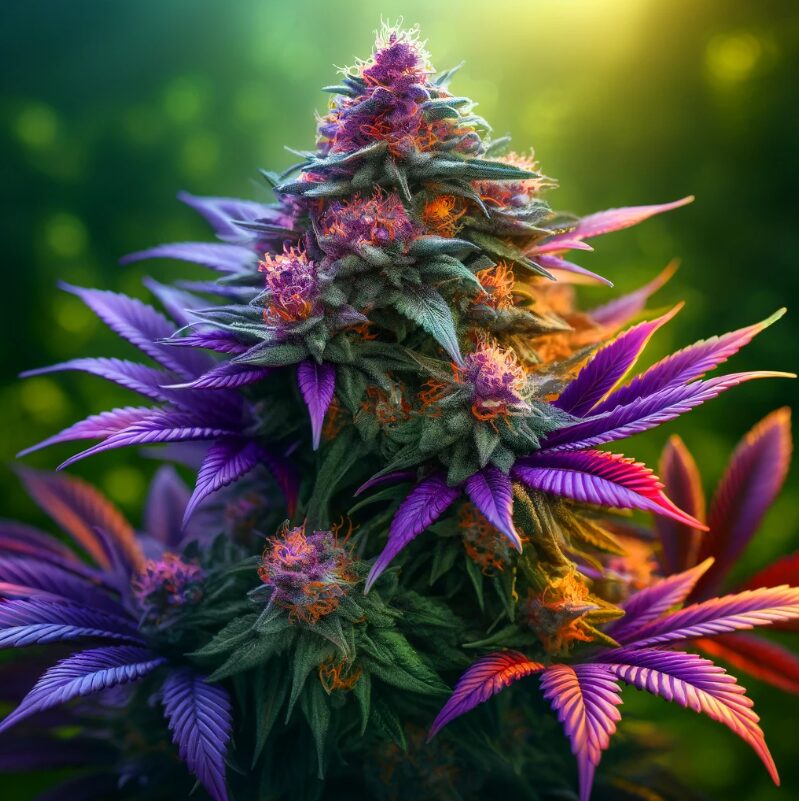
One of the most striking features of Purple Haze is its vibrant purple coloration. This unique hue is due to the presence of anthocyanin pigments, which can be influenced by various factors, including temperature and pH levels during the growing process. The deep purple buds are often complemented by fiery orange pistils and a generous coating of frosty trichomes, giving the strain its signature look.
The aroma of Purple Haze is equally captivating. It boasts a sweet and earthy scent with hints of berries and spices, making it instantly recognizable. When consumed, Purple Haze delivers a smooth and flavorful smoke, with a taste profile that mirrors its aroma. Users often report notes of sweet fruit, mixed berries, and a subtle spiciness on the exhale.
In terms of cannabinoid content, Purple Haze typically features THC levels ranging from 15% to 20%, making it a moderately potent strain. It also contains a variety of terpenes, such as myrcene, pinene, and caryophyllene, which contribute to its distinct flavor and aroma as well as its overall effects.
Purple Haze’s genetic composition and unique characteristics make it a standout strain in the cannabis world. Its vibrant appearance, delightful aroma, and balanced effects have solidified its place as a beloved and legendary strain among cannabis enthusiasts.
The Effects and Benefits of Purple Haze
Purple Haze is celebrated not only for its vibrant appearance and rich aroma but also for its potent effects and numerous benefits. As a sativa-dominant strain, it offers a range of uplifting and energizing effects that make it a popular choice among recreational and medicinal users alike.
Euphoric and Uplifting Effects
One of the most notable effects of Purple Haze is its ability to induce a sense of euphoria and happiness. Users often report feeling an immediate mood boost, characterized by a surge of creativity and an overall sense of well-being. This makes Purple Haze an ideal strain for social gatherings, artistic endeavors, and activities that require a creative spark. The cerebral high it provides can help users feel more focused and motivated, making it a great option for daytime use.
Stress and Anxiety Relief
Purple Haze is also known for its potential to alleviate stress and anxiety. The uplifting effects can help to combat feelings of depression and anxiousness, providing users with a more positive outlook. The strain’s ability to enhance mood and reduce stress levels makes it a valuable option for those dealing with chronic stress or anxiety disorders. Many users find that Purple Haze helps them feel more relaxed and at ease without the sedative effects commonly associated with indica strains.
Pain Management
In addition to its mental health benefits, Purple Haze is also praised for its analgesic properties. It can be effective in managing mild to moderate pain, making it a suitable option for those suffering from headaches, muscle aches, and other minor ailments. The strain’s anti-inflammatory properties can also help reduce discomfort and promote overall physical relaxation.
Enhanced Creativity and Focus
For those looking to enhance their productivity and creativity, Purple Haze can be a valuable ally. The strain’s sativa-dominant nature encourages a more active mind, helping users to think more clearly and creatively. Whether you’re working on a creative project, studying, or simply looking to enjoy a mentally stimulating experience, Purple Haze can provide the mental clarity and focus needed to excel.
Appetite Stimulation
Purple Haze is also known to stimulate appetite, making it a useful strain for those dealing with conditions that cause a lack of appetite, such as certain medical treatments or eating disorders. The “munchies” effect can help users regain their appetite and enjoy food more thoroughly, contributing to overall well-being.
Overall, Purple Haze offers a balanced blend of mental and physical effects that cater to a wide range of needs. Its euphoric and uplifting properties, combined with its potential for stress relief, pain management, and enhanced creativity, make it a versatile and beloved strain in the cannabis community.

Cultivation Tips for Growing Purple Haze Successfully
Growing Purple Haze can be a rewarding experience for both novice and experienced cultivators. This strain is known for its resilience and ability to thrive in various environments, making it a popular choice for home growers. Here are some essential tips to help you cultivate Purple Haze successfully.
Ideal Growing Conditions
Purple Haze can be grown both indoors and outdoors, but it prefers a warm and sunny climate when cultivated outdoors. The strain thrives in temperatures between 70-80°F (21-27°C). If you’re growing indoors, maintaining a controlled environment with consistent temperature and humidity levels is crucial for optimal growth.
Soil and Nutrients
Purple Haze flourishes in nutrient-rich, well-draining soil. A mix of organic compost, perlite, and vermiculite can provide the necessary nutrients and aeration for healthy root development. During the vegetative stage, focus on providing nitrogen-rich fertilizers to support vigorous growth. As the plant transitions to the flowering stage, switch to phosphorus and potassium-rich nutrients to encourage bud development and enhance the strain’s signature purple coloration.
Lighting Requirements
Adequate lighting is essential for the successful cultivation of Purple Haze. When growing indoors, use high-quality LED or HPS grow lights to provide the necessary spectrum and intensity for healthy growth. Purple Haze typically requires 18-24 hours of light during the vegetative stage and 12 hours of light during the flowering stage. Ensure that the lights are positioned at the correct height to prevent light burn and promote even growth.
Watering and Humidity
Proper watering practices are crucial for the health of your Purple Haze plants. Avoid overwatering, as this can lead to root rot and other issues. Allow the top inch of the soil to dry out between waterings to ensure adequate oxygenation of the roots. Maintaining the right humidity levels is also important. During the vegetative stage, aim for humidity levels between 40-60%. Lower the humidity to 30-40% during the flowering stage to prevent mold and mildew on the buds.
Pruning and Training
Pruning and training techniques can help maximize the yield and quality of your Purple Haze plants. Regularly remove any yellowing or dead leaves to promote air circulation and light penetration. Techniques such as topping, low-stress training (LST), and the Screen of Green (ScrOG) method can help control the plant’s height and encourage lateral growth, resulting in more bud sites and a higher yield.
Harvesting and Curing
Harvesting Purple Haze at the right time is crucial for achieving the best flavor and potency. Look for trichomes that have turned milky white with a few amber hues, indicating peak THC levels. Once harvested, dry the buds in a dark, well-ventilated area with a consistent temperature of around 70°F (21°C) and humidity levels of 50%. After drying, cure the buds in airtight jars, opening them daily to release excess moisture and enhance the flavor and potency.
By following these cultivation tips, you can successfully grow Purple Haze and enjoy its unique characteristics and benefits. Whether you’re a beginner or an experienced grower, the rewarding experience of cultivating this legendary strain is well worth the effort.
Consumer Experience: Reviews and Popular Uses
Purple Haze has garnered a loyal following among cannabis enthusiasts, thanks to its distinctive characteristics and balanced effects. Consumers often praise this strain for its unique blend of mental and physical benefits, making it a versatile choice for various uses. Here’s a look at what users typically experience and how Purple Haze is popularly used.
User Reviews and Testimonials
Purple Haze consistently receives high ratings from users, who frequently highlight its uplifting and euphoric effects. Many describe an immediate mood boost and a surge of creative energy, making it a favorite for daytime use. Users often report that Purple Haze helps them feel more sociable and talkative, making it an ideal strain for social gatherings and creative activities.
One common theme in user reviews is the strain’s ability to alleviate stress and anxiety. Consumers appreciate the calming yet invigorating effects, which help them feel relaxed without feeling lethargic. This makes Purple Haze a popular choice for those seeking relief from anxiety or looking to enhance their overall mood.
Popular Uses of Purple Haze
Creative Endeavors
Artists, musicians, and writers often turn to Purple Haze to spark their creativity. The strain’s cerebral high can help unlock new ideas and perspectives, making it a valuable tool for those involved in creative pursuits. Whether it’s painting, composing music, or brainstorming new concepts, Purple Haze provides the mental clarity and inspiration needed to fuel artistic expression.
Social Settings
Purple Haze’s euphoric and sociable effects make it a great choice for social events and gatherings. Users often find that the strain helps them feel more open and communicative, enhancing conversations and social interactions. It’s a popular option for parties, group outings, and any situation where a positive and engaging atmosphere is desired.
Stress Relief and Relaxation
For those seeking relief from the pressures of daily life, Purple Haze offers a welcome escape. The strain’s ability to reduce stress and anxiety makes it a go-to option for unwinding after a long day. Many users find that it helps them relax without feeling overly sedated, making it suitable for both daytime and evening use.
Physical Activity
Some users enjoy Purple Haze before engaging in physical activities like hiking, yoga, or dancing. The strain’s energizing effects can help enhance endurance and focus, making physical activities more enjoyable and immersive. Its ability to boost mood and motivation can also provide an extra push for those looking to stay active and engaged.
Appetite Stimulation
Purple Haze is known to stimulate appetite, which can be beneficial for individuals dealing with a lack of appetite due to medical conditions or treatments. The “munchies” effect can help users enjoy food more and maintain a healthy diet, contributing to overall well-being.
In summary, Purple Haze offers a versatile and enjoyable experience for a wide range of users. Its balanced effects, combined with its unique flavor and aroma, have earned it a well-deserved reputation as a beloved strain in the cannabis community. Whether used for creativity, socializing, relaxation, physical activity, or appetite stimulation, Purple Haze continues to be a popular and cherished choice among cannabis enthusiasts.

Conclusion
Purple Haze stands out as one of the most iconic cannabis strains, renowned for its rich history, distinctive characteristics, and balanced effects. From its vibrant purple buds and sweet, earthy aroma to its uplifting and euphoric effects, Purple Haze offers a unique experience that continues to captivate cannabis enthusiasts worldwide.
The strain’s versatility makes it suitable for a wide range of uses, from sparking creativity and enhancing social interactions to providing relief from stress and anxiety. Its ability to stimulate appetite and manage pain further adds to its appeal, making it a valuable option for both recreational and medicinal users.
Cultivating Purple Haze can be a rewarding endeavor, with its resilience and adaptability to various growing conditions. By following the proper cultivation tips, growers can achieve healthy plants and enjoy the full benefits of this legendary strain.
Whether you are a seasoned cannabis connoisseur or new to the world of cannabis, Purple Haze offers a timeless and enriching experience. Its enduring popularity and cultural significance solidify its place as a beloved strain that continues to inspire and delight users around the globe.
Northern Lights Cannabis Strain: A Detailed Look at Its History, Advantages, and Growing Techniques
Northern Lights Introduction
The Northern Lights cannabis strain is renowned in the world of cannabis enthusiasts for its legendary status and exceptional qualities. This strain, which boasts a rich history and unique origins, has captivated the hearts and minds of users globally. Known for its distinctive flavor profile and powerful effects, Northern Lights has become a staple for both recreational and medicinal users. In this article, we will delve deep into the history of the Northern Lights cannabis strain, explore its unique characteristics, highlight its numerous health benefits, provide valuable tips and techniques for growing this strain, and discuss the most popular methods of consumption. Whether you are a seasoned cannabis connoisseur or a curious newcomer, this comprehensive guide will equip you with all the knowledge you need about Northern Lights.
History and Origins of the Northern Lights Cannabis Strain
The Northern Lights cannabis strain holds a mythical status in the cannabis community, both for its remarkable effects and its storied past. This strain is believed to have originated from the West Coast of the United States in the late 1970s. The precise details of its creation are shrouded in mystery, but it is widely accepted that Northern Lights is a pure Indica strain derived from Afghani landrace genetics.
The strain gained widespread popularity in the 1980s when it was introduced to the Netherlands by a prominent breeder known as Neville Schoenmaker. Schoenmaker, the founder of the first cannabis seed bank, saw the potential in Northern Lights and worked to stabilize and enhance its genetics. This led to the creation of several phenotypes, each with slightly different characteristics but maintaining the core qualities that made Northern Lights famous.
Northern Lights quickly became a cornerstone of the cannabis industry, winning numerous awards and accolades. Its potent effects, ease of growth, and resilience made it a favorite among growers and consumers alike. The strain’s history is intertwined with the development of modern cannabis breeding, influencing countless other strains and solidifying its place as a legendary cannabis variety.

Unique Characteristics and Flavor Profile
Northern Lights is renowned for its striking appearance and distinctive aroma. The buds are dense and resinous, often showcasing hues of deep green and purple, complemented by a thick coating of frosty trichomes. These visual traits not only make Northern Lights visually appealing but also indicate its potency and quality.
The aroma of Northern Lights is a delightful blend of earthy pine and sweet, spicy undertones. When the buds are broken apart, they release a rich, pungent scent that is instantly recognizable. This complex aroma profile is a testament to the strain’s rich genetic heritage.
When it comes to flavor, Northern Lights does not disappoint. The smoke is smooth and flavorful, offering a blend of pine, earth, and a subtle sweetness that lingers on the palate. Users often describe the taste as both refreshing and robust, making it a favorite among those who appreciate a well-rounded cannabis experience. The strain’s smooth smoke and rich flavor contribute significantly to its enduring popularity.
Health Benefits and Effects
Northern Lights is celebrated for its powerful and therapeutic effects. As a pure Indica strain, it provides deep relaxation and a sense of calm, making it an excellent choice for those seeking relief from stress and anxiety. The strain’s potent effects can also help alleviate pain, making it a popular option for medical users dealing with chronic pain conditions.
In addition to its relaxing properties, Northern Lights is known for inducing a strong sense of euphoria and happiness. This makes it an ideal strain for evening use, as it can help users unwind and enjoy a restful night’s sleep. The strain’s ability to combat insomnia and promote relaxation has earned it a reputation as a go-to strain for those seeking restorative rest.
Growing Northern Lights: Tips and Techniques
Northern Lights is a relatively easy strain to grow, making it a favorite among both novice and experienced cultivators. It is known for its resilience and ability to thrive in various environments, whether grown indoors or outdoors. Here are some tips and techniques for growing Northern Lights successfully:
- Climate: Northern Lights prefers a warm, sunny climate. If grown outdoors, it should be planted in a location that receives plenty of sunlight.
- Soil: Well-draining soil with a balanced pH level is ideal for this strain. Adding organic matter can enhance soil fertility and promote healthy growth.
- Watering: Consistent watering is crucial, but be cautious not to overwater, as this can lead to root rot. Allow the soil to dry out slightly between waterings.
- Nutrients: Regular feeding with high-quality nutrients will support vigorous growth. During the flowering stage, switch to a nutrient blend high in phosphorus and potassium.
- Training: Techniques such as topping and low-stress training (LST) can help manage plant height and increase yields.
Popular Uses and Consumption Methods
Northern Lights offers a versatile experience, making it suitable for various consumption methods. Some of the most popular ways to enjoy this strain include:
- Smoking: Traditional smoking methods, such as joints, blunts, or pipes, allow users to savor the strain’s unique flavor profile.
- Vaporizing: Vaporizing Northern Lights can provide a cleaner, smoother experience while preserving the strain’s delicate flavors and aromas.
- Edibles: Infusing Northern Lights into edibles can provide a long-lasting, potent experience, making it a favorite among those seeking extended relief from symptoms.
- Concentrates: Northern Lights is also available in various concentrate forms, such as oils, waxes, and shatter, offering a highly potent option for experienced users.
With its rich history, distinctive characteristics, and numerous benefits, Northern Lights continues to be a revered strain in the cannabis world. Whether you are looking to cultivate your own plants or simply enjoy its effects, Northern Lights is a strain that promises to deliver a memorable experience.

Unique Characteristics and Flavor Profile
Northern Lights is renowned for its striking appearance and distinctive aroma. The buds are dense and resinous, often showcasing hues of deep green and purple, complemented by a thick coating of frosty trichomes. These visual traits not only make Northern Lights visually appealing but also indicate its potency and quality.
The aroma of Northern Lights is a delightful blend of earthy pine and sweet, spicy undertones. When the buds are broken apart, they release a rich, pungent scent that is instantly recognizable. This complex aroma profile is a testament to the strain’s rich genetic heritage.
When it comes to flavor, Northern Lights does not disappoint. The smoke is smooth and flavorful, offering a blend of pine, earth, and a subtle sweetness that lingers on the palate. Users often describe the taste as both refreshing and robust, making it a favorite among those who appreciate a well-rounded cannabis experience. The strain’s smooth smoke and rich flavor contribute significantly to its enduring popularity.
Health Benefits and Effects
Northern Lights is celebrated for its powerful and therapeutic effects, making it a popular choice for both recreational and medical cannabis users. As a pure Indica strain, Northern Lights is renowned for its ability to induce deep relaxation and a sense of calm. This makes it an excellent option for those seeking relief from stress and anxiety.
One of the primary benefits of Northern Lights is its effectiveness in pain management. The strain’s potent analgesic properties can help alleviate chronic pain conditions, including arthritis, muscle spasms, and migraines. Its relaxing effects also make it suitable for easing tension and promoting muscle relaxation.
In addition to pain relief, Northern Lights is known for its mood-enhancing properties. The strain induces a strong sense of euphoria and happiness, which can be particularly beneficial for individuals dealing with depression or mood disorders. This uplifting effect helps users experience a positive outlook and a general sense of well-being.
Northern Lights is also highly effective in combating insomnia. Its sedative properties can help users fall asleep faster and enjoy a restful night’s sleep. This makes it an ideal strain for evening use, allowing users to unwind and prepare for a night of uninterrupted rest.
Other notable effects of Northern Lights include:
- Appetite Stimulation: This strain can induce hunger, making it useful for individuals dealing with appetite loss or nausea, often associated with medical treatments such as chemotherapy.
- Anti-Inflammatory Properties: The strain’s ability to reduce inflammation can provide relief for conditions such as arthritis and inflammatory bowel disease.
- Anti-Anxiety Effects: Northern Lights’ calming effects can help reduce symptoms of anxiety and panic disorders.
Overall, Northern Lights offers a well-rounded profile of benefits, making it a versatile strain for various therapeutic purposes. Its combination of relaxation, pain relief, and mood enhancement ensures that it remains a staple in the cannabis community.

Growing Northern Lights: Tips and Techniques
Northern Lights is a relatively easy strain to grow, making it a favorite among both novice and experienced cultivators. Its resilience and adaptability allow it to thrive in various environments, whether grown indoors or outdoors. Here are some essential tips and techniques for successfully cultivating Northern Lights:
1. Optimal Climate Conditions
Northern Lights prefers a warm, sunny climate, similar to the Mediterranean. If growing outdoors, ensure the plants receive plenty of sunlight and are protected from extreme weather conditions. Indoor growers can replicate these conditions with high-quality grow lights and a controlled environment.
2. Soil and Nutrient Requirements
Well-draining soil with a balanced pH level is ideal for Northern Lights. Adding organic matter, such as compost or well-rotted manure, can enhance soil fertility and promote healthy growth. Regular feeding with high-quality nutrients is essential. During the vegetative stage, use a nitrogen-rich fertilizer to support robust growth. Switch to a nutrient blend high in phosphorus and potassium during the flowering stage to encourage bud development.
3. Watering Schedule
Consistent watering is crucial for healthy growth, but be cautious not to overwater, as this can lead to root rot. Allow the soil to dry out slightly between waterings to prevent waterlogged conditions. Monitor the plant’s needs, adjusting the watering schedule based on the environment and growth stage.
4. Training Techniques
Applying training techniques can help manage plant height and increase yields. Topping involves cutting the main stem to encourage the plant to grow more branches, leading to a bushier plant with more bud sites. Low-stress training (LST) involves gently bending and tying down branches to create an even canopy, allowing more light to reach the lower parts of the plant.
5. Pest and Disease Management
Northern Lights is relatively resistant to pests and diseases, but it is still essential to monitor the plants regularly. Common pests include spider mites, aphids, and whiteflies. Use organic pest control methods, such as neem oil or insecticidal soap, to manage infestations. Ensuring proper air circulation and maintaining a clean growing environment can help prevent mold and mildew.
6. Harvesting and Curing
Northern Lights typically has a flowering period of 7-9 weeks. Harvest when the trichomes on the buds turn milky white with a few amber ones, indicating peak potency. After harvesting, dry the buds in a dark, well-ventilated area for about 7-10 days. Once dried, cure the buds in airtight jars, opening them daily to release moisture for the first few weeks. This process enhances the flavor and potency of the final product.
By following these tips and techniques, growers can achieve a bountiful harvest of high-quality Northern Lights buds. Whether growing for personal use or commercial purposes, the strain’s ease of cultivation and exceptional results make it a top choice for many cannabis enthusiasts.

Popular Uses and Consumption Methods
Northern Lights offers a versatile experience, making it suitable for various consumption methods. Whether you prefer traditional smoking or more modern alternatives, this strain provides a range of enjoyable ways to experience its effects and flavors. Here are some of the most popular methods of consuming Northern Lights:
1. Smoking
Smoking remains one of the most common methods of consuming cannabis. Northern Lights can be enjoyed through various smoking methods, such as joints, blunts, or pipes. Smoking allows users to experience the strain’s rich flavor profile and immediate effects. The smooth smoke and earthy pine aroma make smoking Northern Lights a pleasant experience for many enthusiasts.
2. Vaporizing
Vaporizing, or vaping, is a modern alternative to smoking that heats the cannabis to a temperature that releases its active compounds without combustion. This method provides a cleaner, smoother experience while preserving the strain’s delicate flavors and aromas. Vaporizing Northern Lights can be done using dry herb vaporizers or vape pens with Northern Lights cartridges.
3. Edibles
Edibles offer a long-lasting and potent way to enjoy Northern Lights. Infusing the strain into food items, such as brownies, gummies, or beverages, provides an extended experience of the strain’s effects. Edibles are ideal for those who prefer not to inhale cannabis. However, it’s essential to start with a low dose and wait for the effects to fully manifest, as they can take longer to onset compared to smoking or vaping.
4. Concentrates
Northern Lights is also available in various concentrate forms, such as oils, waxes, and shatter. Concentrates offer a highly potent option for experienced users seeking a more intense experience. These products can be consumed through dabbing, a method that involves heating a small amount of concentrate on a hot surface and inhaling the vapor. Concentrates preserve the strain’s potency and flavor, making them a popular choice among cannabis connoisseurs.
5. Tinctures and Capsules
Tinctures and capsules provide a discreet and convenient way to consume Northern Lights. Tinctures are liquid extracts that can be taken sublingually (under the tongue) or added to food and beverages. Capsules contain precise doses of cannabis oil, offering a smoke-free option for users who prefer measured doses. Both methods provide a consistent and controlled experience, making them suitable for medical users.
6. Topicals
For those seeking localized relief without the psychoactive effects, topicals infused with Northern Lights can be an effective option. Topicals, such as balms, creams, and lotions, can be applied directly to the skin to relieve pain, inflammation, and muscle soreness. This method allows users to benefit from the strain’s therapeutic properties without experiencing a high.
Northern Lights’ versatility and array of consumption methods ensure that it can be enjoyed by a wide range of users. Whether you are seeking relaxation, pain relief, or simply a delightful flavor experience, Northern Lights offers a method that suits your preferences.
Conclusion
The Northern Lights cannabis strain is a legendary variety that has captivated the cannabis community for decades. Its rich history, unique characteristics, and numerous health benefits make it a standout choice for both recreational and medicinal users. From its origins on the West Coast of the United States to its prominence in the Netherlands, Northern Lights has become a cornerstone of modern cannabis breeding.
With its distinctive aroma and flavor profile, Northern Lights offers a delightful sensory experience. The strain’s powerful effects, including deep relaxation, pain relief, and mood enhancement, make it an invaluable tool for managing various conditions. Whether you’re looking to unwind after a long day or seeking relief from chronic pain, Northern Lights delivers a reliable and enjoyable experience.
Cultivating Northern Lights is accessible to growers of all skill levels, thanks to its resilience and adaptability. By following essential growing tips and techniques, cultivators can achieve bountiful harvests of high-quality buds. The strain’s versatility extends to its consumption methods, providing users with multiple ways to enjoy its benefits, from smoking and vaporizing to edibles and topicals.
In conclusion, Northern Lights remains a must-try strain for cannabis enthusiasts and patients alike. Its enduring popularity is a testament to its exceptional qualities and the profound impact it has had on the world of cannabis. Whether you’re new to cannabis or a seasoned connoisseur, Northern Lights is a strain that promises to deliver a memorable and satisfying experience.

Aurora Borealis Strain Review: Potency, Flavor, and Growing Tips
Introduction to Aurora Borealis Cannabis Strain
Aurora Borealis, also known as Northern Lights, is a legendary cannabis strain renowned for its potent effects and delightful flavor profile. This strain has captivated the cannabis community for decades, earning its place as a favorite among both recreational users and medicinal patients. Aurora Borealis boasts a rich genetic heritage, combining the best traits of its parent strains to deliver a unique and unforgettable experience.
Originally developed by blending Afghani and Thai landrace strains, Aurora Borealis offers a balanced high that soothes the body and uplifts the mind. This strain is particularly cherished for its ability to induce relaxation and euphoria, making it a go-to choice for those seeking relief from stress, pain, and insomnia. As we delve deeper into the characteristics of Aurora Borealis, we’ll explore its potency, flavor, growing tips, and user experiences, providing a comprehensive review of this remarkable strain.

Potency and Effects of Aurora Borealis
Aurora Borealis is celebrated for its impressive potency, which is primarily due to its high THC content. On average, this strain contains THC levels ranging from 16% to 21%, making it a powerful option for both novice and experienced users. While the THC content can vary, users can consistently expect a strong and long-lasting high.
The effects of Aurora Borealis are profoundly relaxing, often described as a full-body high that melts away stress and tension. This makes it an excellent choice for evening use or for those looking to unwind after a long day. The high typically begins with a gentle euphoria that uplifts the mood and clears the mind of negative thoughts. As the cerebral effects take hold, users often experience an increase in creativity and a sense of calm.
Medicinally, Aurora Borealis is prized for its therapeutic benefits. It is commonly used to treat conditions such as chronic pain, anxiety, depression, and insomnia. The strain’s analgesic properties help alleviate pain, while its calming effects can reduce anxiety and promote better sleep. For patients dealing with mood disorders, the uplifting nature of Aurora Borealis can provide significant relief from symptoms of depression.
One of the standout features of this strain is its ability to balance mental stimulation with physical relaxation. Users report feeling a wave of tranquility wash over them, relieving muscle tension and promoting a sense of overall well-being. This balance makes Aurora Borealis a versatile strain, suitable for various medical and recreational purposes.
Flavor Profile and Aroma
Aurora Borealis offers a delightful flavor profile that complements its potent effects. Upon the first inhale, users are greeted with a sweet and spicy aroma, reminiscent of pine and earth. This distinctive scent is a result of its rich terpene profile, which includes myrcene, pinene, and caryophyllene. These terpenes not only contribute to the strain’s aromatic qualities but also enhance its therapeutic benefits.
The flavor of Aurora Borealis is equally impressive. Users often describe the taste as a blend of sweet, earthy notes with hints of citrus and herbal undertones. The initial taste is smooth and inviting, with a sweet, piney flavor that lingers on the palate. As the smoke settles, a subtle spiciness emerges, adding complexity to the overall experience.
One of the standout aspects of Aurora Borealis is its ability to provide a consistent and enjoyable smoking or vaping experience. Whether consumed through a joint, a pipe, or a vaporizer, the flavor remains robust and satisfying. The smoothness of the smoke makes it a favorite among those who prefer a less harsh inhalation, allowing users to fully appreciate the intricate flavors without discomfort.
The combination of a pleasant aroma and a rich, flavorful profile makes Aurora Borealis a sensory delight. It’s not just about the effects; the entire experience, from the first whiff to the final exhale, is designed to be enjoyed. This makes it an excellent choice for both seasoned cannabis connoisseurs and newcomers looking to explore high-quality strains.

Growing Aurora Borealis Cannabis
Growing Aurora Borealis cannabis can be a rewarding experience for both novice and experienced cultivators. This strain is known for its resilience and adaptability, making it a relatively easy plant to cultivate. Whether you choose to grow it indoors or outdoors, understanding the ideal conditions and best practices will help you achieve a successful harvest.
Ideal Growing Conditions
Aurora Borealis thrives in a controlled environment where temperature and humidity levels can be carefully monitored. When grown indoors, the optimal temperature range for this strain is between 70°F and 85°F during the day, with a slight drop at night. Maintaining humidity levels around 40% to 50% during the vegetative stage and reducing it to 30% to 40% during the flowering stage will help prevent mold and mildew.
Proper lighting is crucial for indoor cultivation. Aurora Borealis responds well to both High-Intensity Discharge (HID) lights and LED grow lights. Ensure your plants receive at least 18 hours of light per day during the vegetative stage, reducing it to 12 hours during the flowering stage to simulate the natural light cycle.
Soil and Nutrients
Aurora Borealis prefers nutrient-rich soil with good drainage. Using high-quality organic soil will provide the necessary nutrients for healthy growth. Additionally, you can enhance the soil with compost or other organic amendments to boost its fertility.
During the vegetative stage, a balanced fertilizer with equal parts nitrogen, phosphorus, and potassium (N-P-K) will support robust growth. As the plants transition to the flowering stage, switch to a fertilizer higher in phosphorus and potassium to promote bud development.
Watering Practices
Consistent watering is essential for healthy growth, but overwatering can lead to root rot and other issues. Water the plants thoroughly, allowing the soil to dry out slightly between waterings. Monitoring the moisture level of the soil can help you determine the right watering schedule.
Training and Pruning
Training techniques such as topping, Low-Stress Training (LST), and the Screen of Green (SCROG) method can help maximize yield and ensure even light distribution. Pruning lower leaves and branches that receive less light will also improve airflow and reduce the risk of mold.
Outdoor Cultivation
If you choose to grow Aurora Borealis outdoors, select a location with plenty of sunlight and protection from strong winds. This strain prefers a Mediterranean climate, but it can also thrive in more temperate regions with proper care. Planting in early spring will give your plants ample time to grow and flower before the cooler weather sets in.
Harvesting
Aurora Borealis typically has a flowering time of 7 to 9 weeks. You’ll know it’s time to harvest when the trichomes on the buds turn milky white and the pistils start to darken. Harvesting at the right time ensures the best potency and flavor.

User Reviews and Experiences
Aurora Borealis has garnered a strong following among cannabis enthusiasts, thanks to its potent effects and delightful flavor. User reviews and experiences provide valuable insights into what makes this strain stand out from the rest.
Relaxation and Stress Relief
Many users praise Aurora Borealis for its powerful relaxation effects. One user mentioned, “Aurora Borealis is my go-to strain for unwinding after a stressful day. It melts away tension and helps me relax like no other strain.” This sentiment is echoed by numerous others who find this strain particularly effective for stress relief and unwinding after a long day.
Euphoric and Uplifting
Aurora Borealis is also known for its euphoric and uplifting qualities. “This strain puts me in a great mood and makes me feel creative,” said another user. The balanced high, which starts with a cerebral uplift and transitions into deep physical relaxation, is a highlight for many users. This combination of mental stimulation and bodily calm makes it a versatile choice for various activities, from socializing to creative pursuits.
Pain and Insomnia Relief
The medicinal benefits of Aurora Borealis are frequently noted in user reviews. Many patients use this strain to manage chronic pain, anxiety, and insomnia. One patient shared, “I suffer from chronic back pain, and Aurora Borealis provides the relief I need without knocking me out completely.” Another added, “It’s the best strain I’ve found for helping me fall asleep and stay asleep through the night.”
Flavor and Aroma Appreciation
The flavor and aroma of Aurora Borealis also receive high marks. Users appreciate its sweet, piney taste with hints of citrus and earth. “The taste is phenomenal, and the smoke is smooth,” remarked one reviewer. The combination of a pleasant smoking experience with potent effects contributes to its popularity.
Comparisons to Similar Strains
When compared to other popular strains, Aurora Borealis often stands out for its balanced effects and ease of cultivation. Users who enjoy strains like Blue Dream or Northern Lights often find Aurora Borealis to be a welcome addition to their rotation. “It’s like a more balanced version of Northern Lights,” one user noted. The similarity in effects, paired with its unique flavor profile, makes Aurora Borealis a distinctive and desirable strain.
Conclusion
Aurora Borealis, also known as Northern Lights, remains a beloved cannabis strain for good reason. Its potent effects, delightful flavor, and ease of cultivation make it a standout choice for both recreational and medicinal users. With its origins rooted in Afghani and Thai landrace strains, Aurora Borealis offers a balanced high that soothes the body and uplifts the mind. Whether you’re seeking relaxation, stress relief, or a creative boost, this strain delivers on all fronts.
The strain’s high THC content ensures a powerful experience, while its unique terpene profile provides a sensory treat with its sweet, piney, and citrus flavors. For growers, Aurora Borealis offers resilience and adaptability, making it a relatively easy strain to cultivate, whether indoors or outdoors.
User testimonials further underscore the strain’s appeal, highlighting its ability to melt away tension, enhance mood, and alleviate various medical conditions. From novice users to seasoned cannabis connoisseurs, Aurora Borealis has something to offer everyone.
In summary, Aurora Borealis is a must-try strain that promises a memorable and enjoyable experience. Its well-rounded characteristics and consistent quality make it a staple in the cannabis community.

White Widow Cannabis Strain – A Dutch Creation
The Origins of White Widow
White Widow is a legendary cannabis strain that emerged in the early 1990s. Its exact lineage is somewhat of a mystery, but it is widely believed to be a cross between a Brazilian sativa landrace and a resin-heavy South Indian indica. The White Widow strain was first released to the public by Dutch seedbanks, quickly gaining popularity for its robust growth, potent effects, and unique flavor profile.

Characteristics of White Widow
The name ‘White Widow’ itself is a testament to the strain’s distinctive appearance. The buds are often covered in a crystal-like coating of trichomes, giving them a white, frosted look that resembles a wintry forest. The high resin content not only contributes to the visual appeal but also to the potency of the strain.
This hybrid typically exhibits a fairly balanced sativa-indica ratio, offering a complex mix of cerebral and physical effects. White Widow plants are medium in height, making them suitable for a variety of growing environments. They are quite resilient and thus are a popular choice among novice and expert growers alike.
Growing White Widow
White Widow is not particularly difficult to cultivate, but it does require some basic knowledge and care to produce the high-quality flowers it’s known for. It flourishes in both indoor and outdoor settings, with a flowering time of about 8 to 10 weeks. In general, White Widow is resistant to mold and pests, making it a relatively low-maintenance strain.
For growers looking to maximize yield and potency, attention should be paid to proper lighting, nutrients, and pruning. The Sea of Green (SOG) method is often recommended for indoor cultivation to encourage more homogeneous canopy and increased yield.
The White Widow Experience
When consumed, White Widow delivers a powerful burst of euphoria and energy, sparking creativity and conversation. The sativa effects are pronounced, offering a cerebral high that’s both uplifting and invigorating. These are followed by the more relaxed and soothing sensations typical of its indica genetics. Users often report an enhanced mood, improved focus, and a general sense of well-being.
Everyday tasks can become more enjoyable, and artists or creatives might find White Widow particularly beneficial when in need of inspiration. Due to its strong potency, new users should approach White Widow with caution, starting with small doses and gradually increasing as they become familiar with its effects.
Medical Benefits
Alongside its popularity among recreational users, White Widow also has a range of medicinal applications. Its mood-lifting properties can help with managing symptoms of stress, anxiety, and depression. Additionally, its indica side can provide relief for those with chronic pain, muscle tension, or inflammation.
Patients suffering from insomnia might find White Widow helpful as well: while its initial effects are stimulating, they often give way to a more sedative experience that could aid in achieving a restful sleep.
The Lasting Impact of White Widow
White Widow has remained a staple in coffee shops, dispensaries, and grow rooms around the world for decades due to its versatile and powerful nature. Its prestige is reflected in the numerous awards it has won, including the High Times Cannabis Cup in 1995.
More than just a strain, White Widow has become a pillar in cannabis breeding, serving as a genetic base for many popular hybrids. Its consistency and recognizable high have made it a favorite for breeders and an essential component of the modern cannabis landscape. Whether enjoyed for its stunning appearance, robust effects, or rich heritage, White Widow continues to captivate cannabis enthusiasts and cultivators alike.
Green Crack Cannabis Strain – Snoop Doog’s Favorite
Introduction to Green Crack Cannabis Strain
Green Crack is a sativa-dominant hybrid strain known for its energizing effects which have earned it quite the reputation among cannabis enthusiasts. Its origins trace back to the 1970s with an ancestry linked to Skunk #1, though its current incarnation was reputedly perfected in the 1990s. Bearing a name infamously coined by none other than Snoop Dogg, Green Crack’s vividly sharp citrus scent complements the invigorating mental buzz it’s known to induce.

Aroma, Flavor, and Appearance
One of the first characteristics you notice about Green Crack is its pungent, fruity aroma that many compare to a tangy mango. Upon consumption, the taste aligns closely with its scent, delivering a sweet, citrus flavor with earthy undertones. Visually, Green Crack is just as striking. Bright green leaves are accented by vibrant orange hairs, and the presence of trichomes hints at the potency of the strain.
Energizing Effects and Mental Stimulation
The energizing effects of Green Crack are often likened to a strong cup of coffee. This makes it a popular strain for daytime use, as it can help to kickstart your morning or provide a midday boost without the lethargy that some strains induce. The cerebral high is characterized by an increased sense of focus and sharpness in mental clarity, making it a favorite among professionals and creatives who seek a mental lift without the jitters of caffeine.
Potential Medical Benefits
Green Crack has been reported by some users to be beneficial in managing fatigue, stress, and depression due to its uplifting nature. It’s also said to aid in conditions such as ADHD/ADD by enhancing concentration levels. Nevertheless, as with any strain, the medicinal benefits can be subjective, and consultation with a healthcare professional is advisable for anyone considering cannabis as a treatment.
Cultivation of Green Crack
For those interested in growing Green Crack, it boasts a relatively short flowering time of around 7 to 9 weeks when grown indoors. The strain is known for its vigorous growth habit, responding well to various training techniques that can optimize yield and the efficiency of grow space use. Novice growers find it forgiving and rewarding, as it’s resistant to common pests and molds.
Precautions and Dosage
Although the mental boost provided by Green Crack is often sought after, it is advisable to approach this strain with caution, particularly for those who are prone to anxiety or those who have a low THC tolerance. Its high THC content, which can be upwards of 15-25%, may lead to potential side effects such as paranoia or heightened anxiety in some users. As with all strains, responsible dosing is key, and starting with a lower dose can help mitigate adverse effects for those new to Green Crack.
Concluding Thoughts on Green Crack
Green Crack remains a popular choice among cannabis aficionados for its vibrant aroma, robust flavor, and notably invigorating effects. As a strain that promises an energizing high and increased focus, it’s a household name for users looking to manage fatigue and seek mental stimulation without the sedative effects of other strains. Its prominence in the world of cannabis is sustained by its appeal to connoisseurs and the newfound appreciation from medicinal users seeking relief from various ailments. When enjoyed responsibly, Green Crack continues to stand out as a distinctive and powerful variety that has firmly staked its claim within the cannabis culture.
Sour Diesel: The Energizing Strain with a Pungent Kick
Introduction to Sour Diesel
Sour Diesel, often dubbed as “Sour D,” stands as one of the most popular and invigorating strains of cannabis known for its unique flavor and energizing effects. This sativa-dominant strain has been a favorite among marijuana enthusiasts for its fast-acting impact that delivers a dreamy cerebral high. With its pungent and unmistakably diesel-like aroma, it offers an aromatic experience that is as robust as its effects.

Origin and Genetics
The exact lineage of Sour Diesel remains a topic of debate among cannabis aficionados. However, it is commonly believed that this strain is a cross between Chemdawg 91 and Super Skunk. The strain emerged in the early ’90s and quickly gained a reputation on the East Coast, particularly in the New York City area. Its powerful genetic heritage contributes to the characteristic potency and flavor profile that Sour Diesel is known for.
Aroma and Flavor Profile
Sour Diesel’s name partly comes from its distinct scent. The “diesel” moniker references the sharp and somewhat acrid nose of petrol, which this strain exemplifies. Accompanied by hints of orange and a slight herbal undertone, Sour Diesel’s aroma is intense and easily recognizable. Its flavor continues the theme, offering a tangy, sour taste with earthy and herbal notes that linger on the palate long after consumption.
Effects and Benefits
One of the most notable attributes of Sour Diesel is its fast-acting cerebral high. Users often report a heady rush of euphoria and an uplifting boost in mood shortly after use. It’s recognized for enhancing creativity and providing a burst of energy, making it a preferred choice for daytime use. The strain’s invigorating qualities can also help combat fatigue, stress, and depression.
Medically, Sour Diesel is equally sought after. Patients with mood disorders, chronic pain, and anxiety have found its effects to be therapeutic. Its tendency to induce a sense of well-being and stimulate appetite can also be beneficial for individuals facing treatments that diminish hunger, such as chemotherapy.
Growing Sour Diesel
For cultivation enthusiasts, Sour Diesel holds a moderate level of growing difficulty. The strain flourishes in warm, semi-humid climates and requires a substantial amount of space due to its height and branchy structure. Sour Diesel usually has a longer flowering period than the average cannabis plant, taking around 10 to 12 weeks. Growers should monitor the plant closely for pests and mold due to its pungent odor and large stature, which can draw unwanted attention.
Conclusion
Sour Diesel maintains its reputation as a top-tier cannabis strain for both recreational and medicinal users. Its unique combination of a pungent aroma and stimulating effects has made it an iconic symbol within the cannabis community. Whether you’re looking for a mental uplift or some creative inspiration, Sour Diesel promises an energetic rush with a flavorful punch that’s hard to forget. Remember to enjoy responsibly and in accordance with local laws regarding cannabis use and cultivation.
OG Kush: The Legendary Strain Unveiled
Origins and History of OG Kush
OG Kush is a name that resonates with cannabis enthusiasts all over the world. This legendary strain has been a cornerstone in the cannabis culture for years, but its origins remain somewhat mysterious. Many believe it originated in Florida during the early 1990s when a strain from Northern California was crossed with a Hindu Kush plant from Amsterdam. The “OG” in its name is said to stand for “original gangster,” indicating its status as a foundational strain. Alternatively, “OG” is also claimed to mean “ocean grown,” suggesting that the strain was cultivated close to the Pacific Ocean. Despite the mystery surrounding its exact lineage, OG Kush has made a profound impact on the cannabis industry and has spawned countless hybrids.

Characteristics and Appearance
OG Kush is distinguished by its unique aroma, potent effects, and distinct appearance. The buds are typically dense, with a vibrant green hue interspersed with orange pistils. The copious trichomes that cover the buds give them a sticky, crystalline coating that’s indicative of the strain’s potency. When it comes to aroma, OG Kush is notable for its earthy and pine scent with citrus undertones—a fragrance that has become a hallmark of this strain. Its flavor is equally complex, combining spicy, woody notes with a hint of lemon.
Effects and Medical Uses
The effects of OG Kush are as potent as its reputation suggests. It is known for its powerful, euphoric high that can quickly usher in feelings of happiness and a heightened sense of well-being. This is accompanied by a cerebral buzz and a comforting body high that can soothe muscles and relieve tension. The versatility of its effects makes OG Kush a go-to strain for both recreational and medicinal use. Patients seeking relief from conditions such as chronic pain, anxiety, insomnia, and depression often turn to OG Kush for its therapeutic benefits. Nevertheless, because of its strength, novice users should approach this strain with caution to avoid overwhelming effects.
Growing OG Kush
OG Kush’s reputation does not only arise from its effects but also from the challenges it poses to growers. It is considered a temperamental plant, requiring a well-controlled environment to thrive. Its sensitivity to climate and susceptibility to pests and diseases mean that it needs extra care and attention. Indoor cultivation allows growers to maintain the necessary conditions, although OG Kush can also excel in outdoor settings that mimic its natural coastal habitat. The flowering time typically ranges from eight to nine weeks, and while yields may not be as high as some other strains, the quality of the product makes it a rewarding endeavor for experienced growers.
Impact on the Cannabis Industry
The influence of OG Kush on the cannabis landscape is immeasurable. It has become a genetic backbone for many other prominent strains, giving rise to famous derivatives like GSC (formerly Girl Scout Cookies), Headband, and Tahoe OG, among numerous others. This has ensured its legacy, as new generations of strains carry the characteristics that have made OG Kush a beloved choice around the globe. Additionally, its presence in pop culture, from music to television, has only added to its mystique and popularity.
Conclusion
OG Kush is more than just a cannabis strain; it’s a cultural icon with a complex profile and a storied past. For both aficionados and patients, its potency and diverse effects have set a standard in the industry. As it continues to influence breeding and consumer preferences, OG Kush remains an enduring and legendary part of the cannabis community—a strain that unveils its depth with every use and continues to captivate new and old enthusiasts alike.
Girl Scout Cookie A Top Cannabis Strain Choice
Introduction to the Girl Scout Cookie Strain
The Girl Scout Cookie (GSC) cannabis strain, a popular hybrid in the cannabis community, has earned its reputation for its unique flavor profile and potent effects. Originating from a cross between OG Kush and Durban Poison, GSC has become a favorite among users seeking a balance of euphoria and relaxation. Its appealing aroma, reminiscent of freshly baked cookies, combined with its powerful psychoactive properties, has made it a top choice for both recreational and medicinal users.
Flavor Profile and Aroma
The Girl Scout Cookie (GSC) strain is celebrated for its rich and complex flavor profile. As the name suggests, it offers a sweet and earthy taste reminiscent of freshly baked cookies, with a hint of mint and chocolate. This delectable flavor is complemented by a distinct aroma that blends sweetness with a subtle spiciness, creating an enticing sensory experience.
Key Flavor Notes:
- Sweetness: The dominant note is a sugary sweetness, much like a classic cookie.
- Earthiness: A grounding earthy undertone balances the sweetness.
- Mint: A refreshing hint of mint adds a unique twist.
- Chocolate: Subtle chocolate notes enhance the overall richness.
Comparisons to Other Strains:
- OG Kush: While OG Kush provides a similar earthy base, it lacks the sweet, dessert-like quality of GSC.
- Durban Poison: Durban Poison’s spiciness and earthy tones contribute to GSC’s complex aroma, but on its own, it doesn’t have the same sweet profile.
GSC’s flavor and aroma make it a standout strain, appealing to those who appreciate nuanced and layered sensory experiences. This unique profile not only makes it enjoyable to consume but also distinguishes it from many other strains on the market.
User Testimonials:
Many users describe the flavor of GSC as one of their favorites, often highlighting the sweet, cookie-like taste as a primary reason for their preference. The pleasant aroma is also frequently mentioned, with users noting how it enhances the overall experience.

Effects and Benefits
The Girl Scout Cookie (GSC) cannabis strain is renowned not only for its delightful flavor but also for its potent effects and numerous benefits. This balanced hybrid offers a blend of euphoria and relaxation, making it a versatile choice for various users.
Psychoactive Effects:
- Euphoria: One of the most notable effects of GSC is the intense feeling of euphoria. Users often report an uplifted mood and enhanced creativity, making it ideal for social gatherings or artistic endeavors.
- Relaxation: Alongside the euphoric high, GSC provides a deep sense of relaxation. This makes it a great option for unwinding after a long day or alleviating stress and anxiety.
- Cerebral High: GSC offers a clear-headed high, allowing users to remain functional and focused while enjoying the strain’s benefits.
- Body High: The strain also delivers a soothing body high, which can help in relieving physical discomfort and tension.
Medicinal Benefits:
- Pain Relief: Many medical users turn to GSC for its analgesic properties, which can help alleviate chronic pain, headaches, and migraines.
- Stress and Anxiety Reduction: The calming effects of GSC are beneficial for those dealing with stress, anxiety, and depression.
- Appetite Stimulation: GSC is known to stimulate appetite, making it useful for individuals experiencing appetite loss due to medical conditions or treatments.
- Insomnia Relief: The relaxing properties of GSC can aid in improving sleep quality and helping those with insomnia.
User Experiences and Testimonials:
- Positive Mood: Users frequently mention the uplifting and happy feelings that come with consuming GSC. It is often described as a great mood enhancer.
- Relaxation: The strain is praised for its ability to induce relaxation without causing sedation, making it a favorite for evening use.
- Pain Management: Many users have reported significant relief from chronic pain and discomfort after using GSC, highlighting its efficacy as a natural painkiller.

Growing the Girl Scout Cookie Strain
Growing the Girl Scout Cookie (GSC) cannabis strain can be a rewarding experience for both novice and experienced cultivators. This strain is known for its resilience and adaptability, making it suitable for various growing environments. Here are some tips and considerations to help you successfully cultivate GSC.
Growing Conditions:
- Indoor vs. Outdoor: GSC can be grown both indoors and outdoors. Indoor growing allows for better control over environmental factors, while outdoor growing can yield larger plants and higher harvests.
- Climate: This strain thrives in a warm, Mediterranean-like climate with consistent temperatures between 68-77°F (20-25°C). If growing outdoors, ensure the plants receive plenty of sunlight.
Soil and Nutrients:
- Soil Type: GSC prefers well-draining soil rich in organic matter. A mix of soil and coco coir can enhance aeration and water retention.
- Nutrient Requirements: Use a balanced nutrient regimen, focusing on nitrogen during the vegetative stage and phosphorus and potassium during the flowering stage. Organic fertilizers and compost teas can also benefit plant growth.
Watering and Humidity:
- Watering Schedule: Maintain a regular watering schedule, ensuring the soil remains moist but not waterlogged. Overwatering can lead to root rot.
- Humidity Levels: During the vegetative stage, keep humidity levels around 60-70%. Reduce humidity to 40-50% during the flowering stage to prevent mold and mildew.
Pruning and Training:
- Pruning: Regular pruning helps to promote airflow and light penetration, reducing the risk of mold and improving bud development.
- Training Techniques: Techniques such as topping, low-stress training (LST), and the Screen of Green (ScrOG) method can maximize yields and improve plant structure.
Common Challenges:
- Pest Control: Be vigilant about pests like spider mites, aphids, and whiteflies. Use organic pest control methods or neem oil to protect your plants.
- Mold and Mildew: Ensure good airflow and maintain proper humidity levels to prevent mold and mildew growth. Inspect plants regularly and remove any affected areas promptly.
By following these guidelines, you can cultivate healthy and productive Girl Scout Cookie plants, yielding high-quality buds with the strain’s signature flavor and effects.

Purchasing and Consumption Tips
Purchasing and consuming the Girl Scout Cookie (GSC) cannabis strain can be an enjoyable experience if done correctly. This section will provide tips on how to buy quality GSC and recommendations for consumption methods and dosages.
Best Practices for Buying Quality Girl Scout Cookie Strain:
- Reputable Dispensaries: Purchase GSC from licensed and reputable dispensaries. These establishments are more likely to sell high-quality products that have been tested for potency and purity.
- Visual Inspection: Look for buds that are dense, well-trimmed, and covered in trichomes. High-quality GSC will have vibrant green colors with hints of purple and orange hairs.
- Aroma: Fresh GSC should have a strong, sweet, and earthy aroma. Avoid buds that smell musty or off, as this can indicate poor storage or contamination.
- Lab Testing: Check for lab results that verify the cannabinoid and terpene profile, as well as the absence of pesticides and other harmful substances.
- Packaging: Ensure the packaging is airtight and clearly labeled with information about the strain, THC/CBD content, and expiration date.
Recommendations for Consumption Methods and Dosages:
- Smoking: The traditional method of smoking GSC in a joint, pipe, or bong offers immediate effects and is popular among users who enjoy the full flavor profile. Start with a small amount to gauge your tolerance.
- Vaporizing: Vaping GSC can be a healthier alternative to smoking. Use a vaporizer that can handle flower or concentrates, and set the temperature to around 356°F (180°C) for optimal flavor and effect.
- Edibles: Edibles infused with GSC can provide a long-lasting and potent experience. Start with a low dose (5-10 mg of THC) and wait at least two hours before consuming more, as the effects take longer to onset.
- Tinctures: Tinctures are liquid extracts that can be taken sublingually (under the tongue) for fast absorption or added to food and drinks. They offer precise dosing and a discreet consumption method.
- Topicals: For localized relief from pain or inflammation, consider using topicals like creams or balms infused with GSC. These products do not produce psychoactive effects and are ideal for targeted application.
Dosage Recommendations:
- Beginners: Start with a low dose, such as one or two puffs from a joint or vaporizer, or 5-10 mg of THC in edibles.
- Intermediate Users: Moderate doses, such as 3-5 puffs or 10-20 mg of THC in edibles, can provide a more pronounced effect.
- Experienced Users: Higher doses, such as 5-7 puffs or 20-30 mg of THC in edibles, are suitable for those with a higher tolerance.
Always consume GSC responsibly and be mindful of your tolerance and individual response to THC. It’s important to stay hydrated and in a comfortable environment, especially when trying new consumption methods or higher doses.
Conclusion
The Girl Scout Cookie (GSC) cannabis strain has rightfully earned its place as a top choice among cannabis enthusiasts. With its delightful flavor profile, potent effects, and numerous benefits, GSC offers a well-rounded experience that appeals to both recreational and medicinal users. From its sweet, earthy aroma to its ability to induce euphoria and relaxation, this strain continues to captivate and satisfy a diverse range of users.
Cultivating GSC can be a rewarding endeavor, whether you’re growing it indoors or outdoors. By following best practices for soil, nutrients, watering, and pest control, you can ensure a healthy and productive harvest. When it comes to purchasing and consuming GSC, choosing reputable dispensaries and appropriate consumption methods can enhance your experience and help you make the most of this exceptional strain.
In summary, the Girl Scout Cookie cannabis strain stands out for its unique characteristics and versatile effects, making it a beloved choice in the cannabis community. Whether you’re a seasoned user or new to cannabis, GSC offers something special for everyone.
Blue Dream Cannabis
Understanding the Hype Around Blue Dream
Blue Dream, a sativa-dominant hybrid originating from California, has soared to immense popularity among both novice and experienced cannabis users. This strain has secured its status as a top choice in dispensaries across the United States. But what exactly has contributed to its widespread admiration, and why does it continue to draw consumers in droves?
The Genetic Backbone of Blue Dream
The genetic lineage of Blue Dream can be traced back to two foundational strains: Blueberry and Haze. The former is known for its relaxing effects and sweet berry aroma, while the latter, Haze, brings an energetic cerebral buzz to the mix. The fusion of these two strains begets a balanced hybrid that offers the best of both worlds, appealing to users seeking a moderate body high without sacrificing mental clarity.
A Flavor and Aroma that Captivates
Part of Blue Dream’s appeal undoubtedly stems from its tantalizing flavor profile. Upon consumption, users are greeted with a delightful mix of sweet berry and sugar notes, reminiscent of its Blueberry parentage. The aromatic profile is just as enchanting, with a fragrant herbal bouquet accented by fresh blueberries, captivating the senses even before the first inhale.
Versatile Effects for Diverse Use
Blue Dream’s balanced effects make it incredibly versatile, suitable for daytime use due to its uplifting and euphoric cerebral high, while its subtle body high can provide enough relaxation for the evening. This has made it a go-to strain for those dealing with stress, anxiety, and depression, as well as pain management. Its versatility also allows for creative pursuits, social activities, or simply unwinding after a long day.
A Staple for Both Medical and Recreational Users
Medical cannabis patients often turn to Blue Dream for its symptom relief without the lethargy associated with more indica-dominant strains. Its analgesic properties help soothe pain while the anti-anxiety effects can alleviate the worrying mind. Recreational users appreciate the gentle onset and stable high, making it less likely to induce anxiety or paranoia, a common deterrent for those sensitive to cannabis.
Robust Growth and Accessibility
The cultivation of Blue Dream is another factor contributing to its abundance and popularity. It is known for being relatively easy to grow and resistant to common pests and molds, making it a favorite among cultivators. Its high yield and short flowering time mean it can be produced efficiently, ensuring its widespread availability and consistent presence on dispensary shelves.
The Social Influence and Media Portrayal
Media portrayal and social influence also play a role in the notoriety of Blue Dream. Known as a West Coast darling, it is often featured in hip-hop lyrics and social media, heralded by celebrities and influencers alike. As with any product, such endorsements can bolster its status and desirability, cementing it further into the cultural zeitgeist.
The Constancy of Quality
Finally, the consistent quality of Blue Dream batches has helped solidify its place at the pinnacle of cannabis culture. Users can generally count on a reliable experience, as the strain’s popularity incentivizes producers to maintain high standards. In an industry where consumers often have to navigate a labyrinth of unpredictable effects and potencies, Blue Dream’s reliability is a comforting guarantee.
Conclusion: A Dream Strain for Many
With its perfect marriage of effects, flavor, and accessibility, Blue Dream has earned its place in the pantheon of cannabis strains. Whether a consumer is seeking therapeutic relief or simply chasing a lifted mood, Blue Dream meets a myriad of needs with grace and potency. The fervor for this strain is not just a fleeting trend; it reflects the appreciation of a plant that can bring joy, comfort, and creativity into the lives of many.


