hydroponics
Organic Vegetable Seeds: Your Ultimate Guide to Sustainable Gardening
Organic Vegetable Seeds: Your Ultimate Guide to Sustainable Gardening
Introduction to Organic Vegetable Seeds
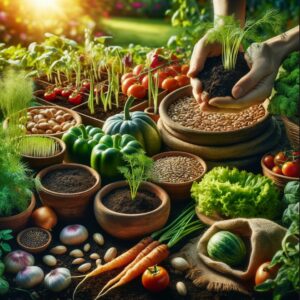
In the world of gardening, the choice of seeds is where the journey to cultivation begins. Organic vegetable seeds are not just a choice; they’re a statement of health, environmental consciousness, and sustainability. But what exactly are organic vegetable seeds, and why are they gaining such popularity among gardeners and farmers alike?
Organic vegetable seeds are produced without the use of synthetic pesticides, fertilizers, or genetically modified organisms. They are the cornerstone of organic gardening, ensuring that the food you grow is not only nutritious but also free of harmful chemicals. In this guide, we’ll explore the myriad benefits of using organic seeds, from their environmental impact to the health advantages they offer.
Choosing organic seeds is the first step toward a more sustainable and eco-friendly garden. Whether you’re a seasoned gardener or just starting, understanding the importance of these seeds is crucial for anyone looking to make a positive impact through their gardening practices. Join us as we delve into the world of organic vegetable seeds, providing you with the knowledge and tips you need to cultivate a thriving, sustainable garden.
Organic gardening is more than a hobby; it’s a commitment to fostering a healthier environment and lifestyle. At the heart of this practice lie organic vegetable seeds, the unsung heroes that set the foundation for sustainable agriculture. These seeds, devoid of synthetic chemicals and genetic modifications, offer gardeners the purest start to their gardening journey.
Why Choose Organic Seeds?
Choosing organic seeds is a vote for environmental health and biodiversity. These seeds are bred in organic settings, which enhances their ability to thrive without chemical assistance. This resilience translates to robust plants that can better resist pests and diseases, reducing the need for synthetic pesticides and fertilizers.
Genetic Diversity and Adaptation
Organic seeds often come from plants that have been grown in diverse and challenging environments. This exposure leads to the development of robust genetic traits, enabling the seeds to adapt to various conditions. By choosing organic, gardeners can cultivate a garden that’s not only productive but also resilient to climate fluctuations and local pests.
The Health Perspective
From a health standpoint, organic seeds are a cornerstone of a toxin-free diet. By starting with seeds that haven’t been treated with harmful chemicals, you ensure that the vegetables you grow and consume are as healthy as possible. This is especially crucial for those who grow food for young children or family members with health concerns.
Supporting Sustainable Practices
When you purchase organic vegetable seeds, you’re supporting a system that values soil health, biodiversity, and ecological balance. Organic farming practices are designed to maintain soil fertility and reduce pollution, ensuring that the land will remain arable and productive for future generations.
A Cost-Effective Choice
Investing in organic seeds can also be seen as a cost-effective gardening choice. Although the initial price might be slightly higher than conventional seeds, the long-term savings are significant. Organic plants are generally more vigorous and require fewer inputs in terms of pest and disease control, which can reduce gardening costs over time.
In the following sections, we’ll delve deeper into the benefits of using organic vegetable seeds, offer guidance on selecting the right seeds for your garden, and share expert tips on cultivating a bountiful and sustainable garden.
Benefits of Using Organic Seeds
How to Choose the Right Organic Vegetable Seeds
Selecting the right seeds is a critical step in the journey of organic gardening. Here are some key factors to consider when choosing organic vegetable seeds:
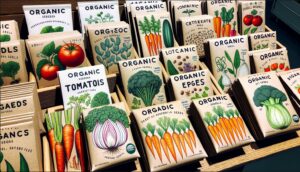
- Climate Compatibility: Not all seeds thrive in the same conditions. Consider your local climate, including temperature ranges and season length, when selecting seeds. Opt for varieties known to perform well in your region’s specific conditions.
- Seed Source: Purchase your seeds from reputable organic seed suppliers. Look for certifications to ensure the seeds are genuinely organic. Trusted suppliers often provide detailed information about the seed’s origin, growing conditions, and organic certification.
- Planting Goals: Define what you want from your garden. Are you focusing on yield, flavor, or perhaps diversity? Choose seeds that align with your goals. For instance, if space is limited, look for compact or dwarf varieties.
- Disease Resistance: Opt for seed varieties with built-in resistance to common pests and diseases in your area. This can lead to a more successful harvest with less need for intervention.
- Heirloom vs. Hybrid: Heirloom seeds are open-pollinated and have been passed down through generations, offering unique flavors and varieties. Hybrids are crossbred for specific traits like disease resistance or uniformity. Decide which type aligns with your gardening philosophy and goals.
- Germination Rate: Check the seed packet for the germination rate, which indicates the percentage of seeds expected to successfully sprout. Higher germination rates can lead to more successful plantings.
By carefully selecting your organic vegetable seeds, you set the stage for a garden that aligns with your environmental values, dietary preferences, and gardening ambitions. In the next section, we’ll explore innovative methods to start your seeds using LED lights and hydroponics, maximizing your garden’s potential from the very beginning.
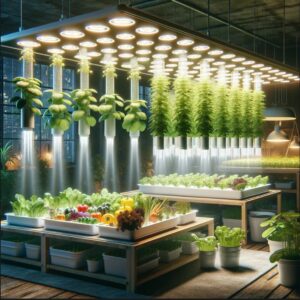
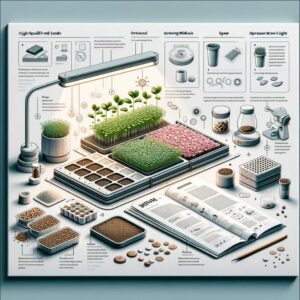
Starting Seeds Indoors: LED Lights and Hydroponics
Embarking on your organic gardening journey can be exciting, especially when you incorporate modern techniques like using LED lights and hydroponic systems. These methods can optimize your seed starting process, ensuring strong and healthy plant growth from the outset.
- Why Use LED Lights?: LED lights provide a consistent light source essential for seedlings, especially in regions with limited natural sunlight. They’re energy-efficient, emit less heat, and can be customized to provide the optimal light spectrum for plant growth, ensuring your seedlings develop strong roots and sturdy stems.
- Setting Up Your LED Grow Lights: Position your LED lights about 2-4 inches above the seed trays, adjusting the height as the plants grow. Ensure the lights are on for 14-16 hours a day to mimic natural sunlight. Using a timer can help maintain a consistent light cycle.
- Introduction to Hydroponics: Hydroponic systems allow you to grow plants in a water-based, nutrient-rich solution, without soil. This method can lead to faster growth rates and higher yields, making it an excellent option for organic vegetable seed starting.
- Hydroponic Seed Starting: Begin with a simple hydroponic setup like a deep water culture or a wick system. Use rockwool cubes or peat moss as a growing medium for your seeds. Once the seeds germinate and seedlings develop, ensure they receive the right nutrients by adding an organic hydroponic nutrient solution to the water.
- Advantages of Hydroponics: This soil-less growing method reduces the risk of soil-borne diseases and pests. It also allows for better control over the plant’s environment, ensuring optimal growth conditions. Additionally, hydroponics can be a space-saving solution, perfect for urban gardeners or those with limited outdoor space.
Combining LED lighting with hydroponic systems can revolutionize the way you start your organic vegetable seeds, leading to robust plant growth and a successful gardening season. In the next section, we’ll cover the best practices for planting and caring for your organic seeds, ensuring a fruitful harvest.
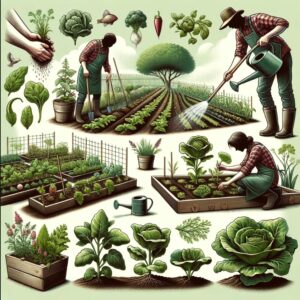
Planting and Caring for Your Organic Seeds
Properly planting and caring for your organic seeds is crucial for developing a thriving, productive garden. Here are some essential tips to guide you through this process:
- Soil Preparation: Start with rich, well-draining soil, ideally enhanced with organic compost. The soil should be loose and fertile to allow for proper root growth and water retention. Ensure the pH level is suitable for the vegetables you plan to grow.
- Seed Planting: Follow the planting instructions on the seed packet, as depth and spacing can vary significantly between different vegetable types. Generally, seeds should be planted at a depth of about two to three times their diameter.
- Watering: Keep the soil consistently moist but not waterlogged. Overwatering can lead to root rot and other issues, while under-watering can stress the plants, affecting their growth and yield.
- Temperature and Light: Ensure your garden or seed-starting area maintains an appropriate temperature for the seeds to germinate. Most vegetables require a warm environment to sprout. Once they emerge, provide ample sunlight or supplement with grow lights for strong, healthy growth.
- Thinning: Once the seedlings have a few true leaves, thin them out to prevent overcrowding. This ensures that the remaining plants have enough space, nutrients, and light to grow.
- Nutrition: Feed your plants with organic fertilizers, but be cautious not to over-fertilize. Too much fertilizer can harm your plants and the environment. Choose a balanced, slow-release organic fertilizer that provides essential nutrients throughout the growing season.
- Pest and Disease Management: Monitor your plants regularly for signs of pests or diseases. Use organic methods to control any issues, such as introducing beneficial insects, applying neem oil, or using homemade remedies.
- Support and Training: Some plants, like tomatoes and climbing beans, may require support as they grow. Use stakes, trellises, or cages to support these plants and promote healthy growth.
By providing the right care and attention, your organic vegetable seeds will develop into strong, healthy plants, yielding a bountiful and nutritious harvest. Embrace the journey of watching your seeds grow and enjoy the fruits (and vegetables) of your labor!
Beyond the Garden: The Broader Impact of Choosing Organic
Choosing organic vegetable seeds extends its benefits far beyond the boundaries of your garden. It’s a decision that positively impacts the environment, supports sustainable agriculture, and promotes a healthier lifestyle. Here’s how making this choice contributes to a larger good:
- Environmental Conservation: By choosing organic seeds, you’re supporting agricultural practices that reduce pollution and conserve water. Organic farming minimizes soil erosion and encourages biodiversity, helping to maintain healthy ecosystems.
- Promoting Biodiversity: Organic seeds often come from heirloom varieties, which helps preserve genetic diversity in the plant kingdom. This diversity is crucial for resilience to pests, diseases, and changing climate conditions.
- Supporting Local Economies: Purchasing organic seeds from local producers or companies committed to sustainable practices supports the local economy and promotes the organic agriculture industry, creating more opportunities for farmers to adopt eco-friendly practices.
- Health and Wellness: Growing your vegetables from organic seeds ensures that your food is free from synthetic chemicals and GMOs, contributing to better health and well-being for you, your family, and your community.
- Educational Value: Your organic garden can serve as a living classroom, educating others about the importance of sustainability and the impact of our choices on the environment. It’s a tangible way to demonstrate the principles of ecology and conservation.
By choosing organic vegetable seeds, you’re not just growing a garden; you’re nurturing a healthier planet and community. It’s a simple yet profound way to make a difference, one seed at a time.
Organic Vegetables: Step-by-Step Techniques for Thriving Gardens at Home
Organic Vegetables: Step-by-Step Techniques for Thriving Gardens at Home
In the quest for healthier living and sustainable practices, growing organic vegetables at home has gained considerable traction among gardening enthusiasts and eco-conscious individuals alike. Embracing organic gardening means nurturing your vegetables without relying on synthetic fertilizers or pesticides, fostering a natural environment that’s not only beneficial for your health but also kind to the planet. This guide, “Organic Vegetables: Step-by-Step Techniques for Thriving Gardens at Home,” is designed to walk you through the essentials of cultivating your organic vegetable garden, from the initial planning stages to the joyous moment of harvest.
Embarking on the journey of organic vegetable gardening offers a myriad of benefits, including access to fresh produce, the reduction of your carbon footprint, and the therapeutic joy of connecting with nature. Whether you have a spacious backyard or a modest balcony space, this guide will provide you with the knowledge and tools needed to start your organic gardening adventure. We’ll delve into the importance of choosing the right location, preparing the soil naturally, and selecting vegetable varieties that will thrive in your garden’s unique conditions. Additionally, we’ll explore innovative gardening techniques, such as utilizing LED grow lights for year-round cultivation and setting up a basic hydroponic system, to enhance your gardening experience.
By the end of this guide, you’ll be equipped with the step-by-step techniques essential for creating and maintaining a flourishing organic vegetable garden at home. So, let’s don our gardening gloves and embark on this green journey together, cultivating not just vegetables, but a lifestyle rooted in sustainability and well-being.
Understanding Organic Vegetable Gardening
Organic gardening goes beyond just avoiding synthetic chemicals; it’s about fostering an ecosystem that promotes natural growth and sustainability. At its core, organic vegetable gardening is about working in harmony with nature, creating a productive environment that benefits both the gardener and the ecosystem.
- The Principles of Organic Gardening: Organic gardening is grounded in the principle of nurturing plants in a way that maintains and enhances the soil’s natural health. It emphasizes the use of organic matter, such as compost, to enrich the soil, which in turn nourishes the plants. This approach ensures that the vegetables are grown in a toxin-free environment, yielding healthier and more flavorful produce.
- Benefits for Health and Environment: Growing vegetables organically eliminates the risk of consuming pesticide residues, offering a cleaner alternative for your diet. Moreover, this method reduces pollution and conserves water, contributing to a healthier environment. The absence of chemicals also encourages biodiversity, attracting beneficial insects and promoting a balanced ecosystem in your garden.
- Understanding Soil Health: Healthy soil is the foundation of a successful organic garden. Organic gardeners focus on building soil that is rich in organic matter and teeming with microbial life. This not only provides a robust environment for plants to thrive but also enhances the soil’s ability to retain water and nutrients, reducing the need for external inputs.
- Composting: One of the pillars of organic gardening is composting. This natural process recycles organic material into a rich soil amendment, providing a steady stream of nutrients for your plants. By composting kitchen scraps and yard waste, you not only enrich your soil but also reduce landfill waste, embodying the principles of sustainability and resourcefulness that are central to organic gardening.
- Choosing the Right Plants: Selecting the right plants is crucial in organic gardening. Opting for native or well-adapted plants can reduce the need for water and fertilizer and increase the garden’s resilience to pests and diseases. Understanding your climate, soil type, and local ecosystem can guide you in choosing plants that will thrive in your organic garden.
By embracing these principles, you’ll be well on your way to establishing a thriving organic vegetable garden at home. As you delve deeper into organic practices, you’ll discover the joys and rewards of growing your food in harmony with nature, reaping the benefits of your efforts in the form of fresh, nutritious produce right from your backyard.
Planning Your Organic Vegetable Garden
Embarking on your organic vegetable gardening journey requires thoughtful planning and a strategic approach. By carefully considering factors like location, soil, and plant selection, you can lay a solid foundation for a thriving garden. Here’s how to get started:
- Choosing the Right Location: The success of your garden starts with selecting the right spot. Most vegetables require at least 6-8 hours of direct sunlight per day. Observe your potential garden area throughout the day to identify the sunniest spots. Also, consider accessibility for watering and proximity to compost or tool storage for convenience.
- Soil Preparation: Organic gardening thrives on rich, fertile soil. Begin by testing your soil to understand its type and pH level, adjusting as necessary to meet the needs of your chosen vegetables. Enhance your soil with organic matter, such as compost or aged manure, to improve its structure, fertility, and water retention.
- Choosing Vegetables: Select vegetables that are suitable for your region’s climate and soil conditions. Consider starting with easy-to-grow options like lettuce, radishes, or tomatoes. Incorporate a mix of vegetables that you enjoy eating and that can be harvested at different times, ensuring a continuous supply throughout the growing season.
- Garden Layout: Plan your garden layout, keeping in mind the space requirements of each plant and their compatibility with each other. Utilize companion planting to naturally repel pests and enhance growth. Remember to provide adequate space between rows or plants for air circulation and ease of maintenance.
- Tools and Resources: Equip yourself with the necessary tools and resources for organic gardening. Basic tools include a spade, garden fork, hoe, and watering can. Consider investing in quality tools that will last and reduce unnecessary waste and consumption.
By meticulously planning your organic vegetable garden, you’re setting the stage for a rewarding and sustainable gardening experience. This preparation not only facilitates a smoother gardening process but also maximizes your garden’s productivity, ensuring a bountiful harvest of fresh, organic vegetables right from your home.
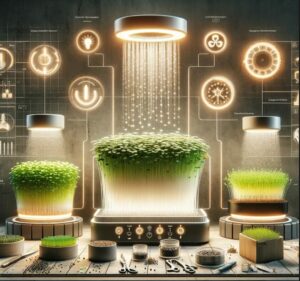
Innovative Growing Techniques: LED Grow Lights and Hydroponic Systems
In the realm of organic vegetable gardening, embracing innovative techniques can enhance your garden’s productivity and overcome common challenges. Two such advancements are LED grow lights and hydroponic systems, which offer unique benefits for indoor and small-space gardening.
- LED Grow Lights: LED grow lights have revolutionized indoor gardening by providing a reliable and energy-efficient light source. These lights emit a spectrum of light that mimics natural sunlight, essential for plant photosynthesis. They’re ideal for spaces lacking in natural light, allowing you to grow vegetables year-round, regardless of outdoor conditions. When selecting LED lights, consider factors like light intensity, spectrum, and coverage area to match your garden’s needs.
- Benefits of LED Grow Lights: Using LED lights can lead to faster plant growth, increased yields, and the ability to control the vegetative and flowering stages with specific light wavelengths. They’re also more energy-efficient and have a longer lifespan compared to traditional grow lights, making them a sustainable choice for the eco-conscious gardener.
- Hydroponic Systems: Hydroponics is a method of growing plants without soil, using a nutrient-rich water solution. This technique is perfect for organic gardeners with limited space, as it allows for higher density planting and can be set up indoors or in small outdoor areas. Hydroponic systems come in various types, such as deep water culture, ebb and flow, and nutrient film technique, each suitable for different plants and spaces.
- Benefits of Hydroponic Systems: Hydroponic gardening offers faster plant growth, efficient water usage, and reduced pest and disease risks. Since the plants receive nutrients directly from the water, they can allocate more energy to growth rather than developing extensive root systems to search for nutrients. Additionally, hydroponics allows for precise control over nutrient levels, pH, and other factors, leading to healthier and more productive plants.
- Combining LED Grow Lights with Hydroponics: Integrating LED grow lights with hydroponic systems can create an optimal environment for vegetable growth, especially in urban settings or during off-season periods. This combination maximizes space utilization and control over growing conditions, offering a sustainable and efficient way to produce organic vegetables year-round.
By incorporating these innovative techniques into your organic vegetable gardening practice, you can expand your gardening possibilities and enjoy fresh, home-grown vegetables regardless of space or seasonal limitations.
Planting and Maintaining Your Garden
Creating a thriving organic vegetable garden requires attentive planting and ongoing care. This section provides step-by-step guidance on planting your organic vegetables and maintaining your garden for optimal health and productivity.
- Planting Your Vegetables: Start by selecting high-quality, organic seeds or seedlings. When planting, consider the specific needs of each vegetable, such as spacing, depth, and orientation to the sun. Proper planting ensures your plants have the room they need to grow and receive adequate sunlight and air circulation.
- Watering Wisely: Regular and consistent watering is crucial for vegetable gardens, but overwatering can be just as harmful as under-watering. Use a watering can or drip irrigation system to deliver water directly to the base of the plants, reducing evaporation and minimizing leaf wetness that can lead to disease. Adjust your watering schedule based on rainfall, temperature, and the specific needs of your plants.
- Mulching: Applying organic mulch around your plants helps retain soil moisture, suppress weeds, and regulate soil temperature. Organic mulches, like straw or grass clippings, also break down over time, enriching the soil with organic matter.
- Monitoring Plant Health: Regularly inspect your plants for signs of stress, pests, or disease. Early detection is key to managing potential issues before they escalate. Healthy plants are better equipped to resist pests and diseases, so focus on providing optimal growing conditions.
- Succession Planting and Crop Rotation: To extend your harvest and maintain soil health, practice succession planting by staggering plantings of crops that mature quickly. Additionally, rotating crops each year can prevent soil depletion and reduce the buildup of pests and diseases associated with specific plant families.
By following these planting and maintenance tips, you’ll cultivate a garden that not only produces bountiful harvests but also contributes to the ecological balance of your outdoor space. Whether you’re a seasoned gardener or a green-thumbed novice, these practices will help ensure your organic vegetable garden is healthy, productive, and sustainable.

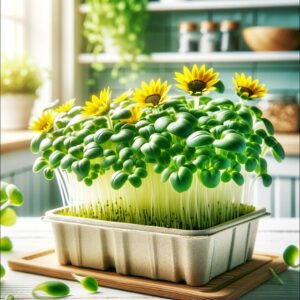
Sunflower Microgreens: A Nutrient Powerhouse in Your Kitchen
Sunflower Microgreens: A Nutrient Powerhouse in Your Kitchen
In recent years, microgreens have surged in popularity, not just among gourmet chefs and food enthusiasts but also in home kitchens across the globe. Among the myriad of microgreens available, sunflower microgreens stand out as a particularly nourishing and versatile option. These tiny greens, harvested just after the cotyledon leaves have developed, are packed with a dense concentration of nutrients, flavor, and texture.
Sunflower microgreens, derived from the sprouts of sunflower seeds, are more than just a garnish on your plate; they are a superfood that can significantly elevate your nutritional intake. They are easy to grow at home, requiring minimal space and care, making them a perfect addition to any kitchen garden. In this article, we’ll explore the multitude of health benefits these microgreens offer, provide a simple guide to growing them at home, share some exciting ways to incorporate them into your daily meals, and offer tips on how to store them to maximize their shelf life. Whether you’re a seasoned chef looking to add a fresh twist to your dishes or someone seeking to enhance your diet with more nutrient-rich foods, sunflower microgreens are a fantastic choice.
5 Top Microgreens Growing Kits Reviewed: Find Your Perfect Match
5 Top Microgreens Growing Kits Reviewed: Find Your Perfect Match
Introduction – Choosing The Best Microgreens Growing Kit
Have you ever wanted to grow your own nutritious greens but felt limited by space or gardening expertise? Microgreens are the perfect solution, offering a burst of nutrition and flavor from the comfort of your home. These tiny greens, harvested just after their first leaves develop, are packed with vitamins, minerals, and antioxidants, making them a powerhouse addition to any meal.
Growing microgreens at home is incredibly accessible, thanks to a variety of microgreens growing kits available on the market. These kits provide everything you need to start your mini indoor garden, regardless of your gardening experience. Whether you’re a seasoned green thumb or a complete novice, there’s a kit out there that’s perfect for you.
In this article, we’ll review the top 5 microgreens growing kits, helping you find the one that best fits your lifestyle and growing preferences. From compact designs for small spaces to kits that include a variety of seed options, we’ll guide you through the best choices to ensure your microgreen growing adventure is a success.
Introduction to Microgreens and Their Benefits
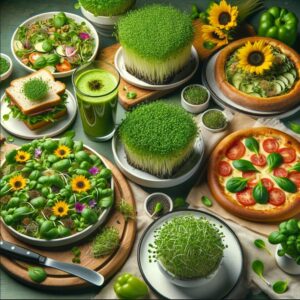
Microgreens, the young seedlings of vegetables and herbs, have emerged as a culinary favorite among health enthusiasts and gourmet chefs alike. These tiny greens are harvested shortly after the cotyledon leaves have developed, and sometimes after the first true leaves have appeared. Despite their small size, microgreens pack a nutritional punch, often containing higher vitamin, mineral, and antioxidant levels than the same plants at maturity.
Nutritional Powerhouses
Research indicates that microgreens can contain up to nine times the nutrients of their mature counterparts. They are rich in essential vitamins such as C, E, and K, minerals including potassium, iron, zinc, magnesium, and copper, and powerful antioxidants that help combat harmful free radicals in the body. Incorporating microgreens into your diet can boost heart health, reduce inflammation, improve digestion, and support a healthy immune system.
Versatility in the Kitchen
Beyond their nutritional benefits, microgreens offer a burst of flavor and color to a variety of dishes. Their delicate textures and distinctive tastes can enhance salads, sandwiches, soups, and even smoothies. Chefs and home cooks alike treasure microgreens for their ability to elevate a dish’s presentation and add a fresh, gourmet touch.
Sustainability and Accessibility
Growing microgreens is a sustainable and accessible venture. They require minimal space, water, and resources, making them an excellent option for urban dwellers or those with limited gardening space. Microgreens can be grown indoors year-round, providing a constant source of fresh produce right in your kitchen.
Economic Benefits
Cultivating your own microgreens can also be cost-effective. Purchasing microgreens can be expensive, but growing them at home significantly reduces costs, providing a fresh, nutrient-rich food source that is both affordable and convenient.
Educational Value
For families, growing microgreens can serve as an educational tool for children, teaching them about the plant life cycle, nutrition, and the importance of sustainable agriculture. It’s a fun, interactive way to introduce kids to gardening and healthy eating habits.
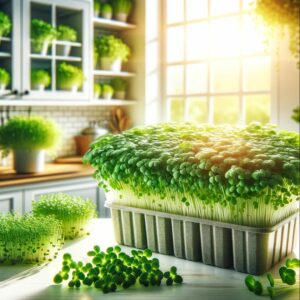
Key Features to Look for in a Microgreens Growing Kit
Choosing the right microgreens growing kit is essential for a successful and enjoyable growing experience. Here are the key features you should consider when selecting a kit:
1. Quality of Seeds: The variety and quality of seeds included in a growing kit are crucial for yielding a bountiful harvest. Look for kits that offer non-GMO, organic seeds to ensure you’re growing the healthiest microgreens possible. Additionally, diversity in seed types can provide a range of flavors and nutrients.
2. Growing Medium: Microgreens can be grown in various mediums, such as soil, coconut coir, or hydroponic mats. Each has its advantages and preferences. Some kits include a soil-based medium, which is excellent for beginners, while others might offer a soilless option, which can be cleaner and less messy.
3. Tray Design: The design of the growing tray impacts the ease of use and the success of your microgreens. Look for trays that allow for proper drainage and are the right depth for microgreens—usually around 1 to 2 inches. Trays should be sturdy and, ideally, reusable or made from sustainable materials.
4. Lighting Solutions: While some microgreens can grow in indirect light, others require more consistent lighting. If your home doesn’t get sufficient natural light, consider a kit that includes a grow light. LED grow lights are energy-efficient and can significantly boost your microgreens’ growth.
5. Ease of Use: Especially for beginners, the growing kit should come with clear, straightforward instructions. Additional resources, like online tutorials or customer support, can be invaluable for troubleshooting and getting the most out of your kit.
6. Size and Space: Consider the amount of space you have available for your microgreens. Kits come in various sizes, so choose one that fits comfortably in your space. Remember, you don’t need a lot of room to grow microgreens, making them perfect for small apartments or spaces.
7. Price and Value: Evaluate the cost of the kit in relation to its contents and quality. The cheapest option isn’t always the best value. Consider the longevity and reusability of the components. A slightly pricier kit of higher quality may be more economical in the long run.
Review of Top 5 Microgreens Growing Kit Types
In the flourishing market of home gardening, microgreens growing kits stand out for their ease of use and efficiency. Here, we review the top 5 microgreens growing kits, assessing their features, benefits, and potential drawbacks to help you find the perfect match for your green thumb.
1. The Compact Choice: Perfect for small spaces, Kit A includes organic seeds, a biodegradable growing tray, and a comprehensive guide to get you started. Its compact design is ideal for windowsills or small countertops.
- Pros: Space-saving, eco-friendly materials, includes a variety of seed options.
- Cons: No grow light included, limited to small batches.
2. The All-Inclusive Set: This kit is a one-stop solution, featuring a range of seeds, a high-quality grow light, and a self-watering tray, making it a breeze for beginners and experienced growers alike.
- Pros: Self-watering system, includes grow light, diverse seed selection.
- Cons: Pricier than other options, larger footprint.
3. The Eco Warrior: Focused on sustainability, Kit C offers organic seeds, a reusable hemp-fiber growing mat, and non-plastic trays. It’s designed for those who prioritize environmental impact without compromising on quality.
- Pros: Sustainable materials, reusable components, excellent for organic growing.
- Cons: No grow light, initial setup may be more involved.
4. The Versatile Performer: Kit D stands out for its adaptability, catering to both soil-based and hydroponic growing methods. It includes a range of seeds and a detailed manual, offering flexibility in your growing approach.
- Pros: Versatile growing options, great seed variety, user-friendly instructions.
- Cons: No grow light, trays are not as durable as some other options.
5. The Tech-Savvy Setup: For those who love technology, Kit E integrates smart features like app-based monitoring and automated lighting, providing a high-tech approach to growing microgreens.
- Pros: Advanced technology features, automated grow light, interactive app support.
- Cons: Higher price point, requires a compatible smartphone or tablet.
How to Get Started with Your Microgreens Growing Kit
Embarking on your microgreens growing journey is exciting and rewarding. Here’s a step-by-step guide to help you get started:
1. Unboxing Your Kit: Open your microgreens growing kit and familiarize yourself with the contents. Typically, you’ll find seeds, a growing medium, a tray, and instructions. Some kits may also include a grow light or additional tools.
2. Preparing the Growing Medium: Follow the instructions to prepare your growing medium. If it’s soil, moisten it before spreading it evenly in the tray. For soilless mediums, ensure they are properly hydrated and positioned in the tray.
3. Sowing the Seeds: Sprinkle the seeds evenly across the surface of the medium. Ensure they are spread out well to avoid overcrowding, which can lead to mold or poor growth.
4. First Watering: Gently water the seeds, ensuring the medium is moist but not waterlogged. Some kits come with a spray bottle to help you water evenly without dislodging the seeds.
5. Placing the Tray in Adequate Light: Position the tray in a location that receives ample light, whether it’s a sunny windowsill or under a grow light. Adequate light is crucial for the growth of your microgreens.
6. Daily Care: Check on your microgreens daily, ensuring the medium remains moist and adjusting the light as needed. Ventilation is also important, so make sure there’s adequate air circulation around the tray.
7. Harvesting: Most microgreens are ready to harvest in 2-3 weeks. Use clean scissors to snip them just above the soil line when they’ve reached the desired size.
8. Enjoying Your Microgreens: Rinse your harvested microgreens and enjoy them fresh in salads, sandwiches, or as a garnish for dishes. The flavor and nutrition they add are unparalleled!
Tips and Tricks for Successful Microgreens Growing
Growing microgreens can be a delightful and rewarding endeavor. Here are some expert tips and tricks to ensure your microgreens thrive:
1. Consistent Watering: Microgreens require consistent moisture to grow well, but overwatering can lead to mold or fungal issues. Use a spray bottle for gentle watering, keeping the soil moist but not soggy. Ensuring proper drainage is also crucial to avoid waterlogging.
2. Optimal Light Exposure: While microgreens can grow under indirect sunlight, they thrive best with ample direct light. If natural light is limited, consider using a grow light. Position the light close enough to the plants to prevent leggy growth but not so close that it causes heat stress.
3. Air Circulation: Good air circulation is essential for healthy microgreens. It helps to prevent mold and supports sturdy, upright growth. If you’re growing indoors, a small fan can improve air flow, reducing the risk of fungal diseases.
4. Harvesting at the Right Time: Timing is crucial when harvesting microgreens. Wait until they have developed their first true leaves, which usually happens around 2-3 weeks after germination. Harvesting too early can diminish flavor and nutrition, while waiting too long can lead to tough textures.
5. Experiment with Varieties: Don’t be afraid to experiment with different seed varieties. Each type of microgreen has its own unique flavor, texture, and nutritional profile. Exploring various options can enhance your culinary experience and offer diverse health benefits.
6. Reusing Your Kit: Many microgreens kits are designed for reuse. After harvesting your greens, clean the tray and start a new batch. This practice is not only eco-friendly but also allows you to continuously enjoy fresh microgreens.
7. Keeping a Growing Journal: Consider keeping a journal of your microgreens growing journey. Note the varieties you’ve planted, growth progress, and any observations or adjustments you’ve made. This record can be invaluable for refining your growing techniques over time.
Conclusion: Embrace the Joy of Growing Microgreens at Home
Embarking on the journey of growing microgreens at home is not just about cultivating plants; it’s about nurturing your well-being. Microgreens offer a unique blend of nutritional benefits, convenience, and the joy of gardening, all within the comfort of your home. Whether you’re a seasoned gardener or new to the world of homegrown greens, a microgreens growing kit can set you on a path to healthier eating habits and a deeper connection with your food.
Choosing the right kit is a step towards sustainability, offering fresh, nutrient-rich greens at your fingertips while reducing your carbon footprint. As you experiment with different seeds and kits, you’ll discover the varieties that resonate most with your taste and lifestyle, making each harvest a personal triumph.
Remember, the process of growing microgreens is as rewarding as the harvest itself. It’s an opportunity to slow down, engage with nature, and savor the simple pleasure of watching your greens sprout and thrive. So, embrace this green adventure with enthusiasm and let your microgreens growing kit be a gateway to a fresher, more sustainable way of living.
Grow Glasses Are They Necessary?
Are LED Grow Light Glasses Necessary for Hydroponics and Microgreens Cultivation?
In the realm of indoor gardening, where hydroponics and microgreens are becoming increasingly popular, the use of LED grow lights has become a staple for achieving optimal plant growth. However, as much as LED lights benefit plants, they pose a question of safety for the gardeners themselves. Specifically, the discussion around the necessity of LED grow light glasses has gained momentum. Are these specialized glasses a must-have accessory for those tending to their indoor gardens under the glow of LED lights? Let’s delve into this topic and shed some light on the importance of protecting your eyes in the vibrant world of indoor gardening.
Understanding the Spectrum of LED Grow Lights
LED grow lights are celebrated for their efficiency and effectiveness in providing a broad spectrum of light that mimics natural sunlight. This spectrum, while beneficial for plant growth, includes wavelengths of blue and ultraviolet light that can be harmful to human eyes over prolonged exposure. Just as we apply sunscreen to protect our skin from UV rays, taking precautions to safeguard our eyes from these intense light sources is equally important.
The Role of LED Grow Light Glasses
LED grow light glasses are designed specifically to filter out harmful rays, reducing the strain on your eyes and protecting them from potential damage. These glasses are engineered with lenses that can block or reduce exposure to UV and blue light, thereby minimizing the risk of eye discomfort, fatigue, or more serious conditions such as cataracts or macular degeneration. For hydroponic enthusiasts and microgreen growers who spend considerable time under the glow of LED lights, investing in a pair of grow light glasses can be a wise decision for long-term eye health.
Benefits Beyond Protection
Apart from the primary benefit of protection, LED grow light glasses offer additional advantages that enhance the indoor gardening experience:
- Improved Visual Clarity: By filtering out the harsh glare and adjusting the light spectrum, these glasses help improve visual clarity, making it easier to monitor plant health and spot potential issues early on.
- Color Correction: LED grow light glasses often come with color-correcting lenses that help neutralize the light’s color, allowing gardeners to see their plants in a more natural light. This feature is particularly useful in hydroponics and microgreen cultivation, where observing the true color of leaves and stems is crucial for assessing plant health.
Are They Necessary?
While not every indoor gardener may feel the immediate need for LED grow light glasses, the benefits they offer in terms of protection and enhanced visual experience make them a recommended accessory, especially for those frequently exposed to LED grow lights. Whether you’re tending to a large hydroponic setup or a small collection of microgreens, taking steps to protect your eyes is a prudent measure.
Making the Right Choice
When selecting LED grow light glasses, consider factors such as the specific wavelengths they filter, their comfort and fit, and the visual clarity they provide. With various options available on the market, finding a pair that suits your needs and preferences can significantly contribute to a more comfortable and safe indoor gardening experience.
Final Thoughts
As the use of LED grow lights continues to grow in popularity among hydroponics and microgreens enthusiasts, the importance of eye safety becomes increasingly apparent. LED grow light glasses represent a simple yet effective solution to protect your eyes from potential harm while enhancing your gardening experience. Remember, safeguarding your health is just as important as ensuring the health of your plants. Investing in a pair of quality LED grow light glasses is a small step that can make a big difference in your indoor gardening journey.
What’s Next?
For more tips and information on hydroponics, LED grow lights, and growing microgreens, visit [your website]. Join our community of indoor gardening enthusiasts and share your experiences with LED grow light glasses in the comments below. Let’s grow together, safely and successfully.
Grow Room Cost Calculator – How to Calculate the Energy Cost for Your Indoor Grow Setup
How to Calculate the Energy Cost for Your Indoor Grow Setup and Grow Lights
Creating an optimal environment for your indoor garden involves not just selecting the right plants and grow lights but also managing operational costs, particularly energy consumption. Understanding how to calculate the energy cost of your indoor grow setup, including grow lights, is essential for any gardener looking to optimize their garden’s efficiency and sustainability. This article provides a step-by-step guide to help you estimate the energy costs associated with your indoor garden, empowering you to make informed decisions about your setup and its impact on your electricity bill.
Step 1: Identify Your Grow Light’s Wattage
The first step in calculating the energy cost of your indoor grow setup is to identify the wattage of your grow lights. Wattage is a measure of electrical power and indicates how much energy your grow light consumes when it’s on. You can usually find this information on the grow light’s packaging, in the product description if purchased online, or directly on the light fixture itself.
Step 2: Calculate Daily Energy Consumption
Once you know the wattage of your grow lights, you can calculate their daily energy consumption. Multiply the wattage by the number of hours you keep the lights on each day. For example, if you have a 400-watt grow light that you run for 18 hours a day, the daily energy consumption would be:
400 watts * 18 hours = 7,200 watt-hours (or 7.2 kilowatt-hours, since 1 kilowatt = 1,000 watts)
Step 3: Determine Your Electricity Rate
Your electricity rate is how much you pay for each unit of electricity, typically measured in cents per kilowatt-hour (¢/kWh). This rate varies depending on your location and your utility provider. You can find this information on your electricity bill or by contacting your utility company.
Step 4: Calculate Monthly Energy Cost
To estimate the monthly energy cost of your grow lights, multiply the daily energy consumption (in kilowatt-hours) by the number of days in the month and then by your electricity rate. Continuing with the example above and assuming an electricity rate of 12 ¢/kWh:
7.2 kWh/day * 30 days * $0.12/kWh = $25.92
Therefore, running a 400-watt grow light for 18 hours a day at an electricity rate of 12 ¢/kWh would cost approximately $25.92 per month.
Step 5: Include Other Equipment
While grow lights are often the most significant contributors to energy consumption in an indoor garden, don’t forget to account for other equipment, such as fans, dehumidifiers, and water pumps. Repeat the steps above for each piece of equipment to calculate its energy cost, and then add all the costs together to get a comprehensive monthly energy cost for your entire grow setup.
Tips for Reducing Energy Costs
- Opt for Energy-Efficient Grow Lights: LED grow lights are more energy-efficient than traditional HID lamps, potentially offering significant savings on electricity costs.
- Use Timers: Automate your grow lights and other equipment with timers to ensure they run only when needed, avoiding unnecessary energy consumption.
- Monitor Environmental Conditions: Use thermostats and humidity controllers to optimize the operation of fans and dehumidifiers, reducing their running time.
Final Thoughts
Calculating the energy cost of your indoor grow setup is a vital step in managing your garden’s operational expenses. By understanding the energy consumption of your grow lights and other equipment, you can make informed decisions that balance your garden’s needs with cost-efficiency. Implementing energy-saving measures can further reduce costs, making your indoor gardening venture more sustainable and rewarding.
What’s Next?
Share your thoughts or questions about managing energy costs in your indoor garden in the comments below. For more gardening tips and tricks, visit www.420ledguide.com where you can access free reports and download a free LED Grow Light guide. Let’s grow smarter, together!
Hydroponic System 101 – Base Level Knowledge
What Is A Hydroponic System and How Does It Work?
Hydroponic systems are a method of growing plants without soil, using a nutrient-rich water solution instead. These systems, including hydroponic grow kits, can range from simple systems that use a floating raft to more complex ebb and flow hydroponic systems that use pumps and aerators to deliver nutrients to the plants. In a DWC hydroponic system, the plants are typically placed in a growing medium such as perlite or rockwool, and the hydroponic nutrient solution is delivered directly to the roots. This method allows for more precise control over the growing environment and can result in faster growth and higher yields.

What is hydroponics?
Hydroponics is a method of growing plants without soil. Instead, plants are grown in a nutrient-rich water solution, either directly in water or on an inert medium like coco coir or perlite. This grow system technique allows for precise control over the plant’s environment and hydroponic nutrient intake, resulting in faster growth and higher yields. Hydroponic systems can be used to grow a variety of crops, from leafy greens and herbs to fruiting plants like tomatoes and peppers. Additionally, this method of farming uses less water than traditional soil-based agriculture and can be done in non-traditional farming environments, such as urban areas or deserts. Hydroponic systems come in a variety of forms, including nutrient film technique (NFT), deep water culture (DWC), and aeroponics, among others. Each system has its own set of advantages and challenges, but all share the common benefit of providing plants with direct access to the nutrients they need for healthy growth.
One of the key advantages of hydroponic farming is its ability to produce higher yields in a smaller space compared to traditional soil-based agriculture. This is particularly beneficial in urban areas where space is limited, and in regions with poor soil quality or limited access to water.
Another benefit of hydroponic systems is the ability to closely monitor and control the plant’s root system’s environment, leading to more consistent crop quality and greater efficiency in resource use. By adjusting factors like nutrient concentration, pH levels, and light exposure, farmers can optimize plant growth and minimize the risk of pests and diseases.
Additionally, hydroponic farming is more environmentally friendly than traditional agriculture, as it uses less water and eliminates the need for chemical pesticides and fertilizers that can leach into the soil and water supply.
Overall, hydroponic farming offers a sustainable and efficient method of food production that has the potential to revolutionize the way we grow and consume crops in the future. With ongoing advancements in technology and increased awareness of the benefits of hydroponics, it is likely to play an increasingly prominent role in the agricultural industry.
How does hydroponics work?
Hydroponics is a method of growing plants without soil, using a water system and nutrient-rich solution as the growing medium instead. Plants are placed in a solution of water and nutrients, allowing them to absorb the necessary elements directly through their roots. The roots are usually supported by an inert growing medium such as perlite or rockwool to provide stability and aeration. The water and nutrient solution is continually circulated or replenished to ensure that the plants have a constant supply of what they need to grow. This method of hydroponic grow allows for precise control over the plants’ environment, leading to faster growth and higher yields. Hydroponics system also conserves water and space, making it a more sustainable and efficient way of growing crops.
What are the components of a hydroponic system?
A hydroponic system typically consists of several key components, including a reservoir to hold the nutrient solution, a water pump or air pump to deliver oxygen and nutrients to the plant roots, a delivery system to distribute the nutrient solution, a grow tray or container to support the plants, a growing medium such as rockwool or perlite to provide stability for the roots, and a light source to facilitate photosynthesis. Additionally, some hydroponic systems may also include a pH control system to regulate the acidity of the nutrient solution and ensure optimal plant growth.
Growing media
Growing media for the hydroponics growing system plays a crucial role in providing support and stability for plants while also promoting nutrient absorption. There are various options available for the hydroponics system, such as perlite, vermiculite, coconut coir, and rock wool, each with its own advantages and limitations. In the root system of hydroponic grow, Perlite is lightweight and provides good aeration, while vermiculite retains moisture well. Coconut coir is a renewable and environmentally friendly option that holds moisture and provides good structure. Rock wool is a popular choice in hydroponic grow systems due to its excellent water retention and pH stability. Ultimately, the choice of growing media for hydroponics, such as indoor hydroponics, depends on the specific needs of the plant’s root system and the preferences of the grower.
Air stones and air pumps
Air stones are essential for creating a healthy and well-oxygenated aquarium environment. These small devices work in conjunction with air pumps to create a steady stream of bubbles that help to aerate the water and provide crucial oxygen to fish and other aquatic life. Air stones come in various shapes and sizes, and they can be placed at the bottom of the tank or strategically positioned to create beautiful bubble displays. The air pump is responsible for pushing air through the tubing and into the air stone, so choosing the right pump is crucial for ensuring proper water circulation and oxygenation within the aquarium.
Net pots
Net pots are a popular choice for hydroponic gardening as they allow for optimal aeration and drainage for plant roots. These pots are typically made of plastic and have a grid-like design that allows water and nutrients to easily flow through, promoting healthy root growth. The open design also allows for roots to access more oxygen, which is crucial for their development. Net pots come in various sizes to accommodate different plant types and can be used in a variety of hydroponic systems, making them a versatile option for growers. Their durable and reusable nature also makes them a cost-effective choice for long-term use in different types of hydroponic systems.
What are the six types of hydroponic systems?
There are six main types of hydroponic systems, each with its own unique advantages and challenges. The first is the Wick System, which is the simplest and most basic type of hydroponic system. It uses a wick to deliver nutrient solution to the plant roots. The Water Culture System for a flow hydroponic setup suspends the plant roots directly in the nutrient solution, providing constant access to water and nutrients. The Ebb and Flow System, also known as the Flood and Drain system, floods the plant roots with nutrient solution at regular intervals, allowing the roots to dry out between feedings.
Another type is the Drip System, which delivers a slow and steady drip of nutrient solution directly to the plant roots. The Nutrient Film Technique (NFT) used in ebb and flow hydroponic involves a shallow stream of nutrient solution that flows over the plant’s root, providing them with a constant supply of water and nutrients. Lastly, the Aeroponic System suspends the plant roots in the air and mists them with nutrient solution, allowing for maximum oxygenation and nutrient absorption. Each of these flow hydroponic systems has its own set of advantages and challenges; the best type for a particular grower will depend on factors such as space, climate, and the kind of plants being grown under the grow light.
What is the best hydroponic system for indoor growing?
The best hydroponic system for indoor growing is often considered to be the Deep Water Culture (DWC) system. This indoor garden system involves suspending the plant’s root in a nutrient solution, allowing for maximum access to oxygen and water. The simplicity of the DWC system makes it ideal for beginners, as it requires minimal setup and maintenance. Additionally, the continuous circulation of nutrients promotes rapid plant growth and high yields. Overall, the DWC hydroponic system is highly efficient and effective for indoor hydroponic gardening.

How do you set up a hydroponic system?
Setting up a hydroponic system involves several key steps. First, choose a location with ample space, good ventilation, and access to water and electricity. Next, select the type of hydroponic system you want to use, such as a deep water culture system, nutrient film technique, or drip system. Once you have chosen a system, assemble the necessary materials, including a reservoir, growing trays, a pump, and a nutrient solution. Then, set up the reservoir of your NFT system and connect it to the pump, which will deliver the hydroponic nutrient solution to the plants. Place the growing trays of your hydroponics growing system on top of the reservoir and ensure they are properly supported. Add the growing medium, such as perlite or coconut coir, to the trays and plant your chosen crops. Finally, adjust the settings on the pump and monitor the system to ensure the plants receive adequate nutrients and oxygen. With proper maintenance and monitoring, your hydroponic system can provide a productive and efficient way to grow plants without soil.
What are the pros and cons of hydroponics?
Hydroponics, such as ebb and flow hydroponic, offers several advantages over traditional soil-based farming in an indoor garden system. One of the main pros is that it allows for higher yields in a smaller space, making it ideal for urban environments where land is limited. Hydroponic systems also use less water than traditional farming methods, as the water is recirculated and not lost through runoff or evaporation. Additionally, hydroponic plants tend to grow faster and can be harvested year-round, leading to increased production. Another advantage is the ability to control the nutrient levels and pH balance of the growing environment, leading to healthier and more consistent plant growth. However, there are also some drawbacks to hydroponics. The initial setup and investment in indoor garden systems, including hydroponic grow kits, can be higher than traditional farming methods and involves a learning curve for system perfection. Furthermore, if there are any issues with the water system or nutrient delivery, it could significantly affect the plant’s root system. Overall, while hydroponics offers many benefits, it also requires a level of expertise and investment that may not be feasible for all farmers.
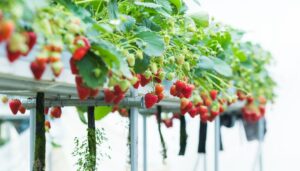
Hydroponic Strawberries – Grow Amazing Strawberries At Home
DIY: How to Grow Hydroponic Strawberries in Your Home Garden
The Basics of Hydroponic Strawberries: What You Need to Know
Hydroponic strawberries are grown without soil, using a nutrient-rich water solution instead. This innovative technique allows for year-round cultivating and results in larger, often sweeter, strawberries. Essential elements to start include hydroponic systems, nutrient solutions, proper lighting, temperature control, and of course, strawberry plants. Good aeration is vital to prevent root diseases. Regular monitoring of pH levels in the water ensures the plants receive all necessary nutrients. Hydroponic strawberries require constant attention and care, but the fruits of your labor can be significantly rewarding. Several options exist on the market that will provide you a quality hydroponic strawberry planter system.

Strawberries Variety: Which Is Best for Hydroponic System?
The best variety of strawberries for a hydroponic system is typically the day-neutral type, such as the ‘Everbearing’ variety. This type of strawberry produces a consistent yield all year round, making it very suitable for hydroponic cultivation. The ‘Everbearing’ strawberry is a durable plant that is highly resistant to diseases, enhancing its viability in a water-based environment. Its yield is characterized by medium to large-sized berries with an intensely sweet taste. Therefore, for a successful hydroponic cultivation of strawberries, the ‘Everbearing’ variety is highly recommended.
What Do You Need to Grow Hydroponic Strawberries?
Growing hydroponic strawberries requires some specific conditions and materials for optimal results. Firstly, you will need a hydroponic system. The most suitable options for strawberries are the Nutrient Film Technique (NFT) system, drip system, or the ebb and flow system. Secondly, you will need a well-balanced, water-soluble nutrient solution. This solution will substitute for the nutrients usually gained from soil and must contain essential macro and microelements like nitrogen, phosphorous, potassium, magnesium, iron, and calcium. Grow lights will be required if you are growing your strawberries indoors or in a place without sufficient natural light. Acceptable temperature and humidity levels are also important, ideally 60-80 degrees Fahrenheit and a relative humidity of 50-70%. Lastly, proper pH levels must be maintained; strawberries do best with a pH of 5.8 to 6.2. Regular monitoring and adjustments will also be essential for successful strawberry growth.
Benefits of Growing Strawberries Hydroponically
Growing strawberries hydroponically, which means cultivating them in water instead of soil, presents numerous benefits over traditional gardening methods. Firstly, hydroponics is a space-effective method for those who want to grow plants, permitting a higher yield per square meter since hydroponic plants can be grown close to each other. Another advantage is the significant reduction in pests and diseases, as the soilless medium eliminates the majority of soil-borne issues. Hydroponically grown strawberries also generally claim a faster growth rate due to the development of smaller root systems, which lead to quicker nutrient absorption and thus, hastens the fruiting process. The hydroponic culturing technique allows for precise control of nutrient delivery to the plants, leading to healthier, larger, and juicier fruit outputs. Additionally, year-round cultivation is achievable as growing is not reliant on seasonal changes. These aspects not only make this method ideal for home gardeners aiming for consistent and efficient cultivation but also offer significant potential for commercial growth.
Setting Up Your Hydroponic System for Strawberries
Setting up a hydroponic system for strawberries involves initial planning and appropriate materials. Clear a space for a hydroponic strawberry planter, ensuring it receives adequate sunlight. Purchase a system kit from a reputable supplier, ideally suited for strawberries. You’ll need nutrient solutions, grow lights and an air pump. Strawberries need a lower pH, ideally between 5.5 and 6.2. Once the system is fully set up, regularly monitor pH levels, nutrient application, temperature, and overall plant health.
Choosing The Best Hydroponic System for Strawberries
Choosing the best hydroponic system for strawberries largely depends on your individual needs and available space. Strawberries thrive in various hydroponic systems, including the NFT (Nutrient Film Technique), DWC (Deep Water Culture), and the Ebb and Flow system. While the NFT system ensures fresh nutrients supply constantly, DWC allows plants to absorb nutrients directly from the water. Conversely, the Ebb and Flow system mimics natural rain conditions. Factors such as available budget, ease of maintenance, space availability, and personal preference should guide your decision-making process. Always remember to maintain pH levels, temperature, and light for robust strawberry growth.
The Importance of Grow Lighting in Hydroponic Growing
Grow lighting plays an indispensable role in hydroponic farming, a cutting-edge agricultural technique. Since Hydroponics substitutes soil with a nutrient-rich water solution, the role of sunlight, crucial for photosynthesis, is taken up by grow lights. These artificial sources of light mimic the solar spectrum, providing the necessary illumination for plant growth. The intensity and spectrum of grow lights can be adjusted to suit different plant species, thereby promoting maximum growth and yield. Hence, grow lighting is vital in hydroponics as it creates an optimal environment for plants to thrive, making year-round cultivation and high crop productivity possible.
How To Set Up Your Hydroponic Garden
Setting up a hydroponic garden may sound complex, but the process is relatively straightforward once you understand the basics. Start by choosing a suitable location for your garden; this could be anywhere from your basement, your garage, or even on your rooftop. The location should have a controlled temperature and access to ample sunlight or artificial light. Next, choose the type of hydroponic system best for your needs; popular options include deep water culture, wick, nutrient film technique, and ebb and flow systems. After determining your system, you need to choose suitable plants for hydroponic cultivation. Lettuce, cucumbers, and tomatoes are often good choices for beginners. Purchase a specialized hydroponic nutrient solution for the plants, as standard soil fertilizers won’t work in this type of setup. The last step is to monitor the pH level of your solution regularly. Ideal pH values will change depending on the type of plant, but usually fall between 5.5 and 6.5.
Generating the Correct Hydroponic Nutrient Solution
Generating the correct hydroponic nutrient solution is key to the success of any hydroponic garden. This process involves precise mixing of water with the right quantity of essential minerals such as nitrogen, calcium, magnesium, phosphorous, potassium, sulfur and trace elements. These nutrients, typically absent in normal soil, are crucial for plant growth and development. It is important to consider the specific nutritional needs of different plants and tailor the solution accordingly. Ensuring the correct pH level, typically between 5.5 to 6.5, is also essential as it affects nutrient availability. Failure to generate the correct hydroponic nutrient solution can result in poor plant health and decreased productivity.
The Right Growing Media for Hydroponic Strawberries
Choosing the right growing media for hydroponic strawberries is vital for a successful crop. Strawberries prefer a well-draining medium, making perlite, coco coir, and rockwool popular choices among hydroponic growers. Perlite is lightweight and facilitates good aeration, while coco coir retains moisture, ensuring consistent hydration. Rockwool, on the other hand, provides excellent water and nutrient retention. Whichever medium is chosen, it’s essential that it supports the plant’s root system, provides adequate aeration, and allows for optimal nutrient uptake.
Planting And Growing Hydroponic Strawberries
Hydroponic strawberries are grown in a nutrient-rich solution, instead of soil, allowing for year-round cultivation in a controlled environment. The method utilizes a water-based system enriched with essential minerals that directly feed the plants’ roots, promoting faster growth and higher yields. Strawberries grown hydroponically are often of superior quality, being sweeter and larger. It’s also a more sustainable farming practice as it requires less water, space, and reduces the risk of disease and pests. With a hydroponic drip system, careful monitoring of the pH and nutrient levels is a crucial way to ensure optimal growth.
Transplanting Your Strawberry Plants into the Hydroponic System
Transplanting your strawberry plants into a hydroponic system can be a great way to boost their growth and yield. Start by carefully uprooting the strawberries from their original soil bed, ensuring their roots are kept intact as much as possible. Rinse the soil off the roots under a gentle stream of lukewarm water, taking care not to damage the roots. Once the roots are clean, place the strawberry plant into its new hydroponic container. Each plant should be given enough space with sufficient lighting to grow without hindrance. Add your nutrient solution, ensuring it reaches the root system of every plant adequately. Periodically check the pH levels of the solution to maintain an optimum balance. With the right setup and proper care, transplanting strawberries into a hydroponic system can result in healthier and bountiful crops in a cleaner, space-saving environment.
Growing Hydroponically: Care and Maintenance for Strawberries
Hydroponic strawberry growing involves cultivating strawberries in water-rich solutions instead of soil, which aid in nutrient uptake. Perfect care and maintenance for hydroponic strawberries involves maintaining steady pH levels, between 5.8 to 6.2, for the smooth flow of nutrients. Regular addition of balanced nutrients, in precise amounts, is also crucial for optimal growth. Air and water temperatures should be regulated within 65-75°F and 65-68°F respectively, while ensuring ample exposure to light for adequate photosynthesis. Cleaning the system periodically prevents disease prevalence. While maintaining hydroponic systems indeed require diligence, the result is bountiful, healthy strawberries, subtly sweet and wholly rewarding.
Understanding the Needs of Hydroponically Grown Strawberries
Understanding the needs of hydroponically grown strawberries is essential for optimal growth and yield. Through this method, strawberries are grown without soil, instead they receive nutrients directly from water. The primary needs include maintaining appropriate levels of pH, electrical conductivity, oxygen, nutrients, and light. It’s important to monitor and adjust these parameters regularly to prevent deficiencies that affect growth. Moreover, factors like temperature, humidity, and pests must be managed properly. A good understanding of these needs is key for successful hydroponic strawberry farming.
Indoor Growing: Ensuring Good Growth and Harvest Year-Round
Indoor growing, also known as urban farming or indoor gardening, has risen in popularity, especially among people living in urban areas with limited outdoor space. By growing crops inside, whether in a small apartment, suburban home, or an indoor commercial facility, you can ensure good growth and harvest year-round regardless of the outdoor weather conditions. This constant cultivation does not merely produce fresh, healthy, homegrown vegetables, fruits, and herbs throughout the year; it also enables you to control the growing environment fully, allowing for meticulous monitoring of lighting, temperature, and moisture levels. This optimal environment, paired with the absence of common outdoor pests and diseases, often results in higher yields and faster growth than traditional outdoor farming. Hydroponics, aeroponics, and aquaponics are some of the techniques utilized for indoor growing, further maximizing space and reducing the use of soil, making indoor cultivation an eco-friendly and sustainable option. By embracing indoor growing, you can ensure constant access to fresh, organic, and pesticide-free produce, significantly reducing the dependence on seasonality or imported goods. Thus, indoor growing enables a good growth and ensures harvest all year round, stepping towards food security and sustainability.
Troubleshooting Issues in Your Hydroponic Strawberry Garden
Drawbacks of Growing Strawberries Hydroponically
Despite the advantages, growing strawberries hydroponically also has its drawbacks. The initial setup of the hydroponic system can be expensive and requires a learning curve to maintain optimal conditions. Additionally, the plants are at a higher risk of disease due to the water-centric environment, and poor water quality could quickly harm or even kill the strawberries. Also, hydroponically grown strawberries may not have the same natural taste as those grown in soil.
How to Spot Nutrient Deficiencies in Hydroponic Strawberries
To spot nutrient deficiencies in hydroponic strawberries, carefully observe the color, size, and general health of the plant. Yellowing leaves may indicate iron deficiency, while stunted growth can signal a lack of nitrogen. Irregular or slow fruit development could be due to insufficient phosphorus. Brown leaf edges could signify potassium deficiency. Conducting regular checks on led grow lights and adjusting nutrient mixes in your grow tray can prevent deficiencies, ensuring successful growth of your hydroponic strawberries.
How to Pollinate Your Strawberries in an Indoor Growing Setting
Indoor strawberry cultivation enables the control of environmental elements, which is often beneficial. However, one important factor that must be addressed is pollination, as bees, wind, or other natural pollinators may not be accessible indoors. Strawberries are self-fertile, meaning they don’t require pollination from other plants, however, some assistance will enhance the yield. You may manually pollinate indoor strawberries by using a small, soft-bristled brush or a cotton-swab. Gently dab the brush or cotton-swab into each flower, touching each stamen and pistil delicately to mimic the role of a bee or the wind. This process allows the pollen to transfer from the stamen to the pistil, necessary for fruit development. The procedure must be repeated every couple of days during the flowering period. Remember, even though manual pollination may seem tedious, it reveals a rewarding, bountiful harvest of indoor-grown, sweet strawberries.
Strawberry Diseases and Pests: Prevention and Treatment
Strawberry plants are susceptible to several diseases and pests, notably fungi like verticillium wilt, powdery mildew, and root rot, along with pests such as spider mites, slugs, and strawberry bud weevils. Prevention techniques include proper spacing and rotation of plants to avoid build-up of disease organisms, using disease-resistant varieties, and maintaining a clean and weed-free garden to deter pests. Utilize organic mulch to retain soil moisture and suppress weed growth, hence lowering the risk of pests and diseases. Regular inspection of plants for signs of disease or pest activity is critical to early detection and curative measures. Treatment methods for diseases usually involve the use of fungicides, while controlling pests in hydroponic strawberry plants frequently requires the use of pesticides in the hydroponic drip system. However, apply these chemicals responsibly and in line with approved protocols to safeguard beneficial pollinators and the overall ecological balance. In serious cases, consider professional pest control services for effective treatment.
Harvesting and Enjoying Your Hydroponic Strawberries
When and How to Harvest Strawberries in a Hydroponic System
Strawberries grown in a hydroponic system often produce fruit faster compared to traditional soil gardening, allowing for harvesting generally 4-6 weeks after planting. The key to when you should pick your hydroponic strawberries is the color. To ensure the best taste, strawberries should be harvested when at least three-fourths of the berry is red. The most desirable time to pluck them is usually in the early morning when the temperature is low.
For how to harvest, it is best to hold the stem between your thumb and forefinger, then gently twist and pull the fruit. Ensure you leave a small portion of the stem on each fruit to prevent any damage or bruising. Any remaining flowers or green strawberries should be left on the plant to allowed continued growth. It should be noted that ripe strawberries do not shelf well so plan your harvest when you are ready to consume them. Consequently, harvesting strawberries from a hydroponic system can yield sweeter and more flavorful fruit, given they are plucked at the right color and time.
Do Hydroponic Strawberries Taste Different?
Growing strawberries hydroponically changes the taste profile compared to traditional soil-grown strawberries, often resulting in a more rich and intense flavor. Hydroponics can control the nutrients, water, and light each plant receives, resulting in strawberries that are larger and more delicious. However, some people argue that hydroponic strawberries might lack the subtle earthy flavor natural to soil-grown strawberries, making their taste slightly different. A well-cared-for hydroponic grow tray system with led grow lights also allows for growth year-round, which can influence the flavor as the hydroponic strawberries do not undergo seasonal changes. Consequently, while hydroponic strawberries are consistent, their taste can differ from their soil-grown counterparts.
The Impact of Growing Strawberries Hydroponically on Their Nutritional Value
The method of cultivating strawberries hydroponically, which involves growing plants without soil and instead using mineral nutrient solutions in a water solvent, has shown to be influential in the nutritional value of the fruit. Hydroponic cultivation can result in strawberries enriched with higher quantities of Vitamin C and antioxidants. This enhancement is due to the controlled environment in which hydroponically grown strawberries exist, allowing for optimal nutrient absorption. The absence of soil eliminates the chances for soil-borne pathogens, thereby decreasing the use of pesticides and increasing the overall fruit’s safety for consumption. Furthermore, the ability to modify the nutrient solution in a hydroponic drip system provides a means to enhance the plant’s nutrient uptake, positively affecting the nutritional profile of the strawberries you want to grow. Thus, hydroponics offers a promising pathway for the production of nutritionally enhanced strawberries.
3×3 Grow Tent – Optimizing Autoflower Yield with Cannabis Plants
How to Grow Cannabis in a 3×3 Grow Tent?
Growing cannabis in a 3×3 grow tent requires a few key steps. Firstly, for your grow space, ensure adequate lighting, as cannabis needs lots of light to grow, ideally around 500-600W per plant. Secondly, maintain temperature and humidity, with ideal conditions being 70-85°F and 40-70% humidity. Controlling ventilation is also important as fresh air promotes better yields. Lastly, choose the proper strain for your tent size; in a 3×3 tent, you can grow about 1-4 plants depending on the strain. Remember to monitor your grow tent regularly to ensure optimal conditions for your autoflowering cannabis plants and promote overall plant health.

Mars Hydro FC-E 3000 3×3 Grow Tent Kit – CHECK PRICE HERE
Optimizing Your 3×3 Tent for Maximum Yield
Optimizing your 3×3 tent for maximum yield involves several factors including the right lighting, proper nutrition, and ideal planting techniques. For lighting, a 600W MH/HPS grow light is recommended for a 3×3 space. This results in not only better photosynthesis, but also more intense flavor and denser buds. Implement a feeding regimen for your autoflowering cannabis that includes nutrients rich in nitrogen, phosphorus, and potassium while also maintaining optimal pH levels in your indoor grow. During the growth phase in your grow room, practice low-stress training (LST) techniques such as topping to promote higher yields. By carefully manipulating your plants, you allow even light distribution and increase their exposure to carbon dioxide. With these indoor grow measures, your autoflowering cannabis crop can thrive in the gorilla grow tent, ensuring a significant increase in yield.
Monitoring temperature and humidity levels is also crucial. Optimal temperatures range between 70-85 degrees Fahrenheit during the day and 20 degrees cooler at night. Maintain relative humidity levels between 40-60% during the growth phase, and lower this down to about 40% during the flowering stage.
Seed selection also plays an essential role in your yield. Choose seeds from breeders known for quality, and consider the space you have to work with. Some strains of autoflowering cannabis are great for maximizing small spaces, so choose accordingly, making sure they are able to fit in your indoor grow space.
Proper timing of the harvest is crucial as well. The ideal time to harvest is when 60-70% of the pistils have darkened. This not only helps ensure the highest yield but also contributes to the overall potency of the buds.
Control pests effectively to ensure they don’t affect your yield. Predatory insects, organic sprays, and cleanliness can help control pests in your indoor tent.
Having a CO2 system can also increase your yield significantly. Plants breathe CO2 and produce oxygen, so a high level of CO2 can result in faster-growing plants and enlarged buds.
Lastly, remember every aspect/supply for growing, such as adequate watering, right soil, and good air circulation plays its role in maximizing the yield.
Therefore, simply follow these best growing practices to improve your cannabis yield in a 3×3 grow tent. These methods take time, effort, and patience, but the end result will be worth it.
What Determines Plant Size In Nature?
The size of a plant in nature is determined by a complex interplay of both environmental and genetic factors. Environmental conditions such as the quality of soil, availability of water, exposure to sunlight, climatic factors like temperature and humidity, and competition for resources with other plants significantly influence plant growth. For instance, nutrient-rich soils and sufficient water supply generally correspond with larger plant sizes. Similarly, genetic factors inherent to the plant species also play a role in determining size, as they dictate the plant’s growth potential. Therefore, both the plant’s genetic makeup and its environment largely determine its size in nature.
What Determines Plant Size Indoors?
Multiple factors contribute to the size of indoor plants. Paramount among them for many plants to grow is the size of the pot per plant. The larger the pot in the grow space, the more room the roots have to expand and hence, the more autoflowers the plant can produce. Apart from this, the variety or species of the autoflowering cannabis plant also determines its size in your indoor grow space. Some autoflowering cannabis plants are naturally predisposed to grow larger than others, but remember that in an indoor grow they need to be able to fit within your space. In a grow room, other factors include the amount of light, water, and nutrients each plant receives, especially when growing many plants. Ideal growing conditions can enhance the plant’s growth, but poor conditions can inhibit it. Therefore, understanding and providing the proper care is essential in determining the size of indoor plants.
Moreover, training and pruning techniques also play an important role in controlling the size of the indoor plants. These methods help shape the plant’s growth pattern, making them more manageable and render efficient use of space and light.
The presence of pests and diseases can also affect the size of the plant. Unchecked pests and diseases can stunt the growth, causing the plant to halt its development or even die. Thus, regular inspection and treatment are necessary to ensure a healthy growth.
Temperature and humidity levels within the grow room are other crucial factors that can impact plant size. Different plants have diverse temperature and moisture needs; if these requirements are not met, it can lead to slow growth or dwarfing. Also, ignoring the pH level of the soil or hydroponic solution can also adversely affect plant growth due to nutrient lockout issues.
Lastly, the genetics of the plant drastically influence the maximum size. Just like humans, each strain of plant has its own set of genetics which determines its potential growth. Thus, even in ideal conditions, a plant can only grow as big as its genetics will allow.
With all these factors in play, growing indoor plants is quite a balancing act. Careful management of all these variables will help in achieving the maximum growth potential of your indoor plants.
Genetics Factors in Cannabis Plants
Genetic factors play a crucial role in the overall growth, potency, and adaptability of autoflowering cannabis plants in different light spectrums found in the gorilla grow tent. The inherent genetic constitution of a cannabis plant determines many aspects, such as the concentration of cannabinoids like THC and CBD, which dictate the psychoactive effects. Additionally, the plant’s genetics also influence its size, yield, and resistance to pests and diseases. Breeding and crossbreeding of strains can manipulate these traits, allowing growers to enhance specific characteristics that align with their needs. Ultimately, a profound understanding of the genetics of autoflowering cannabis plants is vital for effective cultivation in your indoor grow and consistent product quality.
Pot Size Considerations
When choosing pots for many plants to grow, consider the size of the pot per plant. The pot size plays a vital role in determining the growth rate and overall health of the 5 plants you want to grow per square meter, especially when utilizing the sea of green technique in your gorilla grow tent. If the pot is too small, the roots of the auto-flowering cannabis plants you want to grow may become overcrowded, leading to stunted growth. However, a pot that is too large can retain excess moisture, which can cause root rot. Therefore, it’s crucial to select a pot that is appropriate for the specific plant you’re planning to grow. Also, one should consider the growth rate and maturity size of the plant when planning on how many plants per square foot to grow. For optimal growth, a pot should provide ample space for root development without being overly spacious.
Use the Right Lighting Panels
Using the right lighting panels is paramount for creating an optimal lighting environment in various settings such as offices, homes, hospitals, and schools. Lighting panels in a grow room are not just about illuminating space but providing a suitable and comfortable environment for every possible activity, including the sea of green technique. They are classified into different types, including LED flat panels, troffers, and edge-lite, each of which possesses distinct unique features. It’s important to choose the lighting panel with an apt light spectrum that best fits your gorilla grow tent’s requirements and personal preferences. For instance, LED flat panels offer energy efficiency and longevity, while edge-lite panels are ideal for installation in areas with limited space. The proper selection of lighting panels with the correct light spectrum will contribute to improved visual comfort and better energy consumption in your indoor grow space. Finally, while making your choice, consider factors like panel size, power rating, color temperature, and installation methods to ensure you get the most from your lighting panel.
Ensure Proper Ventilation
Ensuring proper ventilation is a crucial aspect when it comes to maintaining a healthy environment for autoflowers in a grow room. Adequate ventilation not only enhances the overall air quality by reducing pollutants and improving its freshness, but also prevents the build-up of harmful elements like mold or mildew which can adversely impact health. It implies the expulsion of stale air from your indoor grow space, and the replenishment with fresh, clean air from outside, enhancing your autoflowering cannabis plants’ health. This can be achieved in your grow space by employing methods such as the use of exhaust fans, air vents and allowing fresh air to circulate through open windows or doors. It is of utmost importance in areas where chemicals are used or where people spend a significant amount of time, such as workspaces, kitchens or bathrooms. Therefore, an appropriate ventilation system is a fundamental component to securing the well-being of people in any indoor setting.
Use the Right Growing Technique
Choosing the right growing technique for your autoflowering cannabis plants is critical to the success of your indoor grow garden or farm. The number of plants you choose can make the difference between a bountiful harvest and disappointing growth. The right method can maximize productivity, reduce plant disease, conserve water, and optimize nutrient use. Techniques such as crop rotation, organic farming, or hydroponics are all beneficial, depending on your specific needs. Crop rotation, for example, helps deliver various nutrients to the soil, while organic farming promotes biodiversity through the use of natural, non-toxic methods. Hydroponics, on the other hand, facilitates growth in small grow spaces and reduces water usage per plant. Each of these techniques serves a unique purpose and should be chosen based on the type of garden, climate, soil, and available resources. Hence, understanding and implementing the right growing technique is a significant determinant of your garden’s health and productivity.
Summary: How to Grow Cannabis in a 3×3 Grow Tent?
Growing cannabis in a 3×3 grow tent involves several crucial steps that need to be meticulously adhered to to achieve high-quality results. The first step is choosing the right strain of cannabis, based on personal preferences and specifications of growth. The chosen seeds should be germinated for 24-48 hours before being transplanted into small pots filled with fertile soil. Your grow tent should be equipped with high-quality LED grow lights, an exhaust fan for proper ventilation, and a temperature & humidity monitor. To ensure their health per plant, you’ll need to water your cannabis plants regularly while maintaining correct pH levels in the water nutrient solution. Pruning and trimming the plants contribute to an efficient growth system, as does rotating the pots, ensuring each plant receives adequate light exposure. Temperature, humidity, and light duration should be regulated carefully to avoid inducing stress on the plants. It typically takes around 8-10 weeks for the autoflowers to mature enough for harvesting. With the correct balance of all elements, your small gorilla grow tent can produce a hearty yield of fast buds from the autoflowering cannabis plants.
Coco Coir Substrate: Why plants like it
The Ultimate Guide to Growing in Coco Coir
Coconut Coir for Your Garden Coco coir, also known as coconut coir, is an excellent growing medium for gardens. It’s natural, sustainable, and easy to work with, making it a popular choice for both professional and amateur gardeners. The Ultimate Guide to Growing in Coco Coir offers valuable information on how to use this versatile material in your garden. From choosing the right type of coir to understanding how to properly prepare and use it, this guide covers all the essentials. Whether you’re cultivating vegetables, flowers, or herbs in potting mixes, coconut coir can provide a healthy and productive environment for your plants, and this guide will assist you in making the most out of coir brick.
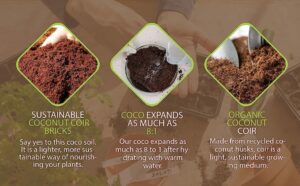
What is Coco Coir and Why is it Useful in Gardening?
Coco coir is a natural fiber extracted from coconut husks, popularly used in gardening. It’s valued for its impressive water retention capabilities, promoting plant growth by maintaining moisture and fostering beneficial bacteria. Additionally, Coco coir improves soil structure, providing ideal conditions for roots due to its light, airy texture. It’s eco-friendly, sustainable, and a versatile medium for various types of plants.
Understanding the Basics of Coco Coir
Coco coir is a popular growing medium made from the husk of coconuts. It serves as an environmentally friendly equivalent to peat moss and is prevalently employed in hydroponic and soil-oriented gardening. Understanding the basics of coco coir is essential for gardeners looking to incorporate it into their growing practices. Coco coir comes in different forms, including bricks, blocks, and loose fibers, and is known for its excellent water retention and aeration properties. To use coco coir effectively, it’s important to properly hydrate it before adding it to the growing medium. It has a neutral pH, making it a versatile option for a variety of plants. Additionally, coco coir is sustainable and renewable, making it an attractive choice for environmentally conscious gardeners. With its numerous benefits, it’s no wonder why coco coir is becoming increasingly popular in the gardening community.
The Environmental Benefits of Using Coconut Coir
Utilizing coconut coir provides significant environmental benefits, contributing immensely towards sustainability and earth-friendly practices. Coconut coir, derived from the fibrous inner shell of coconuts, is a wonderfully versatile, renewable resource that alleviates the strain on our planet’s resources. It discourages deforestation as it serves as a superior alternative to peat moss in horticulture, which is traditionally harvested from peat bogs, thereby preserving these crucial ecosystems. Additionally, its production creates less pollution compared to synthetic counterparts while reducing the waste generated from coconut harvesting. This biodegradable material also improves soil health by enhancing water retention and providing vital nutrients. Its usage hence reduces our carbon footprint, aiding in the crucial fight against climate change. Altogether, the use of coconut coir endorses our responsibility towards maintaining ecological balance and promoting environmental health.
How Does Coco Coir Compare to Other Growing Media?
Coco coir is a popular growing media among gardeners and horticulturalists, comparable to alternatives like peat moss, perlite, and vermiculite. Coco coir is made from the fibrous husks of coconuts, lending it outstanding water retention capabilities, in fact, superior to peat moss. Yet, unlike peat moss, it is much more environment-friendly as it is readily renewable. It has a neutral pH level, ideal for plant growth, while perlite and vermiculite are often more acidic. Though perlite offers excellent aeration benefits, coco coir holds its own by promoting excellent root development due to its fibrous texture. Therefore, while each medium like compost contributes its unique advantages, coco coir offers a beneficial balance of sustainability, water retention capacity, root support, and low EC or electrical conductivity.
Types of Coco Coir and Their Applications
Exploring Different Types of Coconut Coir
Coconut coir, the fibrous materials found in the husk of the coconut, offers several types that can be explored for a range of applications. The three primary types of coconut coir include brown coir, white coir, and coir pith. Brown coir, obtained from fully ripened coconuts, is dense, strong, and highly resistant to abrasion, making it ideal for use in products like ropes, mats, brushes, and upholstery stuffing. White coir, derived from immature green coconuts, is less robust but more flexible and extensively employed in marine applications for ropes, nets, and fishing lines. Lastly, coir pith, or coco peat, a by-product in the processing of coconut fibre, has increased importance as a soil-free growing medium in horticulture and hydroponics due to its excellent water retention properties.
Best Practices for Using Coco Coir in Various Growing Environments
Coco coir, made from the husks of coconuts, is a popular medium for gardening due to its ability to retain water and its natural resistance to diseases and pests. However, using Coco coir effectively requires certain best practices. In diverse growing settings, Coco coir or coco fiber should be applied without adjuvants or fertilizers to ensure plants fully exploit its nutrients. In environments with high humidity, mixing Coco coir with perlite or vermiculite helps improve aeration and drainage, reducing the risk of root rot. It should be thoroughly rinsed before use to lower the salt content, which may harm sensitive plants. Furthermore, even though Coco coir naturally repels pests, it is not immune; regular checks for pests and diseases are advisable for optimal plant growth and health. Hence, proper care and attention are essential when using Coco coir in various growing environments.
Benefits of Using Coir Products in Gardening
Coir products offer numerous benefits for gardening purposes. Derived from the husk of coconuts, coir is a natural and renewable resource, making it an eco-friendly alternative to peat moss. Unlike peat moss, which is highly acidic, coir has a neutral pH level, which makes it suitable for a wider variety of plants. Coir is known for its excellent water retention capabilities and can absorb up to 10 times its weight in water, reducing the risk of overwatering. It also helps to improve soil aeration, promoting healthier root growth for plants. Moreover, coir is resistant to bacterial and fungal growth, ensuring healthier and disease-free plants. Its lightweight and easy-to-handle property make it a preferred material in gardening. Thus, using coir products in gardening not only benefits the plants but also contributes to sustainable practices.
Maximizing Plant Growth with Coco Coir Substrate
Coco coir substrate is an increasingly popular choice for gardeners seeking to maximize plant growth. Made from the husks of coconuts, coco coir is a natural, renewable resource that offers numerous advantages over traditional gardening substrates. Its unique structure allows for excellent water retention, ensuring plants remain adequately hydrated. At the same time, it provides the necessary aeration for the roots, which leads to healthy, vigorous growth. Additionally, coco coir is naturally pH neutral and free from pathogens and weed seeds, reducing the risk of plant diseases. Its inherent nutrients also support plant health and accelerate growth. Moreover, coco coir substrate is light in weight; hence, it’s easy to handle and transport, making it a practical choice for gardeners. Overall, using coco coir substrate promotes sustainable gardening practices while boosting plant growth and yield.
Utilizing Coco Coir in Hydroponic Systems
Coco coir, a byproduct of coconut husk, has gained popularity in the hydroponic world for its numerous benefits. Rich in root-promoting hormones and beneficial microbes, it provides an excellent environment for plant root growth in hydroponic systems. Coco coir absorbs water efficiently, retaining essential nutrients while draining unwanted salts, thus ensuring robust plant health. Additionally, its pH-neutral quality ensures minimal pH-related issues for the crops. Also, it offers significant resistance against fungal and bacterial diseases, thereby reducing the need for chemical additives. Coco coir is reusable after sterilization, thus reducing costs and the environmental impact over time. It suits various hydroponic system designs, including drip systems, ebb and flow systems, and nutrient film technique systems. Therefore, using coco coir in a hydroponic system optimizes water and nutrient usage, improving overall yield and crop quality.
Common Misconceptions and FAQs About Coco Coir
Dispelling Myths Surrounding the Use of Coco Coir in Gardening
Coco coir, a natural byproduct obtained from the husk of coconuts, has gained significant popularity in the gardening community due to its sustainable and highly beneficial attributes. Despite this, there remain a few misconceptions that have led some people to view coco coir with skepticism. One such myth is that coco coir is acidic and thus, harmful for plant growth. On the other hand, coco coir, or coco pith, is neutral to slightly acidic and highly conducive for most plants, particularly those favoring a lower pH level in the root zone. Moreover, lingering apprehensions regarding its salt content are largely immaterial, as high-quality coco coir undergoes a comprehensive rinse procedure to remove excessive salts and ensure the coir is ready for use. Claims about the lack of nutritional value in coco coir can be debunked too. Though it’s true that coco coir is not nutrient-rich by itself, it acts as a magnificent sponge to hold nutrients and release them slowly over time, promoting healthy plant growth.
Addressing Concerns About Nutrient Availability in Coco Coir-Based Growing Media
Coco coir-based growing media has rapidly gained popularity among horticulture enthusiasts and commercial farmers due to its sustainability and excellent water retention capabilities. However, concerns about nutrient availability in this type of growing media have been raised. Coco coir is a neutral medium, meaning it does not provide any nutrients to the plant itself. While this factor can prove advantageous because it reduces the risk of nutrient overloading, it also necessitates the regular addition of nutrient solutions to ensure healthy plant growth. The lack of inherent nutrients means the grower has full control over nutrient management, which can be both a boon and a bane, contingent on the caretaker’s expertise in the field. Therefore, it’s important to educate practitioners on the different nutrient requirements of plants and how to properly administer these nutrients when using coco coir-based growing media to guarantee optimal plant growth and development.
FAQs: Everything You Need to Know About Growing in Coco Coir
Coco coir is a popular medium for gardening, specifically in hydroponics and container gardening due to its excellent water holding capacity and pH neutrality. In light of this, many individuals often have inquiries concerning its usage. Frequently Asked Questions (FAQs):
- How to prepare coconut coir for planting? The process implicates soaking the coir brick in water, breaking it up into a crumbly texture before being mixed with perlite to improve aeration.
- How often to water plants grown in coco coir? The frequency of watering depends on the plant type, stage and environment, although coco coir’s high water retention reduces watering frequency compared to other mediums.
- Can all plants grow in coco coir? Yes, it’s suitable for most plants, including vegetables, flowers, and even small trees.
Ensuring Proper Usage and Storage of Compressed Coco Bricks
Compressed coco bricks are an excellent choice for eco-friendly gardening and farming. They are made from the husk of the coconut, which is a renewable and sustainable resource. Ensuring proper usage and storage of these bricks is crucial to preserve their quality and functionality. To use, the bricks must be soaked in water to expand them into a loose and rich substance ideal for plant growth. It’s vital not to rush this process as it ensures the correct texture and consistency. To store compressed coco bricks, maintain a dry and cool environment. Exposure to excess moisture could lead to undesirable mold growth or product degradation. Similarly, keeping them in hot conditions could dry out the fibers and reduce their water retention capacity. It is also important to ensure the bricks are securely packed away to protect them from pests. With proper care, these bricks can significantly enhance the quality of your soil and contribute to successful plant cultivation.
Understanding the Long-Term Benefits of Using Coconut Coir in Your Garden
Compressed coco bricks are a popular product in horticulture, which offer a nutrient-rich growing medium for plants. Proper use and storage of these versatile and organic bricks are significant for preserving their efficiency. To use, simply rehydrate the coco brick with water, which will cause it to rapidly expand, and then it’s ready for potting. While using, you should always check the pH level to ensure it remains between 5.5 and 6.5 for the optimal growth of plants. You also need to store unused bricks properly to maintain their quality. Keep them in a cool, dry place, away from direct sunlight to avoid degradation, and make sure they remain sealed in their packaging to prevent moisture absorption. In summary, learning how to use and store coir brick, as well as the importance of adding water for rehydration, can fuel a rewarding gardening experience, regardless if it’s being practiced at home or on a commercial scale.
Where to find the best quality Coco Coir?
The best quality Coco Coir can be found in various specialist gardening and horticultural stores both physically and online. However, if you want to have a wider range to choose from, online platforms like Amazon, eBay, and The Home Depot’s website offer an extensive selection since they serve as a marketplace for numerous vendors worldwide. These platforms allow you to compare prices, quality, and customer reviews conveniently, enabling you to make an informed decision. Additionally, websites dedicated to hydroponic and organic gardening, such as UGro and CANNA, offer high-grade Coco Coir. They usually provide detailed information about their products, including its sourcing and manufacturing process, ensuring you get only the best quality. Also, establishing a direct interaction with coir manufacturers in countries like India, Sri Lanka, and the Philippines can be a practical option if you require coir brick in bulk amounts. They can offer you a competitive price, ensuring excellent quality since it comes directly from the source. It is important to remember that the best quality Coco Coir should be low in sodium and have a high water-holding capacity, giving your plants the optimal growing environment.
“`