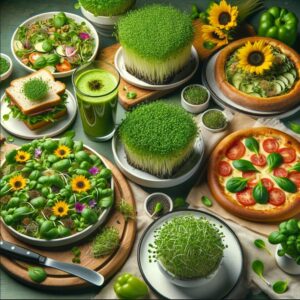
microgreens
Organic Vegetable Seeds: Your Ultimate Guide to Sustainable Gardening
Organic Vegetable Seeds: Your Ultimate Guide to Sustainable Gardening
Introduction to Organic Vegetable Seeds
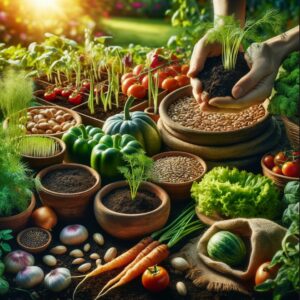
In the world of gardening, the choice of seeds is where the journey to cultivation begins. Organic vegetable seeds are not just a choice; they’re a statement of health, environmental consciousness, and sustainability. But what exactly are organic vegetable seeds, and why are they gaining such popularity among gardeners and farmers alike?
Organic vegetable seeds are produced without the use of synthetic pesticides, fertilizers, or genetically modified organisms. They are the cornerstone of organic gardening, ensuring that the food you grow is not only nutritious but also free of harmful chemicals. In this guide, we’ll explore the myriad benefits of using organic seeds, from their environmental impact to the health advantages they offer.
Choosing organic seeds is the first step toward a more sustainable and eco-friendly garden. Whether you’re a seasoned gardener or just starting, understanding the importance of these seeds is crucial for anyone looking to make a positive impact through their gardening practices. Join us as we delve into the world of organic vegetable seeds, providing you with the knowledge and tips you need to cultivate a thriving, sustainable garden.
Organic gardening is more than a hobby; it’s a commitment to fostering a healthier environment and lifestyle. At the heart of this practice lie organic vegetable seeds, the unsung heroes that set the foundation for sustainable agriculture. These seeds, devoid of synthetic chemicals and genetic modifications, offer gardeners the purest start to their gardening journey.
Why Choose Organic Seeds?
Choosing organic seeds is a vote for environmental health and biodiversity. These seeds are bred in organic settings, which enhances their ability to thrive without chemical assistance. This resilience translates to robust plants that can better resist pests and diseases, reducing the need for synthetic pesticides and fertilizers.
Genetic Diversity and Adaptation
Organic seeds often come from plants that have been grown in diverse and challenging environments. This exposure leads to the development of robust genetic traits, enabling the seeds to adapt to various conditions. By choosing organic, gardeners can cultivate a garden that’s not only productive but also resilient to climate fluctuations and local pests.
The Health Perspective
From a health standpoint, organic seeds are a cornerstone of a toxin-free diet. By starting with seeds that haven’t been treated with harmful chemicals, you ensure that the vegetables you grow and consume are as healthy as possible. This is especially crucial for those who grow food for young children or family members with health concerns.
Supporting Sustainable Practices
When you purchase organic vegetable seeds, you’re supporting a system that values soil health, biodiversity, and ecological balance. Organic farming practices are designed to maintain soil fertility and reduce pollution, ensuring that the land will remain arable and productive for future generations.
A Cost-Effective Choice
Investing in organic seeds can also be seen as a cost-effective gardening choice. Although the initial price might be slightly higher than conventional seeds, the long-term savings are significant. Organic plants are generally more vigorous and require fewer inputs in terms of pest and disease control, which can reduce gardening costs over time.
In the following sections, we’ll delve deeper into the benefits of using organic vegetable seeds, offer guidance on selecting the right seeds for your garden, and share expert tips on cultivating a bountiful and sustainable garden.
Benefits of Using Organic Seeds
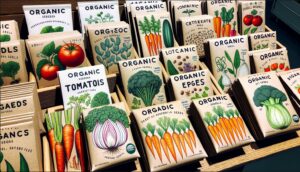
How to Choose the Right Organic Vegetable Seeds
Selecting the right seeds is a critical step in the journey of organic gardening. Here are some key factors to consider when choosing organic vegetable seeds:
- Climate Compatibility: Not all seeds thrive in the same conditions. Consider your local climate, including temperature ranges and season length, when selecting seeds. Opt for varieties known to perform well in your region’s specific conditions.
- Seed Source: Purchase your seeds from reputable organic seed suppliers. Look for certifications to ensure the seeds are genuinely organic. Trusted suppliers often provide detailed information about the seed’s origin, growing conditions, and organic certification.
- Planting Goals: Define what you want from your garden. Are you focusing on yield, flavor, or perhaps diversity? Choose seeds that align with your goals. For instance, if space is limited, look for compact or dwarf varieties.
- Disease Resistance: Opt for seed varieties with built-in resistance to common pests and diseases in your area. This can lead to a more successful harvest with less need for intervention.
- Heirloom vs. Hybrid: Heirloom seeds are open-pollinated and have been passed down through generations, offering unique flavors and varieties. Hybrids are crossbred for specific traits like disease resistance or uniformity. Decide which type aligns with your gardening philosophy and goals.
- Germination Rate: Check the seed packet for the germination rate, which indicates the percentage of seeds expected to successfully sprout. Higher germination rates can lead to more successful plantings.
By carefully selecting your organic vegetable seeds, you set the stage for a garden that aligns with your environmental values, dietary preferences, and gardening ambitions. In the next section, we’ll explore innovative methods to start your seeds using LED lights and hydroponics, maximizing your garden’s potential from the very beginning.
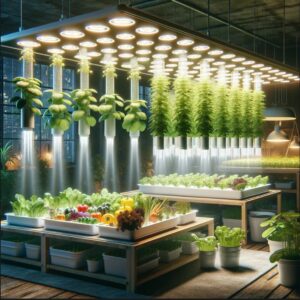
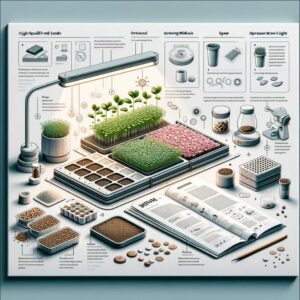
Starting Seeds Indoors: LED Lights and Hydroponics
Embarking on your organic gardening journey can be exciting, especially when you incorporate modern techniques like using LED lights and hydroponic systems. These methods can optimize your seed starting process, ensuring strong and healthy plant growth from the outset.
- Why Use LED Lights?: LED lights provide a consistent light source essential for seedlings, especially in regions with limited natural sunlight. They’re energy-efficient, emit less heat, and can be customized to provide the optimal light spectrum for plant growth, ensuring your seedlings develop strong roots and sturdy stems.
- Setting Up Your LED Grow Lights: Position your LED lights about 2-4 inches above the seed trays, adjusting the height as the plants grow. Ensure the lights are on for 14-16 hours a day to mimic natural sunlight. Using a timer can help maintain a consistent light cycle.
- Introduction to Hydroponics: Hydroponic systems allow you to grow plants in a water-based, nutrient-rich solution, without soil. This method can lead to faster growth rates and higher yields, making it an excellent option for organic vegetable seed starting.
- Hydroponic Seed Starting: Begin with a simple hydroponic setup like a deep water culture or a wick system. Use rockwool cubes or peat moss as a growing medium for your seeds. Once the seeds germinate and seedlings develop, ensure they receive the right nutrients by adding an organic hydroponic nutrient solution to the water.
- Advantages of Hydroponics: This soil-less growing method reduces the risk of soil-borne diseases and pests. It also allows for better control over the plant’s environment, ensuring optimal growth conditions. Additionally, hydroponics can be a space-saving solution, perfect for urban gardeners or those with limited outdoor space.
Combining LED lighting with hydroponic systems can revolutionize the way you start your organic vegetable seeds, leading to robust plant growth and a successful gardening season. In the next section, we’ll cover the best practices for planting and caring for your organic seeds, ensuring a fruitful harvest.
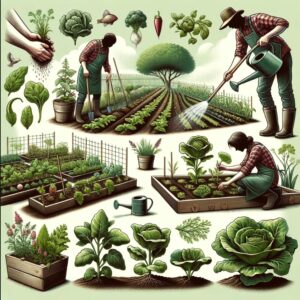
Planting and Caring for Your Organic Seeds
Properly planting and caring for your organic seeds is crucial for developing a thriving, productive garden. Here are some essential tips to guide you through this process:
- Soil Preparation: Start with rich, well-draining soil, ideally enhanced with organic compost. The soil should be loose and fertile to allow for proper root growth and water retention. Ensure the pH level is suitable for the vegetables you plan to grow.
- Seed Planting: Follow the planting instructions on the seed packet, as depth and spacing can vary significantly between different vegetable types. Generally, seeds should be planted at a depth of about two to three times their diameter.
- Watering: Keep the soil consistently moist but not waterlogged. Overwatering can lead to root rot and other issues, while under-watering can stress the plants, affecting their growth and yield.
- Temperature and Light: Ensure your garden or seed-starting area maintains an appropriate temperature for the seeds to germinate. Most vegetables require a warm environment to sprout. Once they emerge, provide ample sunlight or supplement with grow lights for strong, healthy growth.
- Thinning: Once the seedlings have a few true leaves, thin them out to prevent overcrowding. This ensures that the remaining plants have enough space, nutrients, and light to grow.
- Nutrition: Feed your plants with organic fertilizers, but be cautious not to over-fertilize. Too much fertilizer can harm your plants and the environment. Choose a balanced, slow-release organic fertilizer that provides essential nutrients throughout the growing season.
- Pest and Disease Management: Monitor your plants regularly for signs of pests or diseases. Use organic methods to control any issues, such as introducing beneficial insects, applying neem oil, or using homemade remedies.
- Support and Training: Some plants, like tomatoes and climbing beans, may require support as they grow. Use stakes, trellises, or cages to support these plants and promote healthy growth.
By providing the right care and attention, your organic vegetable seeds will develop into strong, healthy plants, yielding a bountiful and nutritious harvest. Embrace the journey of watching your seeds grow and enjoy the fruits (and vegetables) of your labor!
Beyond the Garden: The Broader Impact of Choosing Organic
Choosing organic vegetable seeds extends its benefits far beyond the boundaries of your garden. It’s a decision that positively impacts the environment, supports sustainable agriculture, and promotes a healthier lifestyle. Here’s how making this choice contributes to a larger good:
- Environmental Conservation: By choosing organic seeds, you’re supporting agricultural practices that reduce pollution and conserve water. Organic farming minimizes soil erosion and encourages biodiversity, helping to maintain healthy ecosystems.
- Promoting Biodiversity: Organic seeds often come from heirloom varieties, which helps preserve genetic diversity in the plant kingdom. This diversity is crucial for resilience to pests, diseases, and changing climate conditions.
- Supporting Local Economies: Purchasing organic seeds from local producers or companies committed to sustainable practices supports the local economy and promotes the organic agriculture industry, creating more opportunities for farmers to adopt eco-friendly practices.
- Health and Wellness: Growing your vegetables from organic seeds ensures that your food is free from synthetic chemicals and GMOs, contributing to better health and well-being for you, your family, and your community.
- Educational Value: Your organic garden can serve as a living classroom, educating others about the importance of sustainability and the impact of our choices on the environment. It’s a tangible way to demonstrate the principles of ecology and conservation.
By choosing organic vegetable seeds, you’re not just growing a garden; you’re nurturing a healthier planet and community. It’s a simple yet profound way to make a difference, one seed at a time.
Organic Vegetables: Step-by-Step Techniques for Thriving Gardens at Home
Organic Vegetables: Step-by-Step Techniques for Thriving Gardens at Home
In the quest for healthier living and sustainable practices, growing organic vegetables at home has gained considerable traction among gardening enthusiasts and eco-conscious individuals alike. Embracing organic gardening means nurturing your vegetables without relying on synthetic fertilizers or pesticides, fostering a natural environment that’s not only beneficial for your health but also kind to the planet. This guide, “Organic Vegetables: Step-by-Step Techniques for Thriving Gardens at Home,” is designed to walk you through the essentials of cultivating your organic vegetable garden, from the initial planning stages to the joyous moment of harvest.
Embarking on the journey of organic vegetable gardening offers a myriad of benefits, including access to fresh produce, the reduction of your carbon footprint, and the therapeutic joy of connecting with nature. Whether you have a spacious backyard or a modest balcony space, this guide will provide you with the knowledge and tools needed to start your organic gardening adventure. We’ll delve into the importance of choosing the right location, preparing the soil naturally, and selecting vegetable varieties that will thrive in your garden’s unique conditions. Additionally, we’ll explore innovative gardening techniques, such as utilizing LED grow lights for year-round cultivation and setting up a basic hydroponic system, to enhance your gardening experience.
By the end of this guide, you’ll be equipped with the step-by-step techniques essential for creating and maintaining a flourishing organic vegetable garden at home. So, let’s don our gardening gloves and embark on this green journey together, cultivating not just vegetables, but a lifestyle rooted in sustainability and well-being.
Understanding Organic Vegetable Gardening
Organic gardening goes beyond just avoiding synthetic chemicals; it’s about fostering an ecosystem that promotes natural growth and sustainability. At its core, organic vegetable gardening is about working in harmony with nature, creating a productive environment that benefits both the gardener and the ecosystem.
- The Principles of Organic Gardening: Organic gardening is grounded in the principle of nurturing plants in a way that maintains and enhances the soil’s natural health. It emphasizes the use of organic matter, such as compost, to enrich the soil, which in turn nourishes the plants. This approach ensures that the vegetables are grown in a toxin-free environment, yielding healthier and more flavorful produce.
- Benefits for Health and Environment: Growing vegetables organically eliminates the risk of consuming pesticide residues, offering a cleaner alternative for your diet. Moreover, this method reduces pollution and conserves water, contributing to a healthier environment. The absence of chemicals also encourages biodiversity, attracting beneficial insects and promoting a balanced ecosystem in your garden.
- Understanding Soil Health: Healthy soil is the foundation of a successful organic garden. Organic gardeners focus on building soil that is rich in organic matter and teeming with microbial life. This not only provides a robust environment for plants to thrive but also enhances the soil’s ability to retain water and nutrients, reducing the need for external inputs.
- Composting: One of the pillars of organic gardening is composting. This natural process recycles organic material into a rich soil amendment, providing a steady stream of nutrients for your plants. By composting kitchen scraps and yard waste, you not only enrich your soil but also reduce landfill waste, embodying the principles of sustainability and resourcefulness that are central to organic gardening.
- Choosing the Right Plants: Selecting the right plants is crucial in organic gardening. Opting for native or well-adapted plants can reduce the need for water and fertilizer and increase the garden’s resilience to pests and diseases. Understanding your climate, soil type, and local ecosystem can guide you in choosing plants that will thrive in your organic garden.
By embracing these principles, you’ll be well on your way to establishing a thriving organic vegetable garden at home. As you delve deeper into organic practices, you’ll discover the joys and rewards of growing your food in harmony with nature, reaping the benefits of your efforts in the form of fresh, nutritious produce right from your backyard.
Planning Your Organic Vegetable Garden
Embarking on your organic vegetable gardening journey requires thoughtful planning and a strategic approach. By carefully considering factors like location, soil, and plant selection, you can lay a solid foundation for a thriving garden. Here’s how to get started:
- Choosing the Right Location: The success of your garden starts with selecting the right spot. Most vegetables require at least 6-8 hours of direct sunlight per day. Observe your potential garden area throughout the day to identify the sunniest spots. Also, consider accessibility for watering and proximity to compost or tool storage for convenience.
- Soil Preparation: Organic gardening thrives on rich, fertile soil. Begin by testing your soil to understand its type and pH level, adjusting as necessary to meet the needs of your chosen vegetables. Enhance your soil with organic matter, such as compost or aged manure, to improve its structure, fertility, and water retention.
- Choosing Vegetables: Select vegetables that are suitable for your region’s climate and soil conditions. Consider starting with easy-to-grow options like lettuce, radishes, or tomatoes. Incorporate a mix of vegetables that you enjoy eating and that can be harvested at different times, ensuring a continuous supply throughout the growing season.
- Garden Layout: Plan your garden layout, keeping in mind the space requirements of each plant and their compatibility with each other. Utilize companion planting to naturally repel pests and enhance growth. Remember to provide adequate space between rows or plants for air circulation and ease of maintenance.
- Tools and Resources: Equip yourself with the necessary tools and resources for organic gardening. Basic tools include a spade, garden fork, hoe, and watering can. Consider investing in quality tools that will last and reduce unnecessary waste and consumption.
By meticulously planning your organic vegetable garden, you’re setting the stage for a rewarding and sustainable gardening experience. This preparation not only facilitates a smoother gardening process but also maximizes your garden’s productivity, ensuring a bountiful harvest of fresh, organic vegetables right from your home.
Innovative Growing Techniques: LED Grow Lights and Hydroponic Systems
In the realm of organic vegetable gardening, embracing innovative techniques can enhance your garden’s productivity and overcome common challenges. Two such advancements are LED grow lights and hydroponic systems, which offer unique benefits for indoor and small-space gardening.
- LED Grow Lights: LED grow lights have revolutionized indoor gardening by providing a reliable and energy-efficient light source. These lights emit a spectrum of light that mimics natural sunlight, essential for plant photosynthesis. They’re ideal for spaces lacking in natural light, allowing you to grow vegetables year-round, regardless of outdoor conditions. When selecting LED lights, consider factors like light intensity, spectrum, and coverage area to match your garden’s needs.
- Benefits of LED Grow Lights: Using LED lights can lead to faster plant growth, increased yields, and the ability to control the vegetative and flowering stages with specific light wavelengths. They’re also more energy-efficient and have a longer lifespan compared to traditional grow lights, making them a sustainable choice for the eco-conscious gardener.
- Hydroponic Systems: Hydroponics is a method of growing plants without soil, using a nutrient-rich water solution. This technique is perfect for organic gardeners with limited space, as it allows for higher density planting and can be set up indoors or in small outdoor areas. Hydroponic systems come in various types, such as deep water culture, ebb and flow, and nutrient film technique, each suitable for different plants and spaces.
- Benefits of Hydroponic Systems: Hydroponic gardening offers faster plant growth, efficient water usage, and reduced pest and disease risks. Since the plants receive nutrients directly from the water, they can allocate more energy to growth rather than developing extensive root systems to search for nutrients. Additionally, hydroponics allows for precise control over nutrient levels, pH, and other factors, leading to healthier and more productive plants.
- Combining LED Grow Lights with Hydroponics: Integrating LED grow lights with hydroponic systems can create an optimal environment for vegetable growth, especially in urban settings or during off-season periods. This combination maximizes space utilization and control over growing conditions, offering a sustainable and efficient way to produce organic vegetables year-round.
By incorporating these innovative techniques into your organic vegetable gardening practice, you can expand your gardening possibilities and enjoy fresh, home-grown vegetables regardless of space or seasonal limitations.
Planting and Maintaining Your Garden
Creating a thriving organic vegetable garden requires attentive planting and ongoing care. This section provides step-by-step guidance on planting your organic vegetables and maintaining your garden for optimal health and productivity.
- Planting Your Vegetables: Start by selecting high-quality, organic seeds or seedlings. When planting, consider the specific needs of each vegetable, such as spacing, depth, and orientation to the sun. Proper planting ensures your plants have the room they need to grow and receive adequate sunlight and air circulation.
- Watering Wisely: Regular and consistent watering is crucial for vegetable gardens, but overwatering can be just as harmful as under-watering. Use a watering can or drip irrigation system to deliver water directly to the base of the plants, reducing evaporation and minimizing leaf wetness that can lead to disease. Adjust your watering schedule based on rainfall, temperature, and the specific needs of your plants.
- Mulching: Applying organic mulch around your plants helps retain soil moisture, suppress weeds, and regulate soil temperature. Organic mulches, like straw or grass clippings, also break down over time, enriching the soil with organic matter.
- Monitoring Plant Health: Regularly inspect your plants for signs of stress, pests, or disease. Early detection is key to managing potential issues before they escalate. Healthy plants are better equipped to resist pests and diseases, so focus on providing optimal growing conditions.
- Succession Planting and Crop Rotation: To extend your harvest and maintain soil health, practice succession planting by staggering plantings of crops that mature quickly. Additionally, rotating crops each year can prevent soil depletion and reduce the buildup of pests and diseases associated with specific plant families.
By following these planting and maintenance tips, you’ll cultivate a garden that not only produces bountiful harvests but also contributes to the ecological balance of your outdoor space. Whether you’re a seasoned gardener or a green-thumbed novice, these practices will help ensure your organic vegetable garden is healthy, productive, and sustainable.

Growing Microgreens – A Summary For Beginners
Growing Microgreens – A Summary For Beginners
The Basics of Microgreens
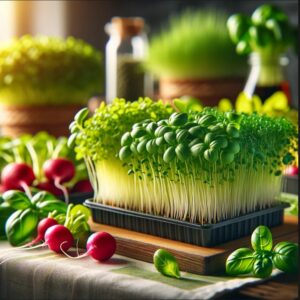
Microgreens have gained popularity among health enthusiasts and culinary experts alike due to their nutritional value and vibrant flavors. These tiny greens are essentially young vegetable plants, harvested shortly after the first true leaves have developed. They’re not only packed with vitamins and minerals but also add a beautiful aesthetic to dishes.
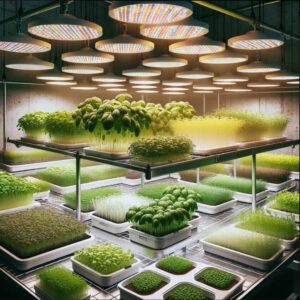
Benefits of Using LED Lights for Microgreens
Growing microgreens indoors under LED lights offers numerous advantages. LED technology has evolved to provide a spectrum of light that closely mimics natural sunlight, which is crucial for photosynthesis and the healthy growth of plants. LED lights generate less heat, reducing the risk of drying out the delicate greens. Additionally, they’re energy-efficient and have a long lifespan, making them an economic choice for indoor farming.
Growing microgreens indoors with LED lights provides a multitude of benefits that extend beyond basic plant growth. LED technology has made significant strides over the years, allowing indoor farmers and gardening enthusiasts to cultivate plants efficiently and effectively.
One of the primary advantages of using LED lights for microgreens is their ability to simulate the spectrum of natural sunlight. This spectrum is essential for photosynthesis, the process by which plants convert light into chemical energy. Unlike traditional lighting options, LED lights can be fine-tuned to emit specific wavelengths of light, which are optimal for the photosynthetic activity of microgreens. This targeted approach ensures that the plants absorb more light energy, leading to faster growth, higher yield, and improved nutritional content.
LED lights are known for their low heat emission, which is particularly beneficial for the cultivation of microgreens. These young plants are sensitive and can easily be damaged or dehydrated by excessive heat. With LEDs, the risk of overheating the plants is significantly reduced, allowing for closer placement of the lights to the plants. This proximity ensures that the microgreens receive an ample amount of light without the adverse effects of high temperatures.
Selecting the Right LED Light
Choosing an LED light for your microgreens involves considering factors such as light intensity, color spectrum, and duration of exposure. Light intensity impacts the growth rate and structural development of the plants; hence, it’s important to select an LED with adjustable intensity to cater to the different growth stages. A full-spectrum LED light is most beneficial, as it includes all the colors required for healthy plant growth, including blue and red, which are essential for leaf development and robust roots.
Selecting the ideal LED light for growing microgreens is a critical decision that can significantly influence the success of your indoor gardening venture. When choosing an LED light, it’s important to consider several key factors to ensure your microgreens thrive and reach their full potential.
Firstly, light intensity, measured in micromoles per square meter per second (µmol/m²/s), is crucial as it affects the growth rate and overall health of the microgreens. An LED light with adjustable intensity offers the flexibility to modify the light output to suit various growth stages, from germination to harvest. This adaptability helps in providing the right amount of light, preventing issues like legginess or stunted growth.
The color spectrum of the light is another vital factor. Microgreens respond differently to various wavelengths of light, which influence aspects such as growth rate, leaf color, and nutrient composition. A full-spectrum LED light, which includes a balance of cool (blue) and warm (red) wavelengths, simulates the natural sunlight conditions. Blue light promotes leafy growth and strong stems, while red light is essential for root development and flowering in later stages of a plant’s life cycle.
In addition to light intensity and spectrum, the duration of light exposure is also key. The photoperiod, or the amount of time the plants are exposed to light each day, needs to be controlled to mimic natural daylight cycles, which can vary depending on the specific needs of the microgreens you are growing.
By carefully selecting an LED light that offers the right intensity, spectrum, and control over the duration of exposure, you can create an optimal growing environment that encourages healthy, vigorous growth of your microgreens, enhancing their nutritional value and taste.
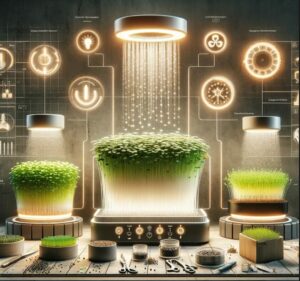
Setting Up Your Microgreens Growth Area
Your microgreens growing station can be as simple as a shelf with LED lights mounted above or a more sophisticated setup with automated controls for light and watering. Ensure that you have a flat surface where you can place your growing trays and that the LED lights are positioned about 6 to 12 inches above the plants. This distance ensures that the microgreens receive adequate light without the risk of leaf burn.
Planting and Caring for Your Microgreens
Start by selecting quality seeds and a growing medium such as soil or a soilless mix. After evenly spreading the seeds in your tray, lightly cover them with your medium or a thin layer of vermiculite. It’s important to keep the medium moist, but not waterlogged, to encourage germination. Once the seeds have sprouted, exposing them to your LED lights will kickstart the photosynthesis process. Regularly check moisture levels and keep the growing environment between 60-70°F for optimal growth.
Harvesting and Storing Your Microgreens
Microgreens are ready to harvest usually two to three weeks after planting, once they have developed their first true leaves. Use a sharp knife or scissors to cut the greens just above the soil line. After harvesting, rinse them gently and let them dry before storing. Microgreens are best consumed fresh but can be stored in a refrigerator for a few days, ideally in an air-tight container.
Cooking with Microgreens
Microgreens, with their delicate textures and vibrant flavors, have become a staple in kitchens, from professional settings to home cooking. These tiny greens can elevate even the simplest dishes with a burst of color and nutrition. If you’re a beginner or a home cook looking to incorporate microgreens into your meals, here are some common and easy ways to use them:
1. Salads: One of the most straightforward ways to use microgreens is by tossing them into salads. Their fresh, often peppery or sweet flavors can add a new dimension to your greens. Mix them with other salad leaves or use them as the primary ingredient. A simple dressing of olive oil, lemon juice, salt, and pepper can enhance their taste without overpowering their delicate flavor.
2. Sandwiches and Wraps: Elevate your sandwiches and wraps by adding a handful of microgreens. They introduce a fresh, crisp texture and a nutritional boost. Whether you’re making a classic turkey sandwich, a vegetable wrap, or a grilled cheese, microgreens can add a gourmet touch to these everyday meals.
3. Garnishes: Chefs often use microgreens as garnishes to add color and flavor to dishes. You can do the same at home to make your meals more visually appealing and tasty. Sprinkle microgreens on top of soups, stews, pizzas, or omelets just before serving.
4. Smoothies and Juices: For an extra dose of nutrients, add a handful of microgreens to your smoothies or juices. They blend well with fruits and other vegetables, boosting your drink’s vitamin and mineral content without compromising flavor.
5. As a Base for Appetizers: Microgreens can be a delicate and flavorful base for appetizers. Top them with slices of smoked salmon, a dollop of cream cheese, or a piece of grilled vegetable for a quick and elegant starter.
6. Incorporating into Hot Dishes: While microgreens are often used raw, they can also be gently wilted into hot dishes at the end of the cooking process. Add them to pastas, risottos, or stir-fries just before serving to retain their color and nutritional value.
Remember, microgreens are versatile and can be adapted to a wide range of cuisines and dishes. Experimenting is key—try different types of microgreens to discover which flavors you enjoy most. Whether you’re garnishing a dish, tossing them into a salad, or blending them into a smoothie, microgreens are a simple way to add a nutritional punch and a dash of color to your cooking.

Troubleshooting Common Issues
While LED lights offer many advantages, growers can sometimes encounter issues such as leggy plants or discoloration. If your microgreens are stretching excessively, it often means they need more light intensity or a longer duration of exposure. Yellowing might indicate overwatering or a deficiency in nutrients. Pay close attention to the plants’ appearance and adjust your care routine as needed.
Conclusion: Enhancing Microgreen Quality with LED Lights
LED lights can significantly improve the quality and yield of your microgreens. By providing an optimal light spectrum and intensity, these energy-efficient bulbs support the growth of dense, nutritious, and flavorful greens. Whether you’re a hobbyist gardener or a commercial grower, integrating LED lighting into your microgreens setup can herald lush, year-round harvests that are healthy for both consumers and the environment.
LED Light Intensity For Optimal Microgreens Growth
LED Light Intensity For Optimal Microgreens Growth
Understanding the Importance of Light in Microgreen Growth
Light is a critical factor that plays a vital role in the process of photosynthesis, which is essential for the growth and development of plants. Microgreens, the young seedlings of vegetables and herbs, require an optimal light intensity to thrive. Insufficient or excessive light can hinder their growth or cause damage to these delicate plants. Therefore, understanding how to manage and optimize light intensity is crucial for cultivating healthy and robust microgreens.
Choosing the Right Light Source
One of the first steps in optimizing light intensity for microgreens is selecting an appropriate light source. Natural sunlight is the most balanced spectrum for plant growth but not always available or consistent, especially for indoor gardening. In such cases, artificial lighting like fluorescent bulbs, LEDs, or grow lights can be a suitable alternative. LEDs are increasingly popular due to their energy efficiency and the ability to tailor spectrums for plant growth. It is important to research and invest in quality lighting systems that can mimic the full spectrum of sunlight to a certain extent.
Determining Optimal Light Intensity
Microgreens have specific light intensity needs which can vary according to their species. Generally, light intensity is measured in units of micromoles per square meter per second (µmol/m²/s). For most microgreens, a light intensity of 100 to 200 µmol/m²/s is adequate for proper growth. This can be monitored using a light meter to ensure the plants are receiving sufficient light without being overexposed. Adjusting the distance between the light source and the plants is one common way to control the intensity reaching the microgreens.
Creating an Ideal Light Schedule
Besides intensity, the duration of light exposure also significantly impacts microgreen growth. A light schedule, or photoperiod, should replicate the natural cycle of day and night to some extent. Typically, microgreens flourish under a photoperiod of 12–16 hours of light per day, followed by 8–12 hours of darkness. This rhythm supports healthy growth and can be achieved using an automatic timer to switch lights on and off at set intervals to ensure consistency.
Monitoring and Adjusting for Growth Stages
As microgreens progress through different stages of growth, their light requirements may change. During the germination stage, seeds often require darkness or very low light intensity to trigger growth. Once the seeds have sprouted, they should be exposed to the optimal light intensity recommended for their species. Vigilant monitoring and adjustment of lighting will ensure that the microgreens develop strong stems and vibrant leaves. It’s also essential to observe the plants for any signs of stress or burning, indicating the need to adjust light intensity or duration.
Balancing Heat and Light
Artificial lighting sources can emit heat, which can negatively impact microgreens if not appropriately managed. Excessive heat can lead to dehydration, nutrient deficiencies, or even death of the plants. To prevent such issues, it’s essential to balance light intensity with ambient temperature. LED lights are known for producing less heat compared to other artificial sources, making them a preferred choice when heat management is necessary.
Conclusion
Optimizing light intensity plays a pivotal role in yielding a successful microgreen harvest. By choosing the right light source, determining the optimal light intensity, creating an ideal light schedule, and adjusting for various growth stages, you can cultivate healthy and vibrant microgreens. Balancing heat and light is also a crucial component of maintaining an ideal growth environment. Careful attention to these details will not only facilitate the flourishing of microgreens but will also produce a crop rich in flavor, nutrition, and visual appeal.
Sunflower Microgreens: A Nutrient Powerhouse in Your Kitchen
Sunflower Microgreens: A Nutrient Powerhouse in Your Kitchen
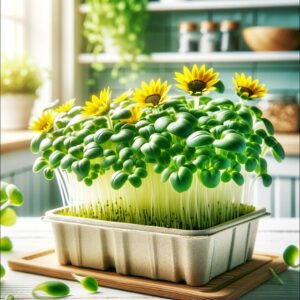
In recent years, microgreens have surged in popularity, not just among gourmet chefs and food enthusiasts but also in home kitchens across the globe. Among the myriad of microgreens available, sunflower microgreens stand out as a particularly nourishing and versatile option. These tiny greens, harvested just after the cotyledon leaves have developed, are packed with a dense concentration of nutrients, flavor, and texture.
Sunflower microgreens, derived from the sprouts of sunflower seeds, are more than just a garnish on your plate; they are a superfood that can significantly elevate your nutritional intake. They are easy to grow at home, requiring minimal space and care, making them a perfect addition to any kitchen garden. In this article, we’ll explore the multitude of health benefits these microgreens offer, provide a simple guide to growing them at home, share some exciting ways to incorporate them into your daily meals, and offer tips on how to store them to maximize their shelf life. Whether you’re a seasoned chef looking to add a fresh twist to your dishes or someone seeking to enhance your diet with more nutrient-rich foods, sunflower microgreens are a fantastic choice.
5 Top Microgreens Growing Kits Reviewed: Find Your Perfect Match
5 Top Microgreens Growing Kits Reviewed: Find Your Perfect Match
Introduction – Choosing The Best Microgreens Growing Kit
Have you ever wanted to grow your own nutritious greens but felt limited by space or gardening expertise? Microgreens are the perfect solution, offering a burst of nutrition and flavor from the comfort of your home. These tiny greens, harvested just after their first leaves develop, are packed with vitamins, minerals, and antioxidants, making them a powerhouse addition to any meal.
Growing microgreens at home is incredibly accessible, thanks to a variety of microgreens growing kits available on the market. These kits provide everything you need to start your mini indoor garden, regardless of your gardening experience. Whether you’re a seasoned green thumb or a complete novice, there’s a kit out there that’s perfect for you.
In this article, we’ll review the top 5 microgreens growing kits, helping you find the one that best fits your lifestyle and growing preferences. From compact designs for small spaces to kits that include a variety of seed options, we’ll guide you through the best choices to ensure your microgreen growing adventure is a success.

Introduction to Microgreens and Their Benefits
Microgreens, the young seedlings of vegetables and herbs, have emerged as a culinary favorite among health enthusiasts and gourmet chefs alike. These tiny greens are harvested shortly after the cotyledon leaves have developed, and sometimes after the first true leaves have appeared. Despite their small size, microgreens pack a nutritional punch, often containing higher vitamin, mineral, and antioxidant levels than the same plants at maturity.
Nutritional Powerhouses
Research indicates that microgreens can contain up to nine times the nutrients of their mature counterparts. They are rich in essential vitamins such as C, E, and K, minerals including potassium, iron, zinc, magnesium, and copper, and powerful antioxidants that help combat harmful free radicals in the body. Incorporating microgreens into your diet can boost heart health, reduce inflammation, improve digestion, and support a healthy immune system.
Versatility in the Kitchen
Beyond their nutritional benefits, microgreens offer a burst of flavor and color to a variety of dishes. Their delicate textures and distinctive tastes can enhance salads, sandwiches, soups, and even smoothies. Chefs and home cooks alike treasure microgreens for their ability to elevate a dish’s presentation and add a fresh, gourmet touch.
Sustainability and Accessibility
Growing microgreens is a sustainable and accessible venture. They require minimal space, water, and resources, making them an excellent option for urban dwellers or those with limited gardening space. Microgreens can be grown indoors year-round, providing a constant source of fresh produce right in your kitchen.
Economic Benefits
Cultivating your own microgreens can also be cost-effective. Purchasing microgreens can be expensive, but growing them at home significantly reduces costs, providing a fresh, nutrient-rich food source that is both affordable and convenient.
Educational Value
For families, growing microgreens can serve as an educational tool for children, teaching them about the plant life cycle, nutrition, and the importance of sustainable agriculture. It’s a fun, interactive way to introduce kids to gardening and healthy eating habits.
Key Features to Look for in a Microgreens Growing Kit
Choosing the right microgreens growing kit is essential for a successful and enjoyable growing experience. Here are the key features you should consider when selecting a kit:
1. Quality of Seeds: The variety and quality of seeds included in a growing kit are crucial for yielding a bountiful harvest. Look for kits that offer non-GMO, organic seeds to ensure you’re growing the healthiest microgreens possible. Additionally, diversity in seed types can provide a range of flavors and nutrients.
2. Growing Medium: Microgreens can be grown in various mediums, such as soil, coconut coir, or hydroponic mats. Each has its advantages and preferences. Some kits include a soil-based medium, which is excellent for beginners, while others might offer a soilless option, which can be cleaner and less messy.
3. Tray Design: The design of the growing tray impacts the ease of use and the success of your microgreens. Look for trays that allow for proper drainage and are the right depth for microgreens—usually around 1 to 2 inches. Trays should be sturdy and, ideally, reusable or made from sustainable materials.
4. Lighting Solutions: While some microgreens can grow in indirect light, others require more consistent lighting. If your home doesn’t get sufficient natural light, consider a kit that includes a grow light. LED grow lights are energy-efficient and can significantly boost your microgreens’ growth.
5. Ease of Use: Especially for beginners, the growing kit should come with clear, straightforward instructions. Additional resources, like online tutorials or customer support, can be invaluable for troubleshooting and getting the most out of your kit.
6. Size and Space: Consider the amount of space you have available for your microgreens. Kits come in various sizes, so choose one that fits comfortably in your space. Remember, you don’t need a lot of room to grow microgreens, making them perfect for small apartments or spaces.
7. Price and Value: Evaluate the cost of the kit in relation to its contents and quality. The cheapest option isn’t always the best value. Consider the longevity and reusability of the components. A slightly pricier kit of higher quality may be more economical in the long run.
Review of Top 5 Microgreens Growing Kit Types
In the flourishing market of home gardening, microgreens growing kits stand out for their ease of use and efficiency. Here, we review the top 5 microgreens growing kits, assessing their features, benefits, and potential drawbacks to help you find the perfect match for your green thumb.
1. The Compact Choice: Perfect for small spaces, Kit A includes organic seeds, a biodegradable growing tray, and a comprehensive guide to get you started. Its compact design is ideal for windowsills or small countertops.
- Pros: Space-saving, eco-friendly materials, includes a variety of seed options.
- Cons: No grow light included, limited to small batches.
2. The All-Inclusive Set: This kit is a one-stop solution, featuring a range of seeds, a high-quality grow light, and a self-watering tray, making it a breeze for beginners and experienced growers alike.
- Pros: Self-watering system, includes grow light, diverse seed selection.
- Cons: Pricier than other options, larger footprint.
3. The Eco Warrior: Focused on sustainability, Kit C offers organic seeds, a reusable hemp-fiber growing mat, and non-plastic trays. It’s designed for those who prioritize environmental impact without compromising on quality.
- Pros: Sustainable materials, reusable components, excellent for organic growing.
- Cons: No grow light, initial setup may be more involved.
4. The Versatile Performer: Kit D stands out for its adaptability, catering to both soil-based and hydroponic growing methods. It includes a range of seeds and a detailed manual, offering flexibility in your growing approach.
- Pros: Versatile growing options, great seed variety, user-friendly instructions.
- Cons: No grow light, trays are not as durable as some other options.
5. The Tech-Savvy Setup: For those who love technology, Kit E integrates smart features like app-based monitoring and automated lighting, providing a high-tech approach to growing microgreens.
- Pros: Advanced technology features, automated grow light, interactive app support.
- Cons: Higher price point, requires a compatible smartphone or tablet.
How to Get Started with Your Microgreens Growing Kit
Embarking on your microgreens growing journey is exciting and rewarding. Here’s a step-by-step guide to help you get started:
1. Unboxing Your Kit: Open your microgreens growing kit and familiarize yourself with the contents. Typically, you’ll find seeds, a growing medium, a tray, and instructions. Some kits may also include a grow light or additional tools.
2. Preparing the Growing Medium: Follow the instructions to prepare your growing medium. If it’s soil, moisten it before spreading it evenly in the tray. For soilless mediums, ensure they are properly hydrated and positioned in the tray.
3. Sowing the Seeds: Sprinkle the seeds evenly across the surface of the medium. Ensure they are spread out well to avoid overcrowding, which can lead to mold or poor growth.
4. First Watering: Gently water the seeds, ensuring the medium is moist but not waterlogged. Some kits come with a spray bottle to help you water evenly without dislodging the seeds.
5. Placing the Tray in Adequate Light: Position the tray in a location that receives ample light, whether it’s a sunny windowsill or under a grow light. Adequate light is crucial for the growth of your microgreens.
6. Daily Care: Check on your microgreens daily, ensuring the medium remains moist and adjusting the light as needed. Ventilation is also important, so make sure there’s adequate air circulation around the tray.
7. Harvesting: Most microgreens are ready to harvest in 2-3 weeks. Use clean scissors to snip them just above the soil line when they’ve reached the desired size.
8. Enjoying Your Microgreens: Rinse your harvested microgreens and enjoy them fresh in salads, sandwiches, or as a garnish for dishes. The flavor and nutrition they add are unparalleled!
Tips and Tricks for Successful Microgreens Growing
Growing microgreens can be a delightful and rewarding endeavor. Here are some expert tips and tricks to ensure your microgreens thrive:
1. Consistent Watering: Microgreens require consistent moisture to grow well, but overwatering can lead to mold or fungal issues. Use a spray bottle for gentle watering, keeping the soil moist but not soggy. Ensuring proper drainage is also crucial to avoid waterlogging.
2. Optimal Light Exposure: While microgreens can grow under indirect sunlight, they thrive best with ample direct light. If natural light is limited, consider using a grow light. Position the light close enough to the plants to prevent leggy growth but not so close that it causes heat stress.
3. Air Circulation: Good air circulation is essential for healthy microgreens. It helps to prevent mold and supports sturdy, upright growth. If you’re growing indoors, a small fan can improve air flow, reducing the risk of fungal diseases.
4. Harvesting at the Right Time: Timing is crucial when harvesting microgreens. Wait until they have developed their first true leaves, which usually happens around 2-3 weeks after germination. Harvesting too early can diminish flavor and nutrition, while waiting too long can lead to tough textures.
5. Experiment with Varieties: Don’t be afraid to experiment with different seed varieties. Each type of microgreen has its own unique flavor, texture, and nutritional profile. Exploring various options can enhance your culinary experience and offer diverse health benefits.
6. Reusing Your Kit: Many microgreens kits are designed for reuse. After harvesting your greens, clean the tray and start a new batch. This practice is not only eco-friendly but also allows you to continuously enjoy fresh microgreens.
7. Keeping a Growing Journal: Consider keeping a journal of your microgreens growing journey. Note the varieties you’ve planted, growth progress, and any observations or adjustments you’ve made. This record can be invaluable for refining your growing techniques over time.
Conclusion: Embrace the Joy of Growing Microgreens at Home
Embarking on the journey of growing microgreens at home is not just about cultivating plants; it’s about nurturing your well-being. Microgreens offer a unique blend of nutritional benefits, convenience, and the joy of gardening, all within the comfort of your home. Whether you’re a seasoned gardener or new to the world of homegrown greens, a microgreens growing kit can set you on a path to healthier eating habits and a deeper connection with your food.
Choosing the right kit is a step towards sustainability, offering fresh, nutrient-rich greens at your fingertips while reducing your carbon footprint. As you experiment with different seeds and kits, you’ll discover the varieties that resonate most with your taste and lifestyle, making each harvest a personal triumph.
Remember, the process of growing microgreens is as rewarding as the harvest itself. It’s an opportunity to slow down, engage with nature, and savor the simple pleasure of watching your greens sprout and thrive. So, embrace this green adventure with enthusiasm and let your microgreens growing kit be a gateway to a fresher, more sustainable way of living.
Optimizing Growth: Proper Grow Light Distance for Healthy Plants
Optimizing Growth: Proper Grow Light Distance for Healthy Plants
Light plays a pivotal role in plant photosynthesis, the process vital for growth and health in plants. For indoor gardens, where natural sunlight is often limited, grow lights offer a simulated sunlight spectrum that can significantly enhance plant growth. The key to harnessing the full potential of these lights lies in the correct placement distance from the plants, impacting their health, growth, and productivity. Inadequate spacing can result in stunted growth, nutrient issues, or even light burn.
Understanding the Optimal Distance Between LED Grow Lights and Plants
Finding the ideal position for your grow lights involves understanding the type of light, its wattage, the growth stage of your plants, and their specific species requirements. This knowledge helps in creating the perfect environment for your indoor garden or hydroponic system.
Choosing the Right Type of Grow Light for Microgreens and Indoor Gardens
Different grow lights emit varying levels of heat and intensity, which influences how close they should be to your plants:
- LED Grow Lights: Ideal for microgreens and hydroponic systems due to their cool operation, allowing placement of 12 to 24 inches from plants.
- HID Lights: These require a distance of 24 to 36 inches due to their higher heat output.
- Fluorescent Lights: Suitable for lower heat emission, can be positioned 6 to 12 inches above the plants.
Wattage and Light Intensity in Hydroponic and Indoor Gardening
The power of your grow light affects its ideal distance from the plants. High-wattage units produce more heat and light, requiring a greater distance to avoid damage, while lower wattage units can be placed closer. Measuring light intensity can help tailor your setup for optimal growth.
Growth Stage Considerations for Effective Light Placement
Adjusting light distance based on your plants’ growth stage ensures they receive the appropriate light intensity:
- Seedlings/Cuttings: Need less intense light, necessitating a farther placement or dimming capabilities.
- Vegetative Stage: Plants benefit from closer, more intense light to foster foliage growth.
- Flowering Stage: Light intensity may need adjustments to protect flowers and buds from damage.
Species-Specific Light Requirements
Understanding the light needs of different plant species is crucial. Low-light plants require less intensity compared to those that thrive in full sun. Customizing your light setup based on species ensures all plants receive their ideal light conditions.
Monitoring and Adjusting Grow Light Distance
Regularly adjusting your grow lights to maintain the correct distance is vital as plants grow. Adjustable hangers or stands simplify this process, helping prevent issues related to incorrect light spacing.
Signs of Inappropriate Grow Light Placement
Keep an eye out for symptoms indicating your grow light distance might be off:
- Light Burn: Manifests as yellowing or browning leaf tips.
- Stretched Growth: Long gaps between nodes suggest the light is too far away.
- Weak Seedlings: A sign of insufficient light, causing them to grow leggy.
Advanced Techniques: Utilizing Light-Moving Systems
For even growth and optimized light coverage, consider light-moving technology. This system minimizes intensity variations and hotspots, potentially allowing lights to be placed closer to plants for more uniform growth.
Final Thoughts on LED Grow Lights in Hydroponic and Indoor Gardening
Finding the right grow light distance is a delicate balance that, when achieved, can lead to flourishing, productive plants. By understanding your lights’ specifications, closely observing plant responses, and making necessary adjustments, you can create an ideal environment for your indoor garden or hydroponic setup. Remember, what works for one garden may not work for another; personal observation and customization are key to success.
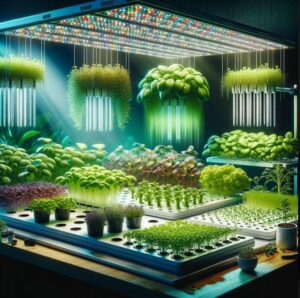
Setting Up a Grow Tent or Grow Room – What’s Needed?
Setting Up a Grow Tent or Grow Room: What’s Needed for Success in Hydroponics and Microgreens Cultivation
Whether you’re a seasoned gardener or just dipping your toes into the world of indoor cultivation, setting up a grow tent or grow room can be an exciting venture. It’s a step that opens up a plethora of possibilities, especially for enthusiasts of hydroponics and microgreens. However, the process involves more than just space; it requires careful consideration of several key components to ensure your indoor garden thrives. This guide will walk you through everything needed to set up an efficient grow tent or room, optimized for hydroponics, LED grow lights, and microgreens cultivation.
Essential Components for a Successful Indoor Garden
1. Choosing the Right Space: Grow Tent vs. Grow Room
- Grow Tent: Ideal for hobbyists or those with limited space, grow tents are portable, easy to set up, and create an ideal environment for controlling light, temperature, and humidity. They come in various sizes, making them suitable for growing anything from a few pots of microgreens to larger hydroponic systems.
- Grow Room: A dedicated room offers more space and the potential for a larger scale operation. It requires more setup but allows for greater customization. Whether it’s a spare room or a basement, transforming a space into a grow room is perfect for those looking to expand their indoor gardening efforts.
2. Lighting: The Heart of Your Indoor Garden
LED grow lights are the preferred choice for modern indoor gardens due to their energy efficiency, longevity, and spectrum versatility. They are particularly beneficial for hydroponics and microgreens, providing the full spectrum of light these plants need without the excess heat that can disrupt delicate water-based systems.
- For Microgreens: Look for LED lights with a balanced spectrum that supports the rapid growth cycle of microgreens.
- For Hydroponics: Consider LEDs with adjustable spectrums to cater to different growth stages, from vegetative to flowering.
3. Climate Control: Temperature and Humidity
Maintaining the right temperature and humidity is crucial for the health of your indoor garden.
- Ventilation System: Invest in a good quality ventilation system to circulate air and maintain oxygen levels while controlling temperature and humidity.
- Humidifiers/Dehumidifiers: Depending on your climate, you may need to add or remove moisture from the air to create the optimal environment for your plants.
4. Hydroponic System
Choosing the right hydroponic system depends on the type of plants you’re growing, the space available, and your level of expertise. From simple wick systems to more complex nutrient film techniques (NFT) or deep water culture (DWC), each has its benefits for specific types of cultivation.
5. Growing Medium
While traditional soil is not used in hydroponic setups, selecting the right growing medium is vital. Options like coconut coir, rockwool, or clay pebbles provide support and retain moisture and nutrients.
6. Nutrients and Water Quality
A balanced nutrient solution is the lifeline for your hydroponic garden. Ensure you have a reliable source of clean water and invest in quality hydroponic nutrients that fulfill all your plants’ needs.
7. Monitoring and Testing Tools
Keeping tabs on your garden’s conditions is essential. Tools like pH meters, EC meters, and thermometers/hygrometers help monitor the nutrient solution’s pH and strength and the grow space’s temperature and humidity.
Conclusion
Setting up a grow tent or grow room for hydroponics and microgreens cultivation is a rewarding endeavor that brings the joy of gardening indoors, year-round. By carefully selecting and optimizing each component of your indoor garden, from the space and LED grow lights to the climate control and hydroponic system, you can create a thriving environment that supports vibrant plant growth. Remember, the key to success lies in understanding the specific needs of your plants and providing them with the best possible conditions to grow.
For more tips, guides, and insights on hydroponics, LED grow lights, and growing microgreens, visit [your website]. Dive into the world of indoor gardening with us and discover the endless possibilities of cultivating your own lush, productive garden, regardless of the outside weather.
Grow Glasses Are They Necessary?
Are LED Grow Light Glasses Necessary for Hydroponics and Microgreens Cultivation?
In the realm of indoor gardening, where hydroponics and microgreens are becoming increasingly popular, the use of LED grow lights has become a staple for achieving optimal plant growth. However, as much as LED lights benefit plants, they pose a question of safety for the gardeners themselves. Specifically, the discussion around the necessity of LED grow light glasses has gained momentum. Are these specialized glasses a must-have accessory for those tending to their indoor gardens under the glow of LED lights? Let’s delve into this topic and shed some light on the importance of protecting your eyes in the vibrant world of indoor gardening.
Understanding the Spectrum of LED Grow Lights
LED grow lights are celebrated for their efficiency and effectiveness in providing a broad spectrum of light that mimics natural sunlight. This spectrum, while beneficial for plant growth, includes wavelengths of blue and ultraviolet light that can be harmful to human eyes over prolonged exposure. Just as we apply sunscreen to protect our skin from UV rays, taking precautions to safeguard our eyes from these intense light sources is equally important.
The Role of LED Grow Light Glasses
LED grow light glasses are designed specifically to filter out harmful rays, reducing the strain on your eyes and protecting them from potential damage. These glasses are engineered with lenses that can block or reduce exposure to UV and blue light, thereby minimizing the risk of eye discomfort, fatigue, or more serious conditions such as cataracts or macular degeneration. For hydroponic enthusiasts and microgreen growers who spend considerable time under the glow of LED lights, investing in a pair of grow light glasses can be a wise decision for long-term eye health.
Benefits Beyond Protection
Apart from the primary benefit of protection, LED grow light glasses offer additional advantages that enhance the indoor gardening experience:
- Improved Visual Clarity: By filtering out the harsh glare and adjusting the light spectrum, these glasses help improve visual clarity, making it easier to monitor plant health and spot potential issues early on.
- Color Correction: LED grow light glasses often come with color-correcting lenses that help neutralize the light’s color, allowing gardeners to see their plants in a more natural light. This feature is particularly useful in hydroponics and microgreen cultivation, where observing the true color of leaves and stems is crucial for assessing plant health.
Are They Necessary?
While not every indoor gardener may feel the immediate need for LED grow light glasses, the benefits they offer in terms of protection and enhanced visual experience make them a recommended accessory, especially for those frequently exposed to LED grow lights. Whether you’re tending to a large hydroponic setup or a small collection of microgreens, taking steps to protect your eyes is a prudent measure.
Making the Right Choice
When selecting LED grow light glasses, consider factors such as the specific wavelengths they filter, their comfort and fit, and the visual clarity they provide. With various options available on the market, finding a pair that suits your needs and preferences can significantly contribute to a more comfortable and safe indoor gardening experience.
Final Thoughts
As the use of LED grow lights continues to grow in popularity among hydroponics and microgreens enthusiasts, the importance of eye safety becomes increasingly apparent. LED grow light glasses represent a simple yet effective solution to protect your eyes from potential harm while enhancing your gardening experience. Remember, safeguarding your health is just as important as ensuring the health of your plants. Investing in a pair of quality LED grow light glasses is a small step that can make a big difference in your indoor gardening journey.
What’s Next?
For more tips and information on hydroponics, LED grow lights, and growing microgreens, visit [your website]. Join our community of indoor gardening enthusiasts and share your experiences with LED grow light glasses in the comments below. Let’s grow together, safely and successfully.
Broccoli Microgreens – Grow your own food
Why Grow Broccoli Microgreens?
Growing broccoli microgreens at home is an excellent choice for both health benefits and the ease of cultivation. Broccoli microgreens are the tiny, nascent versions of mature broccoli, harvested when they’re only about a week old, and are packed with far more nutrients than their fully grown counterparts. Their remarkably high nutritional content, including vitamins such as A, B, C, E, and K, as well as minerals like calcium, iron, magnesium, and zinc, makes them an invaluable addition to any diet.
Unlike regular broccoli, microgreens require less growing space and offer faster crop turnaround. It takes roughly seven to ten days for them to be ready for harvesting. This makes it convenient for urban dwellers who are under constraints of space but still want the benefits of broccoli.
Broccoli microgreens are associated with potential health benefits. Studies have suggested that these tiny sprouts contain sulforaphane, a compound that has been seen to counteract cancer cells. The high antioxidants they contain are also known to play a vital role in preventing diseases like heart disease and cancer. Besides, they are rich in fiber, aiding in digestion and even contributing to weight loss by keeping one full for longer periods.
Finally, broccoli microgreens are a versatile addition to your kitchen. Their mild yet slightly spicy flavor makes them a fantastic ingredient in salads, sandwiches, wraps, green shakes and much more.
To sum it up, growing broccoli microgreens can significantly boost your intake of essential nutrients, help in disease prevention, enhance culinary experiences, and promote sustainability because they can be grown indoors without needing extensive space or resources. All these reasons make the case for why you should consider growing broccoli microgreens.
Materials Required
To grow broccoli microgreens, you will need a few essential materials. Firstly, you will need broccoli seeds, which can be purchased from a reputable supplier or a local gardening store. It is important to ensure that the seeds are specifically labeled for microgreen use. Additionally, you will need a shallow container that is at least 2 inches deep for planting the seeds. This container can be a plastic tray or any other similar vessel. You will also need a growing medium, such as potting soil or coconut coir, to provide the seeds with the necessary nutrients and support for healthy growth. Additionally, you may want to consider using a spray bottle for watering the microgreens, as well as a humidity dome to create the ideal growing environment. Lastly, access to natural light or a grow light is essential for the photosynthesis process. With these materials, you can successfully grow and harvest your own nutritious broccoli microgreens at home.
Materials List:
Broccoli microgreens, despite their modest size, are powerhouses of nutrition and are increasingly becoming a popular add-on for many dishes. Firstly, they are incredibly rich in antioxidants and vitamins A, C, and K, offering significant health benefits. Specifically, they pack sulforaphane, a compound known for its powerful cancer-fighting properties. Research has shown that just a handful of broccoli microgreens can contain up to 40 times the level of this life-saving nutrient compared to mature broccoli heads.
From a cultivation perspective, broccoli microgreens are an excellent choice for individuals seeking to establish a home garden. These miniature greens have a quick and abundant growing cycle. In just seven to ten days, you can have a full crop ready for harvest. Their simple growing requirements make them an ideal choice for inexperienced gardeners or those with limited space. They grow well in small containers or trays, and they require minimal light and water. This is a fantastic way to have fresh greens on hand constantly.
Furthermore, the versatility of broccoli microgreens adds to their appeal. Their nutty and mild flavor makes them a delicious accent to salads, sandwiches, or garnishes on a variety of dishes. They can also be blended into smoothies for an additional boost of nutrition.
In addition to their nutritional benefits and ease of growth, cultivating broccoli microgreens can also contribute towards environmental sustainability. They require far less land, water, and resources to produce than mature broccoli. Their rapid growth reduces the need for artificial fertilizers and pesticides, making them eco-friendlier.
In conclusion, whether you’re a seasoned gardener exploring new greens, a health-conscious individual looking to boost your daily nutrition, or someone interested in sustainable gardening practices, growing broccoli microgreens can be incredibly advantageous for a multitude of reasons. The health benefits they offer, coupled with their sustainable growth, make them a truly valuable food choice.
1. Broccoli microgreen seeds
2. A shallow tray or container – Best results with a hydroponic system and grow light kit
3. Organic potting soil
4. Water
5. Scissors
Steps to Growing Broccoli Microgreens:
- Prep the Tray: Start by preparing your tray or container. You’ll want it to be about 1-2 inches deep. Fill it with about 1 inch of organic
- potting soil and moisten the soil with water.
- Sow Seeds: Spread the broccoli microgreen seeds over the surface of the soil as evenly as possible. You want a dense sowing, but try not to let the seeds pile on top of each other. 3.
- Cover Seeds: Lightly cover the seeds with a thin layer of soil. This will help keep them moist and promote germination.
- Water: Lightly mist the seeds with water and cover the tray with a lid or another tray to keep the humidity levels high.
- Placement: Place it in a location that gets a medium amount of light and stays at a steady room temperature.
- Water Daily: Water your seeds daily by misting them lightly. Don’t let the soil dry out, but also try to avoid drenching it.
- Germination: The seeds should sprout within 3-5 days.
- Uncover: Once the sprouts start pushing against the cover, remove it.
- Continue Watering: Keep watering the sprouts once a day.
- Harvest: When the microgreens are about 2-3 inches tall, typically 10-14 days after sowing, they are ready to be harvested. Cut them just above the soil line with a pair of scissors and enjoy!
Growing broccoli microgreens is indeed a rewarding practice, as you have a fresh supply of these nutrient-dense superfoods right in your home. They’re perfect as an addition to your salads, sandwiches, or simply tossing a handful into your morning smoothie.+
Grow Light Considerations for Broccoli Microgreens
When growing broccoli microgreens, it’s important to consider the type of grow light you will use. Broccoli microgreens require ample light to grow to their full potential, so choosing the right type of grow light is essential to their success. LED grow lights are a popular choice for growing microgreens, as they provide a full spectrum of light that is conducive to plant growth. These lights also produce less heat, making them a safer option for indoor growing. When selecting a grow light for broccoli microgreens, it’s important to consider its intensity and coverage area. Broccoli microgreens will thrive under a grow light with high light intensity and a large enough coverage area to reach all of the plants. Additionally, consider the energy efficiency and lifespan of the grow light to ensure that it will provide long-lasting and effective lighting for your broccoli microgreens. By carefully considering these factors, you can ensure that your broccoli microgreens receive the optimal lighting for their growth and development.
Growing Broccoli Microgreens with a Hydroponic System
Growing broccoli microgreens with a hydroponic system is a great way to enjoy these nutritious greens in just a few weeks. To start, you’ll need a shallow tray, a hydroponic growing medium, broccoli seeds, and a light source. Fill the tray with the growing medium, sprinkle the seeds evenly over the surface, and then cover them with a thin layer of the medium. Water the seeds with a gentle spray and cover the tray with a lid to create a greenhouse effect. Place the tray under a grow light for about 12 hours a day. Keep the growing medium moist but not waterlogged, and in about 10-14 days, your broccoli microgreens will be ready to harvest. These tiny greens are packed with nutrients and delicious in salads, sandwiches, or as a garnish. Plus, growing them hydroponically means you can enjoy fresh, home-grown microgreens year-round, regardless of the weather outside. So, give it a try and enjoy the rewards of growing your own broccoli microgreens with a hydroponic system.
Planting The Broccoli Microgreens
To plant broccoli microgreens, start by filling a shallow tray with a nutrient-rich potting mix. Sprinkle the broccoli seeds evenly over the soil and then gently press them down. Water the seeds lightly and cover the tray with a lid or plastic wrap to create a greenhouse effect. Place the tray in a warm, sunny spot and mist it with water daily. In about 7-10 days, the microgreens should be ready to harvest. To harvest, simply snip the young shoots just above the soil line. Broccoli microgreens have a higher nutritional value than their mature counterparts and are tasty, making them an exceptional addition to salads, sandwiches, and smoothies.
Explore Our Top Microgreen Seed Varieties To Grow
If you’re looking to grow microgreens at home, exploring our top microgreen seed varieties is a great place to start. We offer a wide selection of seeds, including popular varieties like sunflower, broccoli, radish, and pea shoots. Each seed, for instance, broccoli sprouts or mature broccoli, offers unique flavors and nutrition, allowing you to add a variety of healthy microgreens to your meals. Whether you’re a beginner or experienced grower, our top microgreen seed varieties are easy to grow and maintain, making them an ideal choice for anyone looking to add fresh, nutrient-rich greens to their diet. From spicy and bold to mild and sweet, there’s a microgreen seed variety to suit every palate. So why not explore our selection and start growing your own vibrant and delicious microgreens today?
Germinating & Growing
The procedure through which a dormant seed, like that of a broccoli plant, germinates and grows involves its transformation into a sprouting plant, with its true leaves. The process of a seed initiating germination, such as a broccoli sprout, starts with it absorbing water from the surrounding soil, which leads to the seed coat breaking and swelling. Next, the embryonic plant begins to grow, with the root emerging first to anchor the seedling into the ground and absorb necessary nutrients. The growth of a broccoli plant is majorly influenced by environmental conditions such as temperature, light, and water availability. The growth period sees the development of a shoot, leaves, and ultimately, the budding of flowers or the formation of fruits, hence completing a growth cycle.
Harvesting
The harvesting of broccoli microgreens may be a simple process, but it’s extremely fulfilling. These tiny plants are ready to harvest usually between 7-10 days after sowing, once they have developed two full leaves. The process involves gently snipping the stems just above soil level using a sharp pair of scissors, ensuring not to uproot the tiny plant. Snip only what you plan on consuming immediately, as the harvested greens do not store well. Broccoli microgreens, with their mild peppery taste, are a nutritious addition to salads, sandwiches, and smoothies, packed with Vitamins A, C, E, K, and B6, calcium, iron, magnesium, phosphorus, potassium, and zinc.
Broccoli Microgreens Nutrition
Broccoli microgreens, with their notable nutritional value, are densely packed with essential nutrients, proving crucial for maintaining good health. These tiny greens are known for a significant protein boost, providing the necessary amino acids that contribute to the growth, repair, and maintenance of body tissues. Broccoli microgreens are rich in antioxidants, specifically sulforaphane, which plays an essential role in neutralizing harmful free radicals and can reduce oxidative stress, thereby supporting overall well-being.
The high amount of fiber found in these greens can aid in promoting gut health, enhancing digestion, and fostering a healthy gut microbiome. Not only this, but broccoli microgreens are also noted for their mental health benefits. They carry essential nutrients like Omega-3 fatty acids that play a key role in cognitive function and mental health.
Broccoli microgreens have also been found to offer cardiovascular benefits owing to their high content of sulforaphane, which plays a critical role in reducing high blood pressure and cholesterol. By incorporating broccoli microgreens into your diet, you can reap a host of health benefits that extend much beyond their size and simplicity. After all, good things really do come in small packages!
Growing Broccoli Microgreens At Home – Final Thoughts
Growing broccoli microgreens at home can be a rewarding and enjoyable activity. Not only is it an economic way to keep a constant supply of nutritious food in your kitchen, but it can also bring an element of greenery and nature into the home environment. It’s simple and effortless; you don’t need a large garden or professional tools, a shale tray or a pot with good quality soil is enough to start. The growth process is speedy, thus offering you almost instant gratification and the continuous option to harvest homegrown food.
Out of all possible microgreens, broccoli ones are particularly beneficial due to their high content of nutrients like vitamins A and C, calcium, iron, and fiber. They also contain Sulforaphane which could potentially protect against cancer. Their flavor is mild and hence, quite adaptable to different recipes. Overall, this process encourages a healthier lifestyle, promotes sustainability, and nurtures a connection with nature. Despite the simplicity of this project, the end results are truly multi-fold, positively impacting your health, your home, and your sustainability, while also offering an enjoyable and rewarding pastime. So, if you haven’t started already, it’s high time you consider growing broccoli microgreens at home. It’s a small task with grand outcomes.